Table of Contents >> Show >> Hide
- What You Need Before You Start
- How to Choose the Right Rainbow Loom Bracelet Pattern
- 9 Ways to Make a Rainbow Loom Bracelet
- Tips for Making Your Rainbow Loom Bracelets Look Better
- Common Rainbow Loom Mistakes to Avoid
- Why Rainbow Loom Bracelets Are Still So Fun to Make
- Real-Life Crafting Experiences: What Making Rainbow Loom Bracelets Actually Feels Like
- Conclusion
If you have a box of tiny rubber bands, a hook, and the sudden confidence of a person who once watched half a craft video at 1 a.m., welcome. You are exactly where you need to be. Learning how to make a Rainbow Loom bracelet is one of those hobbies that starts with, “I’ll make just one,” and ends with a wrist full of neon accessories and a deep opinion about C-clips.
The good news is that Rainbow Loom bracelets can be as simple or as dramatic as you want. Some patterns are perfect for absolute beginners who still put their bands on backward once in a while. Others are chunkier, more textured, and ideal for crafters who want their bracelet to look like it walked out of a bead-and-band fashion show. In this guide, you’ll learn nine fun ways to make a Rainbow Loom bracelet, plus tips for choosing colors, avoiding common mistakes, and actually finishing with a bracelet instead of a mysterious rubber-band knot.
What You Need Before You Start
Before you dive into bracelet-making mode, gather the basics. Most Rainbow Loom bracelet patterns use the same core supplies, so once you have your starter setup, you can try several styles without constantly raiding the craft drawer.
- Rainbow Loom board, mini loom, or finger loom
- Rubber bands in one or more colors
- A hook tool
- C-clips or S-clips
- A flat workspace with decent lighting
If you are brand-new, start with two or three colors. It is much easier to follow a bracelet pattern when you can clearly see which band goes where. If you dump twelve shades into one project right away, you may create something exciting, but you may also create a rubber-band identity crisis.
How to Choose the Right Rainbow Loom Bracelet Pattern
Not every Rainbow Loom bracelet tutorial is built for the same skill level. Some designs are quick and slim, while others are thick, textured, and better for patient hands. When choosing a pattern, think about three things: difficulty, time, and the final look.
Start simple if you are a beginner
Single chain and fishtail bracelets are the easiest places to start. They help you learn tension, clipping, and the basic rhythm of looping bands without making your brain file a formal complaint.
Pick a chunkier style if you want a statement bracelet
Patterns like dragon scale, starburst, and hexafish are wider and more textured. They use more bands, but the finished bracelet looks extra impressive.
Match colors to the pattern
Simple bracelet designs often look best with bold color blocking. More complex Rainbow Loom bracelet ideas usually benefit from contrast, such as black with neon, pastel mixes, or a repeating rainbow order.
9 Ways to Make a Rainbow Loom Bracelet
1. Single Chain Bracelet
The single chain bracelet is the “hello world” of Rainbow Loom projects. It is fast, easy, and perfect for learning how the hook works. If you have never made a rubber band bracelet before, this is your low-pressure warm-up round.
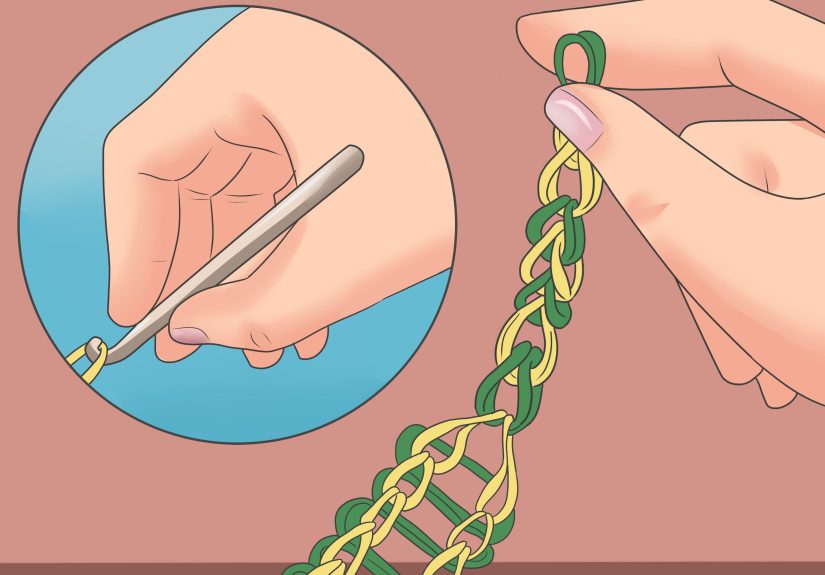
To make it, place one band at a time in a straight line on the loom. Each band should overlap the previous one. Add a cap band at the end, then use your hook to pull each lower band over the one above it, moving backward through the chain. Once you reach the beginning, secure the ends with a clip.
This bracelet is narrow, stretchy, and ideal for kids, beginners, and anyone who wants a quick win. It also works well as a base for charms or letter beads.
2. Fishtail Bracelet
If the single chain is the warm-up, the fishtail bracelet is the crowd favorite. It is one of the most popular Rainbow Loom bracelet patterns because it looks polished without being difficult.
To make a fishtail bracelet, use two pegs, your fingers, or a mini loom. Twist the first band into a figure-eight, then stack two more bands on top without twisting. Pull the bottom band over the top on both sides. Add another band, then repeat the process: bottom band over the top, again and again, until the bracelet is long enough.
Fishtail bracelets look great in two alternating colors, but they also shine in full rainbow order. This is a smart choice if you want a bracelet that looks more detailed than a single chain but still feels beginner-friendly.
3. Inverted Fishtail Bracelet
The inverted fishtail is like the fishtail’s cooler, slightly more dramatic cousin. It creates a different texture and gives the center of the bracelet more visual depth.
The setup is similar to a regular fishtail, but the looping order changes to create a more layered look. You will still work with two pegs and continue adding bands one at a time, but the placement and pull direction help flip the design inward. The result is a bracelet with more dimension and a neater, tighter appearance.
This pattern is great once you feel confident with a classic fishtail. Try it in ombre colors if you want a bracelet that looks fancy without requiring a degree in engineering.
4. Triple Single Bracelet
The triple single bracelet takes the idea of a basic chain and makes it wider, stronger, and more interesting. Instead of a single center line, you create three linked columns that work together.
To make this style, set bands in a repeating pattern across three rows of pegs. Add horizontal connector bands at intervals, then use your hook to loop the lower bands up and forward. Because there are more bands involved, it takes longer than a single chain, but the finished bracelet feels sturdier and more decorative.
This pattern is perfect when you want a simple Rainbow Loom bracelet that still looks like you made an effort. It is also a good bridge between beginner and intermediate designs.
5. Ladder Bracelet
The ladder bracelet gets its name from the structure of the pattern. It has a central line with side bands that resemble the rungs of a ladder. It is neat, symmetrical, and ideal for crafters who like organized-looking designs.
You create this bracelet by building a center chain first, then adding side bands along both edges. During the hooking step, the center line and side loops come together to form the finished shape. It sounds fussy, but once you understand the layout, it becomes very satisfying to make.
Use one color in the center and another on the sides for a crisp two-tone effect. A black center with rainbow edges is especially fun if you want your bracelet to look bold and graphic.
6. Starburst Bracelet
The starburst bracelet is one of the most iconic Rainbow Loom bracelet designs. It looks bright, textured, and slightly magical, like your wrist joined a fireworks show.
This pattern uses several pegs to create repeating star-shaped clusters. First, lay out the outer border bands. Then build each starburst in the center using a contrasting color. Add cap bands on top of each burst, and use your hook to pull the loops in the correct sequence so the design locks together.
The starburst bracelet takes patience, but the payoff is worth it. It is a great choice for gift-making because it looks detailed and cheerful. If you want a Rainbow Loom bracelet idea that instantly says, “Yes, I have leveled up,” this is it.
7. Hexafish Bracelet
The hexafish bracelet is chunkier than a standard fishtail and has a rounded, braided look. It is made using more pegs, which creates a thicker bracelet with a satisfying, almost rope-like texture.
To make one, place bands around a set of pegs in a circular or grouped arrangement, then continue adding layers while pulling the lower bands over the top. Because the bracelet builds upward with each row, you will want to keep your tension even so the shape stays consistent.
This is a fantastic pattern for anyone who wants a fuller bracelet. It looks especially nice in six repeating shades or in a gradient from dark to light. The hexafish may use more bands, but it delivers serious visual payoff.
8. Dragon Scale Bracelet
The dragon scale bracelet is wide, dramatic, and not remotely shy. If you want your Rainbow Loom bracelet to make a statement, this is the one. The pattern creates overlapping loops that resemble scales, which is probably why it sounds ready to guard treasure.
This bracelet is usually made across multiple pegs in a wider formation. You build layers of bands and loop them in a repeating sequence that creates the scale effect across the width of the bracelet. Because it is broader than many beginner patterns, it takes more time and more bands, but the final result is striking.
Choose two high-contrast colors to make the scale pattern stand out. Metallic-looking combinations, jewel tones, or dark bands paired with neon can all look amazing here.
9. Twistz Band Bracelet
The Twistz-style bracelet is playful and full of motion. Instead of lying flat, the design has a twisted, spiraled appearance that makes it look more dynamic than a standard chain.
This bracelet usually starts with a basic arrangement but uses repeated twists and alternating colors to create movement through the pattern. As you loop the bands, the design starts to curl and twist slightly, giving it a fun, springy texture.
It is a nice choice when you want something different from the classic flat bracelet look. Bright, candy-colored bands work especially well, and the finished result feels fun, casual, and easy to stack with other bracelets.
Tips for Making Your Rainbow Loom Bracelets Look Better
Keep your band tension even
If some bands are stretched tight and others are loose, the bracelet can look lumpy. Try to pull each band with the same amount of tension while hooking.
Use contrast to show off the pattern
Complicated bracelet styles get lost when every band is a similar shade. Use light and dark colors together so the structure is easier to see.
Do not rush the clipping step
Many brave crafters have finished a bracelet, reached for the clip, and accidentally released the whole thing back into the wild. Secure the end carefully before lifting it off the loom.
Count your rows
If one side of the bracelet looks longer than the other, a missed row is often the culprit. Count as you go, especially on wide or multi-peg bracelet patterns.
Common Rainbow Loom Mistakes to Avoid
Even easy Rainbow Loom bracelet tutorials can go sideways when the setup is off. One of the most common mistakes is placing a band on the wrong peg early in the process. That single misplaced band can throw off the entire pattern. Another issue is forgetting a cap band, which often causes the design to unravel during hooking.
Beginners also tend to overstuff the loom with too many colors at once. Yes, every color looks fun in the box. No, every color does not always belong in the same bracelet. When in doubt, keep the palette simple and let the pattern do the heavy lifting.
Why Rainbow Loom Bracelets Are Still So Fun to Make
Part of the charm of Rainbow Loom bracelet making is that it feels both creative and relaxing. There is enough repetition to make it soothing, but enough variety to keep it interesting. You can make one bracelet in ten minutes or spend an afternoon testing new designs. You can craft alone, with kids, with friends, or while pretending you are “just organizing supplies” when everyone knows you are about to make six more bracelets.
They also make easy gifts. A handmade rubber band bracelet is inexpensive, colorful, and personal. You can match school colors, create holiday combinations, or make friendship bracelets in a custom color palette. That flexibility is part of what makes Rainbow Loom bracelet ideas so addictive.
Real-Life Crafting Experiences: What Making Rainbow Loom Bracelets Actually Feels Like
Making a Rainbow Loom bracelet is one of those craft experiences that looks tiny on the table but somehow takes over the whole mood of a room. It usually starts with good intentions. You set out a few bands, tell yourself you are just testing a pattern, and suddenly you are emotionally invested in whether a lime-green band belongs next to hot pink. Spoiler: apparently it does, and now you have opinions.
For beginners, the first experience is often a mix of confidence and confusion. The first few rows feel easy enough, and then the hook slips, a band pops off, and everybody stares at the loom like it personally betrayed them. But that is part of the charm. Rainbow Loom projects teach patience in a sneaky, low-stakes way. You mess up, you backtrack, you fix it, and then you end up with something wearable. That is oddly satisfying.
There is also a very specific joy in seeing a bracelet come together after the pattern finally clicks. A starburst bracelet can look like complete chaos halfway through. Then you do a few more loops, pull it off the loom, and suddenly it makes sense. It is like watching a puzzle solve itself in rubber-band form. That little reveal moment is one reason so many people keep coming back to new bracelet designs.
Another common experience is the color dilemma. You begin with a perfectly sensible plan such as blue and white. Five minutes later, glitter bands have entered the chat, followed by neon orange, and now the bracelet looks like a tropical smoothie with commitment issues. Oddly enough, that unpredictability is part of the fun. Rainbow Loom bracelets invite experimentation, and some of the best combinations happen by accident.
These projects also tend to become social fast. One person starts making a fishtail bracelet, and before long someone else is choosing colors, someone is asking for one in their favorite shades, and someone is absolutely giving unrequested artistic direction. Rainbow Loom crafting has a way of turning into a shared activity without much planning. It works at sleepovers, classrooms, family tables, and lazy weekends when everyone wants to do something creative without setting up a giant mess.
Then there is the oddly satisfying stash-building phase. Once people get the hang of making a Rainbow Loom bracelet, they rarely stop at one. They start stacking them, sorting bands by color, making themed versions for holidays, and experimenting with wider patterns. The collection grows quickly. One bracelet becomes five, then ten, then a small mountain of rubber-band confidence.
And yes, there is always that one bracelet that goes wildly wrong. Maybe the clip slips. Maybe the pattern twists. Maybe it becomes less “dragon scale” and more “confused noodle.” But even those projects are useful because they teach what to do differently next time. Crafting experience is often just a polite phrase for “I have made enough mistakes to know better now.” Rainbow Loom is no exception.
In the end, the experience of making these bracelets is about more than the finished accessory. It is about the rhythm of looping bands, the satisfaction of solving a pattern, the fun of choosing colors, and the small thrill of wearing something you made yourself. Even a simple bracelet can feel rewarding because it came from your own hands, your own choices, and maybe a tiny bit of trial and error. That is what keeps the craft fun. It is easy to start, hard to get bored with, and surprisingly delightful for something built one rubber band at a time.
Conclusion
If you want a craft that is creative, colorful, and easy to scale from beginner to advanced, Rainbow Loom bracelet making is still a fantastic choice. You can start with a single chain, master a fishtail, and work your way up to bold designs like starburst, dragon scale, and hexafish. Whether you are making bracelets for fun, gifts, parties, or pure stress relief, these nine bracelet styles give you plenty of room to experiment.
The best approach is simple: start with an easy pattern, keep your colors clear, focus on even tension, and do not panic when a band slips. Every bracelet teaches you something. Before long, you will have a whole stack of handmade pieces and a suspiciously strong attachment to tiny plastic clips. That is just part of the Rainbow Loom lifestyle.





