Table of Contents >> Show >> Hide
- Before You Start: 5 Things That Make Every Technique Look Better
- 1) Color Washing (Glaze) for Soft, Cloudy Depth
- 2) Strié: The Linen-Like Drag Finish That Looks Expensive
- 3) Limewash for Old-World Movement and a Chalky Glow
- 4) Faux Venetian Plaster (Without Becoming a Full-Time Artisan)
- 5) Rag Rolling for Mottled, Textured Charm
- 6) Layered Stenciling for Pattern With Real Depth
- 7) Dry Brushing to Highlight Details on Trim, Cabinets, and Furniture
- How to Choose the Right Technique for Your Space
- Conclusion: Dimension Is a Design Shortcut (and a Confidence Boost)
- Real-World Experiences: What It’s Like Living With These Finishes (Plus What DIYers Learn Fast)
- SEO Tags
Flat walls are fine. They’re also the beige cardigan of home decor: practical, polite, and completely unbothered by drama. If you want your space to look more layered, custom, and “Waithow did you DO that?” without remodeling your whole life, decorative paint techniques are the cheat code.
The secret is dimension: subtle movement, texture, shadow, and highlights that shift as the light changes. Some of these finishes look old-world and artisanal; others look crisp and modern. All of them can be done with basic tools, a little patience, and the willingness to accept that perfection is overrated (and also suspicious).
Before You Start: 5 Things That Make Every Technique Look Better
- Prep is the unsexy hero. Clean walls, patch dents, sand rough spots, and prime when needed. Your “custom finish” shouldn’t be highlighting last year’s door knob incident.
- Sample first. Paint a poster board or a hidden wall section. Faux finishes can look wildly different in morning vs. evening light.
- Choose the right sheen. Matte hides texture flaws; satin is wipeable; gloss is basically a spotlight. For most dimensional looks, matte or eggshell is friendliest.
- Ventilate. Even low-odor paints can release VOCsfresh air and fans are your best friends during and after painting.
- If your home is older (pre-1978), be lead-smart. Sanding and scraping can create hazardous dustuse lead-safe practices and consider certified help if you’re disturbing old paint.
1) Color Washing (Glaze) for Soft, Cloudy Depth
Look: A velvety, layered wall that feels richer than a single flat colorlike your wall learned how to filter itself.
Best for
Bedrooms, dining rooms, hallways, and anywhere you want a cozy, “lived-in” finish without heavy texture.
How to do it
- Paint a solid base coat and let it fully dry.
- Mix your top color with glaze (or use a ready-made glazing liquid) to create a translucent layer.
- Apply the glaze in sections with a brush or sponge, then soften it with a clean, damp cloth or dry brush to create variation.
Pro tip
Stick to colors in the same family (like warm white + greige, or navy + smoky blue). The effect is more “intentional designer” and less “accidental storm cloud.”
2) Strié: The Linen-Like Drag Finish That Looks Expensive
Look: Fine, vertical “threads” that mimic linen or grasscloth. It’s subtle, elegant, and makes plain drywall look suspiciously upscale.
Best for
Powder rooms, formal dining spaces, or a single accent wall behind a bed.
How to do it
- Paint your base coat and let it dry.
- Apply a tinted glaze over a small area (about 3–4 feet wide).
- While wet, drag a dry brush or specialty comb downward in long strokes. Lightly re-drag to soften and vary the lines.
Pro tip
Work top to bottom and keep a “wet edge.” If the glaze dries mid-panel, you’ll get seamsaka “the wall has a zipper.”
3) Limewash for Old-World Movement and a Chalky Glow
Look: Matte, cloudy variation with natural highs and lows. Limewash is famous for the way it “blooms” and shifts with the light.
Best for
Fireplace surrounds, plaster-like feature walls, cozy living rooms, and spaces that lean rustic, Mediterranean, or modern organic.
How to do it
- Make sure your surface is compatible. Limewash loves porous materials; drywall usually needs the right primer.
- Use a large masonry brush and apply in X-shaped strokes for natural variation.
- Build in thin layers. The magic comes from depth, not thickness.
Pro tip
Expect variation. If you want perfectly uniform color, limewash will respectfully decline your invitation.
4) Faux Venetian Plaster (Without Becoming a Full-Time Artisan)
Look: Smooth, polished movementlike stone or plasteroften with a gentle sheen and visible trowel variation.
Best for
Entryways, statement walls, dining rooms, and anywhere you want “boutique hotel lobby” energy.
How to do it (DIY-friendly version)
- Apply tinted joint compound in thin, uneven layers using a drywall knife or trowel.
- Let it dry, sand lightly, then add a second (or third) layer with varied pressure and direction.
- For a soft sheen, burnish with the trowel and seal if recommended.
Pro tip
Step back often. Overworking is how plaster goes from “European” to “I fought the wall and the wall won.”
5) Rag Rolling for Mottled, Textured Charm
Look: Soft, randomized texture that adds visual depthgreat for hiding minor wall flaws while looking deliberately decorative.
Best for
Stairwells, entry halls, bathrooms, and any wall that gets lots of side light (which loves to expose imperfections).
How to do it
- Paint a base coat and let it dry.
- Mix paint + glaze for a longer working time.
- Roll or dab with a twisted rag in random patterns (vary pressure, rotate the rag often).
Pro tip
Keep it random. If your pattern starts repeating, your wall will look like it’s wearing wallpaper cosplay.
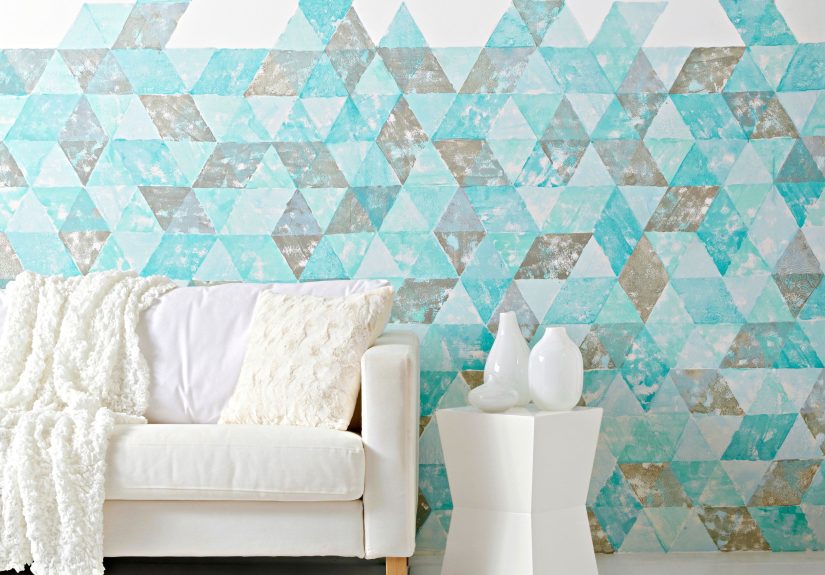
6) Layered Stenciling for Pattern With Real Depth
Look: Custom pattern that can be tone-on-tone (subtle) or high-contrast (bold). Layering two close shades adds shadow-like dimension without being loud.
Best for
Accent walls, mudrooms, laundry rooms, kids’ spaces, and furniture makeovers (like dresser fronts).
How to do it
- Secure the stencil firmly and use a foam roller or stencil brush.
- Offload most of the paint first (seriouslyless paint means crisper edges).
- Stencil one layer, let dry, then shift slightly (or use a second stencil) with a second shade for a subtle “shadow” effect.
Pro tip
Use a high-quality painter’s tape border if you want the stencil to live inside a neat frameit instantly looks more “designed.”
7) Dry Brushing to Highlight Details on Trim, Cabinets, and Furniture
Look: A lightly textured, brushed highlight that catches edges and raised detailsperfect for making boring pieces look collected and dimensional.
Best for
Picture frames, vintage furniture, beadboard, cabinet doors, or any surface with grooves or raised trim.
How to do it
- Start with a fully dry base coat (painted or stained).
- Dip the brush, then wipe most paint off on a rag or cardboard.
- Lightly sweep over edges and details with minimal pressurebuild slowly.
Pro tip
Dry brushing is basically makeup contouring for furniture: start light, step back, and don’t go full dramatic at noon.
How to Choose the Right Technique for Your Space
If you’re deciding between finishes, use this quick logic:
- Want subtle luxury? Go strié or color washing.
- Want moody, organic texture? Choose limewash or faux plaster.
- Need pattern without wallpaper commitment? Do layered stenciling.
- Hiding wall flaws? Rag rolling and color washing can be forgiving.
- Want a fast weekend win? Dry brushing on a small piece or trim detail is high impact.
Conclusion: Dimension Is a Design Shortcut (and a Confidence Boost)
Dimensional paint finishes add richness you can’t get from a single coat of color. The best part: you can scale them to your comfort levelstart with a stenciled nook or a dry-brushed thrifted table, then graduate to limewash or faux plaster when you’re ready to feel powerful.
And if something goes sideways? Congratulationsyou’ve created “handcrafted character.” Designers charge extra for that.
Real-World Experiences: What It’s Like Living With These Finishes (Plus What DIYers Learn Fast)
Most people try a dimensional paint technique for one reason: they want a room to feel “finished” without buying new furniture or ripping out walls. What surprises them is how much light becomes part of the design. A color-washed wall can look calm and blended in the morning, then suddenly show dramatic movement at night when a lamp hits it from the side. This is usually the moment someone texts a friend, “Waitwhy does my wall look expensive now?”
Color washing and rag rolling are often described as “oddly relaxing” once you get into the rhythmapply, soften, step back, repeat. The learning curve is mostly about timing: if you try to work too large an area, the glaze starts drying, and blending becomes harder. The sweet spot is small sections and steady progress. People also learn quickly that two helpers can be both a blessing and a curse. One person wants chaos (random texture), the other wants symmetry (pattern). Both are correct. Both should not be holding wet glaze at the same time.
Strié is the technique that gives the most “professional” reaction for the least amount of paint drama, but it does demand a little courage. The first drag marks can feel too bold. Then you step back, and it softens into that linen look. The emotional arc is usually: “Oh no” → “Maybe?” → “Okay, that’s actually gorgeous.” It’s also the finish that makes people suddenly care about their trim. Once your wall looks tailored, you notice every crooked outlet cover like it’s personally offended you.
Limewash brings the most comments from guests because it looks handmade and earthy. The experience of applying it is different from regular paintmore like brushing on atmosphere. Homeowners often say it feels like the wall changes throughout the day. That’s real: the finish can show variation depending on angle and light, which is exactly why people love it. The main lesson is to embrace unevenness. If you keep trying to “fix” every patch, you can flatten the look. Limewash rewards restraint.
Faux Venetian plaster is where DIYers learn the value of patience. Dry time matters. Thin layers matter. And sanding is a workout you didn’t schedule. But the payoff is huge: the wall looks like a surface, not just a color. People who do this once often end up wanting to plaster-finish everythinguntil they remember they also like having free weekends.
Stenciling teaches one universal truth: too much paint is the enemy. Almost everyone’s first stencil pass bleeds a little. Then they figure out the “offload most of the paint” rule, and suddenly it’s crisp. Layering a second shade is where the magic happensespecially if you keep it subtle. The result reads like texture and shadow, not a loud pattern.
Finally, dry brushing is the gateway technique: fast, forgiving, and wildly satisfying. People try it on one small piece, love the highlight effect, and then look around the room like, “What else can I make cooler with one brush and a tiny amount of paint?” That’s the moment you realize dimensional paint isn’t just decorit’s momentum.





