Table of Contents >> Show >> Hide
- Quick cheat sheet: which sander should you grab?
- 1) Belt Sander
- 2) Random Orbital Sander (ROS)
- 3) Sheet/Orbital Sander (Finishing Sander)
- 4) Detail (Mouse) Sander
- 5) Disc / Rotary Sander
- 6) Drywall Sander
- How to Choose the Right Power Sander
- Common mistakes (and how to avoid them)
- Buying a first sander: the simplest recommendation
- Experiences & lessons from the shop (extra ~)
- Conclusion
Sanding is the glow-up stage of any project. It’s also the stage where many perfectly good DIY dreams go to die
usually under a blizzard of dust and a chorus of “Why is this taking so long?”
The secret isn’t “work harder.” It’s “pick the right power sander.” A belt sander can flatten a rough board fast,
but it can also turn a tabletop edge into modern art (and not the good kind). Meanwhile, a random orbital sander can
make a finish look buttery smoothbut only if you stop fighting it like it owes you money.
Below are the six most useful types of power sanders you’ll actually see in garages, workshops, and remodels,
plus a no-nonsense guide to choosing one based on your project, your patience level, and how much dust you’re willing to
invite into your life.
Quick cheat sheet: which sander should you grab?
- Best “only one sander” choice: Random orbital sander (versatile, beginner-friendly)
- Fastest material removal on flat wood: Belt sander
- Large flat areas with inexpensive sandpaper: Sheet/orbital (1/4- or 1/2-sheet)
- Corners, trim, tight spots: Detail (mouse) sander
- Heavy stripping near edges, shaping, quick leveling: Disc/rotary sander
- Drywall finishing with dust control: Drywall sander (ideally with vacuum)
1) Belt Sander
A belt sander uses a continuous loop of sandpaper that runs over two rollers. Think of it as a tiny treadmill
that ate a protein shake. It removes material quickly and is fantastic for the “this surface is a mess” stage.
Best for
- Flattening or leveling glued-up panels (like a tabletop) before finer sanding
- Removing old finish or paint from broad, flat wood (with care)
- Sizing doors, smoothing rough lumber, shaping edges (carefully, and preferably on scrap first)
Watch-outs (aka “how belt sanders earn their reputation”)
- Gouges happen fast. If you tip the tool, the belt edge can dig in and leave deep tracks.
- Not a detail tool. Tight corners and delicate trim work are not its happy place.
- Easy to round edges. Keep it flat, keep it moving, and don’t press down like you’re kneading bread.
Real example
You’re refinishing a dining table with thick old polyurethane. A belt sander can strip the broad top efficiently,
then you switch to a random orbital sander to erase belt lines and prep for stain.
2) Random Orbital Sander (ROS)
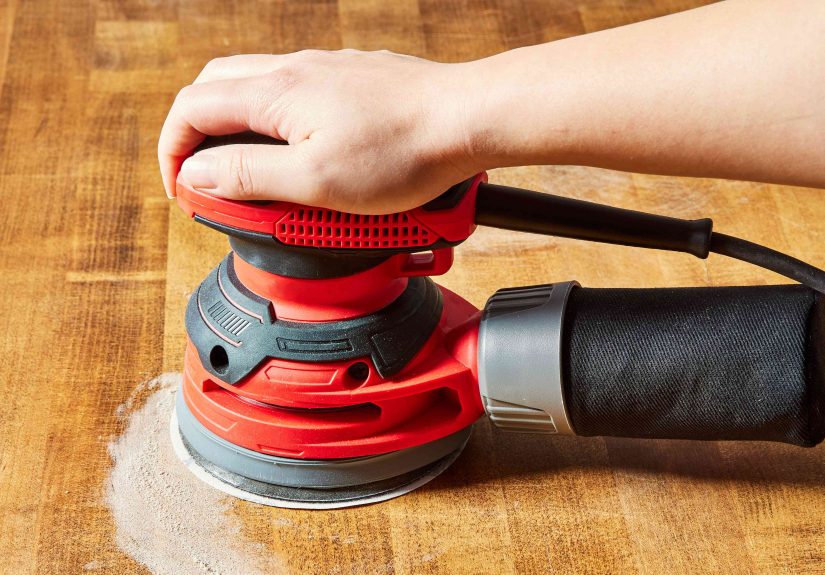
The random orbital sander is the all-rounder most people should start with. It uses a round sanding disc and
combines spinning with a small orbiting motion. That “random” movement helps reduce obvious sanding patterns, so your finish
doesn’t scream, “Hello, I was sanded by a beginner on a deadline.”
Best for
- Furniture refinishing and general woodworking
- Prepping surfaces for paint, stain, or clear coats
- Smoothing between coats (with fine grits)
What to look for when buying
- Variable speed: Helpful when you’re sanding soft woods, veneers, or finish coats.
- Comfort + low vibration: Your hands should not feel like you high-fived a lawnmower.
- Dust collection: A good dust port (ideally vacuum-compatible) is worth real money.
- Pad size: 5-inch is the common sweet spot; 6-inch is faster for big surfaces if you can manage it.
Pro tip
Let the tool do the work. Use light pressure, keep the pad flat, and move at a steady pace. The moment you “scrub,”
you increase heat, clog paper faster, and invite swirl marks to the party.
3) Sheet/Orbital Sander (Finishing Sander)
A sheet sander (often called an orbital or finishing sander) uses a rectangular or square pad and
typically clamps standard sandpaper sheets (common sizes are 1/4-sheet or 1/2-sheet). The motion is a consistent orbit/vibration pattern.
It’s less aggressive than a belt sander and can be very handy for large, flat workespecially if you like the low cost of sheet sandpaper.
Best for
- Finish sanding on flat boards and panels
- Quick smoothing of wide areas (like cabinet sides or a door)
- Budget-friendly sanding (sheet paper is usually cheaper than hook-and-loop discs)
Watch-outs
- Pattern marks are possible. Because the motion repeats, it can leave visible tracks if you rush.
- Dust collection varies. Some are decent; many are “better than nothing.” Vacuum hookup helps.
- Not great in corners. The pad shape helps near edges, but tight corners still need a detail tool or hand sanding.
Real example
You built a simple plywood bookcase and want the panels smooth before paint. A 1/4-sheet sander with 120–180 grit can
quickly even out surfaces without getting overly aggressive.
4) Detail (Mouse) Sander
A detail sander has a small, usually triangular pad designed to reach tight spacescorners, trim profiles, chair spindles,
and spots where round pads can’t go. It’s the “fine-tooth comb” of sanding tools.
Best for
- Inside corners (window trim, baseboards, cabinets)
- Small furniture parts (chair rails, lattice, carved edges)
- Touch-ups and spot repairs
Watch-outs
- Slow on big areas. If you try to sand a whole tabletop with it, you’ll finish sometime next year.
- Pad wear: The pointed tip takes abuse. Replace pads when they lose grip or get chewed up.
- Heat buildup: Small pads can warm quicklygo easy on delicate veneers.
Real example
You’re repainting old window trim and need to scuff sand into corners and along profiles. A detail sander saves you from
folding sandpaper into sad little triangles all day.
5) Disc / Rotary Sander
A disc sander (portable rotary sanding) uses a spinning round disc. This can be a dedicated tool, a drill attachment, or a sanding disc on
a grinder-style tool. It’s typically more aggressive than a random orbital sander and can be excellent for stripping, shaping, and working near edges
but it demands respect.
Best for
- Rapid finish removal in stubborn spots
- Sanding close to edges where larger tools struggle
- Shaping and leveling (especially on non-delicate materials)
Watch-outs
- Swirl marks are easy. A spinning disc can leave visible scratches if you linger.
- Over-sanding risk: Great for “remove material fast,” not always great for “keep it subtle.”
- Tool control matters: Start with lighter grits and test on scrap before touching your real project.
Real example
You’re stripping paint from overlapping siding edges or tight exterior spots where a belt sander can’t reach cleanly.
A disc/rotary setup can do the rough work, then you follow with a gentler sander to refine the surface.
6) Drywall Sander
A drywall sander (often a large round pad on a pole) is designed to smooth joint compound on walls and ceilings.
Used correctlyespecially with vacuum-assisted dust collectionit can turn a dusty nightmare into a manageable cleanup.
Best for
- Sanding drywall mud on large areas
- Ceilings (where ladders plus hand sanding equals misery)
- Big remodel jobs where dust control is a priority
Dust and safety notes (seriously, don’t skip this)
- Drywall dust gets everywhere. Vacuum-compatible systems help a lot.
- Respiratory protection matters. Wear a properly fitted mask/respirator when generating fine dust.
- Be extra cautious with older materials. If there’s any chance of lead paint or asbestos-containing materials,
pause and follow safe testing/abatement guidance before sanding.
Real example
You’re finishing a basement and have long seams to smooth. A drywall sander with a vacuum hookup can speed up the job while keeping the room
far cleaner than traditional sanding.
How to Choose the Right Power Sander
Choosing a sander is mostly about matching aggressiveness, surface area, and control to the job.
Here’s a practical way to decide without overthinking it.
Step 1: Name the job (don’t just say “sanding”)
- Stripping paint/finish or flattening rough wood: Start aggressive (belt or disc), then refine (random orbital).
- General smoothing and finish prep: Random orbital is usually your best friend.
- Big flat surfaces on a budget: Sheet/orbital sander with clamp-on paper.
- Corners and tight profiles: Detail sander (plus some hand sanding for perfect results).
- Drywall mud: Drywall sander, ideally vacuum-assisted.
Step 2: Pick the “finish quality” you actually need
If you’re painting trim, you don’t need museum-level perfectionbut you do need consistent scuff sanding so paint adheres.
If you’re staining a tabletop, scratch patterns matter a lot more because stain can highlight sanding marks.
Step 3: Think about dust collection like it’s a feature, not an accessory
Dust collection isn’t just about cleanliness. It can improve visibility, reduce paper clogging, and make sanding more comfortable.
If you’ll sand indoors or often, prioritize a tool with a solid dust bag or (better) a vacuum port that fits common shop vac hoses.
Step 4: Corded vs. cordless
- Corded: Consistent power, often lighter, great for longer sanding sessions.
- Cordless: Convenient and portable, great for quick jobs or places without outlets, but expect battery management and potentially more weight.
Tip: If you already own a battery platform (same brand batteries for drills, saws, etc.), choosing a matching cordless sander can be cost-effective.
Step 5: Don’t ignore ergonomics
- Comfortable grip and balanced feel
- Low vibration (your hands will thank you)
- Easy paper changes (hook-and-loop discs are fast; sheet clamps are economical)
- Speed control if you work on different materials or finishes
Step 6: Build a sane grit strategy
Most sanding problems aren’t “wrong tool,” they’re “wrong grit progression” (or “I skipped half the steps because I got impatient”).
As a general approach:
- Coarse (around 60–80): remove defects, flatten, strip tough finish
- Medium (around 100–150): smooth after coarse scratches
- Fine (around 180–220): prep for paint or many stains (project-dependent)
- Very fine (320+): between coats, polishing, ultra-smooth finishes
Always test on scrap (or an inconspicuous spot). Wood species, finish type, and the look you want can change the “best” grit to stop at.
Common mistakes (and how to avoid them)
- Pressing too hard: Let the sander’s weight do the work; pressure can cause swirls and clog paper faster.
- Skipping too many grits: Big jumps leave deep scratches that “mysteriously” show up under finish.
- Not cleaning dust between grits: Dust becomes grit you didn’t chooseoften the worst kind.
- Rounding edges accidentally: Be gentle on corners, especially with random orbital sanders.
- Ignoring safety: Eye protection, hearing protection, and a dust mask/respirator are not optional “extra credit.”
Buying a first sander: the simplest recommendation
If you want one tool that can handle the most jobs, get a 5-inch random orbital sander with variable speed and good dust collection.
Add a detail sander later if you do a lot of trim or furniture with tight corners.
Experiences & lessons from the shop (extra ~)
Here’s the part people don’t always tell you: sanding isn’t hard because it’s complicated. Sanding is hard because it’s honest.
It shows every shortcut you tried to take five steps earlier.
One common “first project” story goes like this: someone buys a belt sander to refinish a table, because they want the fastest option.
The belt sander is fastfast enough to erase the old finish, fast enough to level minor dents, and fast enough to carve a trench
if the tool tilts for half a second. The lesson most DIYers learn (usually after practicing on scrap… or after the first “oops”) is that the belt sander
works best as a controlled first pass, not the entire sanding plan. After that first aggressive stage, switching to a random orbital sander
feels like moving from a bulldozer to a paintbrushin a good way.
Another frequent experience: people fall in love with the random orbital sander and then accidentally sabotage it with enthusiasm.
The instinct is to push harder to “make it go faster.” In reality, extra pressure often increases heat, clogs the abrasive, and can create the very swirl marks
you were trying to avoid. The more effective habit is boring but magical: light pressure, steady movement, and clean paper.
When you do that, sanding stops feeling like punishment and starts feeling like progress.
Trim work brings its own comedy. Corners and profiles look easy until you realize a round sanding disc can’t reach into a crisp inside corner.
That’s when the detail sander earns its keep. DIYers often describe it as “the tool that saves my sanity,” because it turns frustrating hand-sanding into a
manageable, precise step. The funny part is that detail sanders are slow on big surfacesbut for corners, they feel like a superpower.
Drywall sanding is where people become dust philosophers. You can be careful, you can be neat, you can even whisper apologies to your vacuum…
and drywall dust will still try to colonize your entire house. Folks who’ve been through a remodel tend to recommend two things almost universally:
vacuum-assisted sanding (if possible) and good sealing/containment (plastic barriers, returns covered, airflow planned).
The first time you sand drywall without dust control, you learn what “fine particulate” really meansbecause it ends up on top of the refrigerator,
inside the closet you didn’t open, and somehow in a room you swear was behind a closed door.
One last “experienced DIYer” tip is about expectations: sanding is a sequence, not a single event. Pros tend to think in stages:
shape & flatten (belt/disc if needed), smooth (random orbital or sheet), and finish prep (finer grits, light touch,
dust cleanup). If you adopt that mindset, you stop asking “Which sander is best?” and start asking the more useful question:
“Which sander is best right now for this stage?”
And yesthere’s a weird emotional moment when you wipe away the dust and see the surface finally look uniform. It’s like the project exhales.
Just remember: the cleanest sanding victory is the one where you still have fingerprints by the end of the day.
Conclusion
The right power sander is the one that matches your job’s personality: aggressive when you need speed, gentle when you need a finish,
and precise when corners and details demand it. If you’re building a starter toolkit, a quality random orbital sander is usually the smartest first buy.
Add a belt sander for heavy removal, a detail sander for corners, and a drywall sander when your remodel plans involve joint compound and regret.




