Table of Contents >> Show >> Hide
- Why Paint Roller Technique Matters More Than People Think
- Secret #1: Choose the Right Roller Cover Before You Open the Paint
- Secret #2: Load the Roller Like a Pro, Not Like a Pancake in Syrup
- Secret #3: Roll in Sections and Use the W or M Pattern
- Secret #4: Keep a Wet Edge to Avoid Lap Marks
- Secret #5: Finish Lightly and Know When to Leave It Alone
- Common Paint Roller Mistakes and How to Fix Them
- Best Paint Roller Setup for Interior Walls
- Extra Experience-Based Tips for Better Roller Results
- Conclusion: Better Roller Technique, Better Walls
Using a paint roller looks almost suspiciously simple. Dip, roll, admire your work, and wait for your home to magically look like a magazine spread, right? Unfortunately, many first-time painters discover that a roller can also create streaks, lap marks, splatters, fuzzy lint, weird texture, and a wall that looks like it lost a fight with a mop.
The good news is that learning how to use a paint roller properly is not complicated. The difference between an amateur-looking wall and a smooth, professional-looking paint finish usually comes down to a few small habits: choosing the right roller cover, loading it correctly, rolling in the right pattern, keeping a wet edge, and knowing when to stop fussing with the paint.
This guide breaks down five insider secrets to using a paint roller, with practical examples, common mistakes, and real-world tips you can use on walls, ceilings, trim-adjacent areas, and textured surfaces. No dramatic renovation montage required. Just solid technique, a little patience, and maybe one old T-shirt you are emotionally ready to sacrifice.
Why Paint Roller Technique Matters More Than People Think
A paint roller is designed to cover large surfaces quickly, but speed is only half the story. A roller also controls how much paint lands on the surface, how evenly that paint is distributed, and what kind of texture is left behind. The wrong roller nap can leave too much stipple. A dry roller can drag and create patchy coverage. Too much pressure can form ridges at the edges. Rolling too slowly or randomly can create lap marks where one section dries before the next blends in.
In other words, the roller is not just a paint delivery tube with a handle. It is the tool that determines whether your wall looks calm and smooth or like it has been through a minor weather event.
Secret #1: Choose the Right Roller Cover Before You Open the Paint
The first insider secret is simple: the best paint roller technique cannot rescue the wrong roller cover. Roller covers vary by nap length, material, width, and quality. The “nap” is the thickness or length of the fibers on the roller. Shorter naps create smoother finishes on smooth surfaces, while longer naps carry more paint into rough or textured surfaces.
Match the Nap to the Surface
For smooth interior drywall, a 3/8-inch nap roller is a reliable choice for many latex wall paints. For very smooth surfaces such as cabinets, doors, or fine finish work, a 1/4-inch nap or foam roller may be better because it leaves less texture. For lightly textured walls, a 1/2-inch nap can help the paint reach shallow grooves. For rough surfaces such as brick, stucco, concrete block, or heavily textured ceilings, thicker naps like 3/4-inch or more may be necessary.
Here is the basic rule: the rougher the surface, the thicker the nap. But do not automatically grab the fluffiest roller in the store. A roller that is too thick for a smooth wall can leave an unwanted orange-peel texture. That texture might be fine on a rental hallway that has already seen three decades of mystery paint, but it is not ideal for a clean living room wall.
Do Not Buy the Cheapest Roller Cover
Cheap roller covers often shed fibers, hold less paint, and create uneven coverage. A better-quality roller cover loads more evenly, releases paint more smoothly, and usually saves time because you do not have to fight it every three feet. If your roller is leaving lint in the paint, your wall should not have to suffer because you saved two dollars.
Before using a new roller cover, remove loose lint with painter’s tape or a lint roller. Some painters also lightly dampen roller covers used with latex paint, then remove excess water before loading. The roller should be barely damp, not dripping like it just returned from a swimming lesson.
Secret #2: Load the Roller Like a Pro, Not Like a Pancake in Syrup
Many painting problems start in the tray or bucket. A roller that is overloaded will drip, splatter, and create thick ridges. A roller that is underloaded will drag, skip, and force you to press too hard. The goal is to load the roller evenly so the paint sits throughout the fibers without running off the tool.
Use the Tray or Bucket Grid Correctly
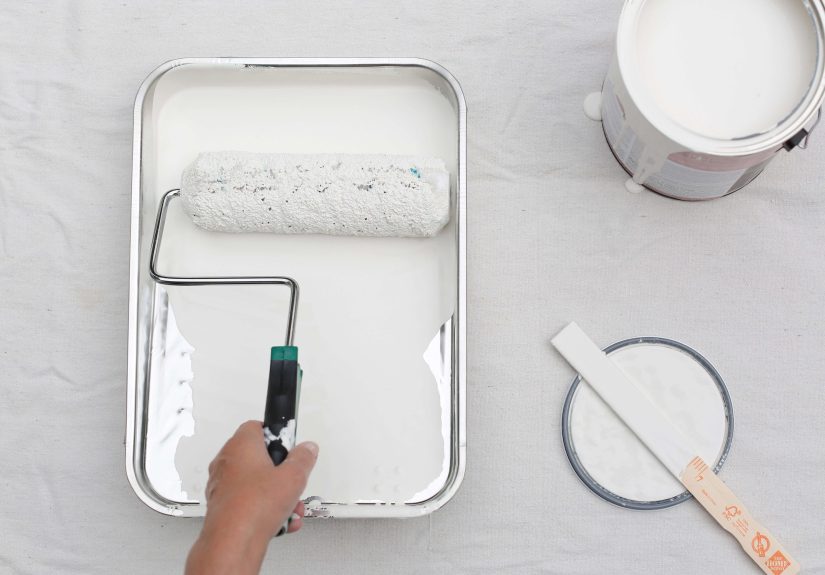
Pour paint into the deep end of a tray, then dip the roller lightly into the paint. Roll it back and forth over the ridged part of the tray until the roller cover is evenly coated. You should not see dry patches on the roller, but it should not drip when lifted.
For larger rooms, many experienced painters prefer a five-gallon bucket with a metal or plastic paint grid. A bucket holds more paint, is harder to step into accidentally, and makes it easier to load the roller consistently. A tray is still perfectly fine for bedrooms, accent walls, and smaller projects. Just do not fill it to the brim unless your goal is to paint the floor too.
The “No Heavy Pressure” Test
A properly loaded roller should release paint with light, even pressure. If you have to push hard to get paint onto the wall, the roller is too dry. Pressing harder does not create better coverage. It usually creates roller marks, edge lines, and uneven texture. Think of the roller as a sponge that should gently release paint, not a rolling pin trying to flatten pizza dough.
Refresh the roller often. When the roller begins making a dry, whispery sound or the wall starts showing gaps, reload. Waiting too long between reloads is one of the easiest ways to create uneven coverage.
Secret #3: Roll in Sections and Use the W or M Pattern
The classic W or M pattern is popular because it helps distribute paint evenly before smoothing it out. Start near the top of a wall, a little away from the edge, and roll a large W or M shape over a manageable area. Then fill in the empty spaces with overlapping strokes. The pattern does not need to be a work of calligraphy. Nobody is grading your alphabet. The purpose is simply to spread paint before leveling it.
Work in Manageable Areas
Work in sections about three feet wide by three feet tall, or slightly larger if you can move quickly and comfortably. If you try to roll an entire wall randomly, parts of the paint will begin drying before you blend the next section. That is when lap marks appear.
After filling the W or M, use long, light finishing strokes from top to bottom. These final passes help even out the texture and align the roller marks. Keep the roller moving smoothly, overlap each pass slightly, and avoid pressing at the end of a stroke.
Start Away From the Edge
Do not start by jamming a fully loaded roller directly into a corner or against trim. That is how thick paint ridges and accidental ceiling kisses happen. Instead, start several inches away from the edge, distribute the paint, then roll closer to the cut-in area as the roller unloads slightly.
Use a brush to cut in around corners, ceilings, baseboards, and trim before rolling the main wall. To avoid a visible “picture frame” effect, roll as close as safely possible to the brushed areas while they are still wet. A small mini roller can also help blend brushed edges into the rolled field.
Secret #4: Keep a Wet Edge to Avoid Lap Marks
Lap marks happen when fresh paint overlaps paint that has already started to dry. They often show up as darker or shinier bands after the wall dries. The secret to avoiding them is maintaining a wet edge. That means each new section should overlap the previous section while it is still wet enough to blend smoothly.
Plan Your Route Before You Roll
Start on one side of the wall and move steadily across. Do not paint one random patch near the window, then another by the door, then return to the first area after a snack break. Paint is not especially forgiving when treated like a scavenger hunt.
On walls, work from top to bottom and from one side to the other. On ceilings, work in small sections and keep a consistent direction, especially if natural light enters the room. For large areas, an extension pole helps maintain rhythm and reach without climbing up and down a ladder every thirty seconds.
Watch Temperature, Airflow, and Paint Type
Paint dries faster in hot rooms, dry air, or strong airflow. If a fan, open window, or HVAC vent is blasting across the wall, your wet edge may disappear faster than expected. Work at a steady pace and avoid painting in conditions that make the paint dry too quickly.
Using enough paint also matters. Thin, stretched-out coats dry unevenly and are harder to blend. That does not mean applying a heavy coat that sags. It means applying a consistent, full coat recommended by the paint manufacturer. Two proper coats usually look better than one heroic coat applied with too much optimism.
Secret #5: Finish Lightly and Know When to Leave It Alone
One of the hardest painting skills is knowing when to stop. Many roller marks are caused not by too little effort, but by too much. Once paint begins to set, rolling back over it can lift partially dried paint, create texture differences, or leave shiny patches.
Use Light Finishing Passes
After spreading the paint in your section, lightly roll from top to bottom with minimal pressure. These finishing strokes help create a uniform surface. Keep the open side of the roller frame facing the direction you are moving to reduce pressure lines from the roller edge.
If you notice a ridge while the paint is still wet, gently smooth it right away. If the paint has started to dry, leave it alone and fix it after it cures. Sanding and repainting a small area later is usually better than turning a minor mark into a large, dramatic paint crime scene.
Use the Same Roller Nap for Touch-Ups
Touch-ups can look different if you use a different tool than the original application. A brush touch-up on a rolled wall may leave a different texture. A different nap size may create a different sheen or stipple. For the best match, use the same paint, same finish, same roller nap, and similar technique.
Also, stir leftover paint well before touching up. Paint components can separate over time, and a poorly mixed touch-up may dry slightly different from the surrounding wall.
Common Paint Roller Mistakes and How to Fix Them
Roller Marks
Roller marks often come from pressing too hard, using a roller that is too dry, or using the wrong nap. Fix the problem by reloading more often, using lighter pressure, and applying finishing strokes in one direction.
Excessive Texture or Stipple
If the wall looks too bumpy, the roller nap may be too thick for the surface or paint. Switch to a thinner nap for smooth walls and avoid overworking the paint.
Drips and Runs
Drips usually mean the roller is overloaded or the paint is being applied too heavily. Roll excess paint onto the tray ridges or bucket grid before touching the wall. Smooth drips immediately while wet.
Patchy Coverage
Patchy coverage may come from underloading the roller, stretching the paint too far, skipping primer, or trying to cover a dark color with one coat. Use primer when needed and plan for two coats, especially with bold color changes.
Lint in the Finish
Lint comes from low-quality or unprepared roller covers. Remove loose fibers before painting and choose lint-free roller covers for smooth interior walls.
Best Paint Roller Setup for Interior Walls
For most standard interior walls, a practical setup includes a 9-inch roller frame, a high-quality 3/8-inch nap roller cover, a sturdy tray or five-gallon bucket with grid, painter’s tape, a quality angled brush for cutting in, a drop cloth, and an extension pole. The extension pole is not just for ceilings. It also gives better control on walls, helps reduce wrist strain, and lets you roll with smoother, longer movements.
Keep a damp rag nearby for quick cleanup. Remove outlet covers before painting. Protect floors and furniture. Stir paint thoroughly. These small steps make the actual rolling process easier and cleaner.
Extra Experience-Based Tips for Better Roller Results
After painting enough rooms, you learn that walls have personalities. Some are smooth and cooperative. Others are patched, textured, dusty, glossy, thirsty, or covered in the mysterious legacy of previous DIY decisions. The roller technique stays mostly the same, but your judgment improves with experience.
One useful habit is to inspect the wall before painting, not after the first coat exposes every flaw like a spotlight. Look for nail holes, dents, raised patches, dust, grease, and glossy areas. Paint does not hide everything. In fact, fresh paint often makes imperfections more obvious because the new finish catches light differently. Fill holes, sand rough spots, clean dirty areas, and prime repairs. A roller can apply paint beautifully, but it cannot perform miracles on a wall that still has drywall dust and old tape fuzz clinging to it.
Another real-world lesson is to box your paint when using multiple cans of the same color. “Boxing” means mixing the cans together in a larger bucket so the color is consistent. Even paint mixed from the same formula can vary slightly from can to can. If you switch cans halfway across a wall, the difference may show after drying. It is a small step that can prevent a big headache.
Lighting also matters more than most beginners expect. A wall may look perfect when you are standing directly in front of it at noon, then reveal roller lines when evening light hits from the side. This is especially true with higher-sheen paints such as satin or semi-gloss. When possible, check your work from different angles while the paint is wet. Use light finishing strokes and keep the texture consistent.
Ceilings deserve special patience. They are physically awkward, and gravity is not your teammate. Use an extension pole, wear eye protection, and avoid overloading the roller. Paint small sections and keep your wet edge moving. If the ceiling has texture, choose a nap thick enough to reach the uneven surface without forcing the roller. If the ceiling is smooth, a heavy nap can leave too much texture, so choose carefully.
For accent walls, take extra care near edges because bold colors make mistakes more visible. Cut in neatly, then roll as close to the edge as possible while the cut-in paint is still wet. If you let the edges dry before rolling, the border may appear slightly different from the main wall. This “picture frame” effect is common, and it is annoying because it usually appears after you have already cleaned the tools and congratulated yourself.
When painting over dark colors, do not try to win the battle in one coat. Use a suitable primer or plan for multiple coats. Stretching paint too thin to avoid buying another quart usually leads to patchy results. Paint coverage depends on color, sheen, surface porosity, and paint quality. A calm two-coat plan beats an angry one-coat gamble almost every time.
Breaks are another practical issue. If you need to pause for a short time, wrap the roller cover tightly in plastic wrap or place it in a sealed plastic bag to prevent drying. Do not leave a loaded roller sitting in the tray exposed to air. Dried bits of paint can break loose later and end up on your wall. For longer breaks or overnight storage, follow the paint manufacturer’s recommendations and clean or store tools properly.
Cleaning the roller is worth doing if you bought a quality cover and plan to reuse it. Scrape excess paint back into the can or tray, rinse latex paint with water until it runs clear, and let the roller cover dry completely before storing. Never store a roller cover while wet in an airtight container for a long period. That is how you create a sad little science experiment.
Finally, remember that confidence comes from rhythm. Load the roller, spread the paint, smooth the section, overlap the wet edge, and move on. Do not panic over every tiny wet mark. Paint changes as it dries, and many small roller lines level out on their own. The goal is not to pet the wall with the roller until it becomes perfect. The goal is to apply a consistent coat and let the paint do its job.
Conclusion: Better Roller Technique, Better Walls
Using a paint roller well is not about secret contractor magic. It is about respecting the basics that professionals repeat because they work. Choose the right roller cover for the surface. Load it evenly. Use a W or M pattern to distribute paint. Keep a wet edge. Finish with light strokes and resist the urge to overwork drying paint.
Once you understand these five insider secrets, painting becomes faster, cleaner, and far less mysterious. Your walls will look smoother, your coverage will improve, and your roller will finally feel like a tool instead of a fuzzy cylinder of chaos. Whether you are refreshing a bedroom, painting a ceiling, or tackling a full home makeover, good roller technique is one of the easiest ways to make your project look more polished.




