Table of Contents >> Show >> Hide
- Why Make Your Own Cupcake Stand?
- Before You Start: Cupcake Stand Basics
- Method 1: Make a Cardboard Cupcake Stand
- Method 2: Make a Cupcake Stand with Plates and Candlesticks
- Method 3: Build a Wooden Cupcake Stand
- Method 4: Create a Clear Acrylic-Style Cupcake Stand
- How to Decorate a Cupcake Stand
- How to Arrange Cupcakes on the Stand
- Common Mistakes to Avoid
- Which Cupcake Stand Method Should You Choose?
- Extra Experience: Real-Life Tips for Making a Cupcake Stand That Actually Works
- Conclusion
Cupcakes are already tiny edible celebrations, but place them on a beautiful cupcake stand and suddenly they become the main character. A good stand adds height, drama, order, and just enough “I planned this” energy to make guests believe you did not frost half the cupcakes at midnight while wearing flour like face powder.
The best part? You do not need to buy an expensive display tower. With a little creativity, a few sturdy materials, and a healthy respect for balance, you can make a cupcake stand for birthdays, weddings, showers, school parties, bake sales, holidays, or any Tuesday that needs frosting. This guide covers four practical ways to make a cupcake stand: a cardboard cupcake stand, a plate-and-candlestick stand, a wooden cupcake tower, and a reusable acrylic-style display using clear trays or plastic sheets.
Each method has its own personality. Cardboard is budget-friendly and customizable. Plates and candlesticks bring instant charm. Wood offers rustic strength. Clear plastic or acrylic-style materials create a clean modern look. Choose the one that matches your event, your tools, and your patience levelbecause not every party project should require a garage full of equipment and emotional support snacks.
Why Make Your Own Cupcake Stand?
A DIY cupcake stand solves three common party problems: limited table space, messy presentation, and the mysterious disappearance of dessert-table style. By stacking cupcakes vertically, you display more treats in less space while creating a centerpiece that looks intentional instead of “we found a tray and hoped for the best.”
Homemade cupcake stands also let you control the size, color, theme, and number of tiers. Hosting a princess birthday party? Use pink cardstock, ribbon, and glitter paper. Planning a rustic wedding dessert table? Try wood rounds and natural twine. Making cupcakes for a graduation party? Use school colors and a bold topper. The stand becomes part of the decor, not just something holding buttercream soldiers in formation.
Before You Start: Cupcake Stand Basics
Plan the Capacity
Before cutting, gluing, or dramatically declaring yourself a craft genius, estimate how many cupcakes the stand needs to hold. Standard cupcakes usually need about 2.5 to 3 inches of space each, depending on frosting height and wrapper width. Mini cupcakes need less room, while jumbo cupcakes are basically dessert furniture and deserve more space.
For a small party, a two-tier stand may hold 12 to 18 cupcakes. A three-tier stand can often display 24 to 36 cupcakes. Larger events may require multiple stands rather than one towering dessert skyscraper. Remember: a stable display is more impressive than a tall one that makes guests whisper, “Is that thing leaning?”
Keep It Food-Safe
Whenever food touches a surface, use food-safe materials or cover the surface with parchment paper, doilies, cupcake liners, cake boards, or food-safe decorative paper. Paint, glue, glitter, raw wood, and some plastics should not directly touch cupcakes. They may be cute, but cupcakes are not interested in absorbing craft-store chemistry.
Test Stability Before the Party
Always test your cupcake stand before the event. Set it on a flat table, gently press each tier, and load it with wrapped items or empty cupcake liners to check balance. If it wobbles, adjust the base, reinforce the center supports, or reduce the number of tiers. Cupcakes deserve drama in flavor, not in structural engineering.
Method 1: Make a Cardboard Cupcake Stand
A cardboard cupcake stand is one of the easiest and most affordable options. It is lightweight, customizable, and perfect for birthdays, classroom parties, bake sales, baby showers, and themed events. The secret is using strong cardboard or foam boardnot the flimsy box your cereal came in, unless your goal is dessert suspense.
Materials You Need
- Foam board, thick cardboard, or cake boards in three sizes
- Cardboard tubes, paper towel rolls, or sturdy mailing tubes
- Hot glue or strong craft glue
- Decorative paper, wrapping paper, or cardstock
- Ribbon or trim for tier edges
- Craft knife or scissors
- Ruler, pencil, and compass or round templates
- Parchment paper or food-safe doilies
Step-by-Step Instructions
Start by cutting three circles or squares for the tiers. A good size combination is 12 inches for the bottom tier, 9 inches for the middle tier, and 6 inches for the top tier. If you want a larger cupcake tower, increase each tier size while keeping the shape proportional.
Next, cover each tier with decorative paper. Use glue carefully so the surface stays smooth. Wrinkles are fine on linen pants, less charming on a cupcake platform. Cover the edges with ribbon, washi tape, or paper trim for a finished look.
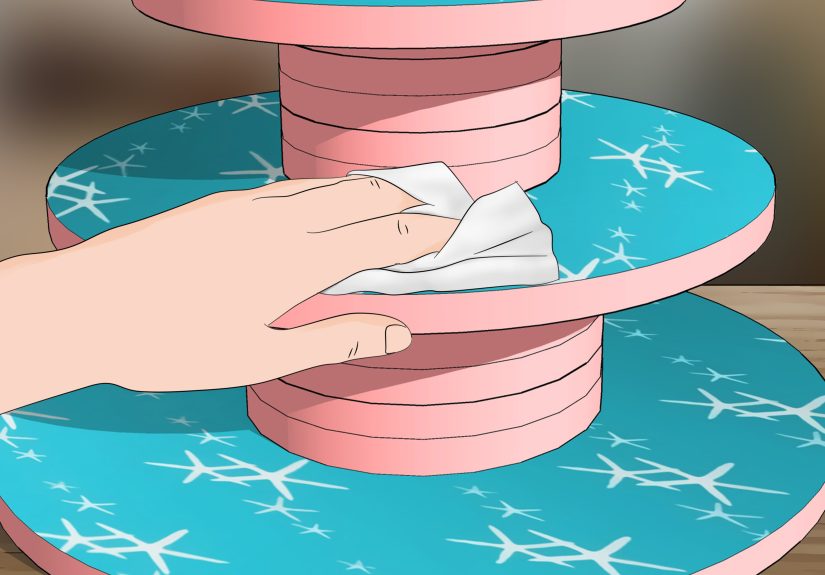
Cut two support columns from cardboard tubes. Each support should be about 4 to 5 inches tall, depending on how much vertical space you want between tiers. Wrap the tubes in matching paper or ribbon. Glue one support column to the center of the largest tier, then glue the middle tier on top. Repeat with the second column and top tier.
Let the stand dry completely. Hot glue sets quickly, but stronger craft glue may need several hours. Once dry, place food-safe doilies or parchment circles on each tier before adding cupcakes.
Best Uses for a Cardboard Stand
This method is ideal for one-time events, themed parties, and budget-friendly dessert tables. You can match the stand to any color scheme, from rainbow birthdays to elegant white-and-gold showers. It is also easy to recycle after use, assuming it has not been attacked by frosting, fruit filling, or one very enthusiastic toddler.
Method 2: Make a Cupcake Stand with Plates and Candlesticks
The plate-and-candlestick cupcake stand is a classic DIY project because it looks fancy without requiring complicated tools. It works especially well for tea parties, bridal showers, brunches, small weddings, and dessert tables that want a vintage or boutique feel.
Materials You Need
- Two or three plates in different sizes
- One or two candlestick holders, small vases, or sturdy glass cups
- Strong adhesive suitable for ceramic or glass
- Rubbing alcohol and a clean cloth
- Painter’s tape, optional
- Food-safe doilies, optional
Step-by-Step Instructions
Choose plates that stack visually from largest to smallest. Dinner plates, salad plates, and saucers work well. The bottom plate should be wide and heavy enough to anchor the stand. Avoid using lightweight plastic plates unless the stand is temporary and lightly loaded.
Clean the bottom of each plate and the ends of the candlesticks with rubbing alcohol. This helps remove dust and oils so the adhesive bonds better. Find the center of the largest plate and glue the first candlestick in place. Let it become tacky according to the adhesive instructions, then attach the second plate on top. Repeat the process if making a third tier.
For best results, let the stand cure for at least 24 hours before using it. This is not the time to test fate by loading it with two dozen cupcakes five minutes after gluing. Patience is cheaper than replacing broken plates and emotionally damaged frosting.
Design Ideas
Use mismatched vintage plates for a charming tea-party look. Try all-white plates for a clean wedding display. Pair clear glass plates with crystal candlesticks for a delicate, elegant stand. For a playful birthday version, use colorful melamine plates and removable museum putty instead of permanent glue if you want to take the stand apart later.
Best Uses for a Plate Stand
This cupcake stand is best for indoor parties and smaller displays. It is attractive enough to reuse and easy to personalize with different plate styles. Just remember that glass and ceramic stands can be heavy and breakable, so they should be placed on a stable table away from table edges, excited pets, and guests doing dramatic arm gestures.
Method 3: Build a Wooden Cupcake Stand
A wooden cupcake stand is sturdy, reusable, and especially popular for rustic weddings, farmhouse dessert tables, outdoor parties, and holiday displays. It can be simple or elaborate depending on your tools. Even a basic version made from wood rounds and dowels can look warm, natural, and intentionally handmade.
Materials You Need
- Wood rounds, plywood circles, or square wood boards in three sizes
- Wood dowels, blocks, or short wooden legs for supports
- Wood glue and screws
- Sandpaper
- Drill
- Food-safe finish or sealant
- Parchment paper, cake boards, or doilies
Step-by-Step Instructions
Begin by sanding all wooden surfaces until smooth. No cupcake should have to sit beside a splinter. If using natural wood slices, make sure they are dry, level, and not shedding bark. For a cleaner look, use plywood circles or pre-cut craft wood rounds.
Mark the center of each tier. Attach the support dowel or block to the center of the bottom tier using wood glue and screws from underneath. Add the next tier on top and secure it. Repeat for the upper tier. Keep the supports centered so the tower remains balanced.
Apply a food-safe finish if the wood will be reused. However, even with a sealed surface, it is smart to place cupcakes on liners, parchment, cake boards, or doilies. This protects both the wood and the food while making cleanup easier.
Rustic Styling Ideas
For a woodland party, decorate the base with greenery, pinecones, or small flowers placed around the cupcakes, not directly touching the frosting. For a wedding, add a small cutting cake on the top tier and cupcakes below. For a fall dessert table, pair the stand with mini pumpkins, caramel-colored ribbons, and warm lights. Basically, give the cupcakes a cabin vacation.
Best Uses for a Wooden Stand
A wooden cupcake stand is excellent for larger gatherings because it can hold more weight than cardboard or delicate glass. It is also reusable, making it a smart choice for frequent hosts, bakers, or anyone who has accepted that cupcakes are now part of their personality.
Method 4: Create a Clear Acrylic-Style Cupcake Stand
A clear cupcake stand gives desserts a modern, floating look. Real acrylic stands can be expensive, but you can create a similar effect using clear plastic trays, sturdy transparent plates, or acrylic sheets from a craft or hardware store. This method works beautifully for weddings, anniversaries, minimalist parties, and dessert tables where the cupcakes should steal the spotlight.
Materials You Need
- Clear plastic plates, trays, or acrylic circles
- Clear acrylic tubes, small clear cups, or plastic risers
- Strong clear adhesive suitable for plastic
- Ruler and marker
- Non-slip pads
- Food-safe liners or doilies
Step-by-Step Instructions
Select clear trays in graduated sizes. A three-tier version might use 14-inch, 10-inch, and 7-inch rounds. Make sure each tray is firm enough that it does not flex when lightly pressed. Thin plastic may look fine empty but sag once cupcakes arrive wearing frosting hats.
Mark the center of each tray. Attach a clear tube, cup, or riser to the center of the largest tray using clear adhesive. Add the second tray and repeat. Let the adhesive cure fully according to the product directions. Add small non-slip pads under the bottom tier to help keep the stand steady.
Because clear surfaces show crumbs and smudges, clean the stand shortly before serving. Use food-safe liners if the cupcakes will touch the surface directly. The result is polished, simple, and easy to dress up with flowers, fairy lights, ribbon, or a custom topper.
Best Uses for a Clear Stand
This style is perfect when you want the cupcakes, wrappers, frosting colors, and decorations to be the visual focus. It pairs especially well with modern party themes, monochrome dessert tables, and elegant events where too much decoration would feel like the stand is trying to audition for Broadway.
How to Decorate a Cupcake Stand
Once the structure is finished, decorating is where the project becomes yours. Use ribbon around tier edges for instant polish. Add themed toppers, tiny flags, paper flowers, greenery, or battery-powered fairy lights. For a child’s birthday, use stickers or character colors. For a wedding, choose lace, pearls, neutral tones, or fresh flowers arranged safely away from food.
One smart decorating rule is to repeat colors from the cupcakes. If the frosting is lavender, add a lavender ribbon. If the wrappers are gold, use a gold topper. Matching small details makes the entire display look planned, even if your actual plan was “finish before guests arrive.”
How to Arrange Cupcakes on the Stand
Place the largest or heaviest cupcakes on the bottom tier. Lighter cupcakes can go on upper levels. Leave a little space between each cupcake so guests can pick one up without performing frosting surgery on its neighbor.
For a professional look, arrange cupcakes in circles on round stands and straight rows or diagonals on square stands. Mix flavors in a pattern rather than random clusters. For example, alternate vanilla, chocolate, and red velvet around each tier. Add small flavor labels if guests may need to know what they are choosing. Nobody enjoys biting into what they thought was lemon and discovering surprise coconut if coconut is their villain origin story.
Common Mistakes to Avoid
Making the Top Too Heavy
A cupcake stand should be bottom-heavy and balanced. Avoid placing too many cupcakes, large decorations, or a heavy cake on the top tier unless the base is strong enough to support it.
Using Weak Glue
Choose adhesive based on the materials. Hot glue may work for temporary cardboard projects, but glass, ceramic, wood, and plastic often need stronger specialty adhesives. Read the label and allow proper curing time.
Skipping the Test Run
Always test the stand before party day. Load it with wrapped items, empty cupcake liners, or lightweight cups to check spacing and balance. A test run helps you fix problems before frosting is involved, which is the adult version of avoiding disaster.
Ignoring Cleanup
Think about cleanup before you decorate. Removable liners, doilies, and parchment circles make life easier. Glitter, fuzzy ribbon, and delicate paper trims may look adorable but can become annoying if frosting touches them.
Which Cupcake Stand Method Should You Choose?
Choose cardboard if you need a low-cost, themed, one-time stand. Choose plates and candlesticks if you want a charming reusable display with vintage style. Choose wood if you need strength, rustic beauty, and long-term use. Choose clear plastic or acrylic-style materials if you want a sleek, modern look that keeps attention on the cupcakes.
The best cupcake stand is not always the fanciest one. It is the one that fits your event, holds your cupcakes safely, and does not make you regret your life choices at 1 a.m. the night before the party.
Extra Experience: Real-Life Tips for Making a Cupcake Stand That Actually Works
After making several cupcake stands for birthdays, family gatherings, holiday tables, and “I saw this online and now I must try it” moments, one lesson stands above all others: stability matters more than decoration. A cupcake stand can be covered in ribbon, sparkle, and personality, but if the base is too narrow, the entire display feels risky. Always start with a wide bottom tier and strong center supports. The stand should feel calm and confident, like it has done this before.
Another useful experience is to design the stand around the cupcakes, not the other way around. Tall frosting, fondant toppers, fruit garnishes, and decorative picks all need extra headroom. A stand with tiers too close together may look cute when empty, but once the cupcakes are loaded, the top of one cupcake can bump into the bottom of the next tier. That is how beautiful frosting becomes modern art, and not in a good way.
For cardboard cupcake stands, double up the boards if you want extra strength. Foam board is easier to cut cleanly than thick corrugated cardboard, and cake boards already have a polished look. If you are using wrapping paper, apply it smoothly and avoid too much wet glue because it can wrinkle the paper. A glue stick or spray adhesive often gives a cleaner finish for paper coverings, while hot glue is better for attaching supports and trim.
For plate-and-candlestick stands, the biggest trick is patience. Let the adhesive cure fully. Many people want to build the stand and use it immediately, but glass and ceramic need time to bond. Also, check that the candlestick is truly centered. Even a small off-center placement can make the stand feel awkward once cupcakes are added. Use a ruler from several angles or trace a light guide before gluing.
Wooden stands are wonderfully forgiving because they are strong and can be sanded, stained, painted, or reused. However, wood should be smooth and sealed if it will appear near food. I prefer placing cupcakes on liners or doilies even when the wood is finished because cleanup becomes much easier. If buttercream gets on raw wood, the wood remembers. Possibly forever.
Clear stands look elegant, but they reveal every fingerprint, crumb, and smudge. Clean them right before display time and keep a soft cloth nearby. They are beautiful for light-colored cupcakes, metallic wrappers, and modern dessert tables. If the party lighting is good, clear stands can make cupcakes look like they are floating, which is exactly the kind of unnecessary magic dessert deserves.
One final experience: do not overload the stand just because there is space. Leave room for guests to grab cupcakes easily. A crowded stand may photograph well for three seconds, but it becomes frustrating when someone tries to take one cupcake and accidentally elbows three others into frosting chaos. A little breathing room makes the display look cleaner and keeps the dessert table civilized, at least until the last chocolate cupcake is spotted.
Conclusion
Making a cupcake stand is one of those DIY projects that gives you a big visual payoff without demanding professional-level skills. Whether you build one from cardboard, plates, wood, or clear acrylic-style materials, the goal is the same: create a stable, attractive, food-safe display that makes your cupcakes look as special as they taste.
Start with the right size, choose sturdy materials, decorate with intention, and test the stand before guests arrive. Do that, and your cupcake display will look polished, practical, and party-ready. Cupcakes may be small, but with the right stand, they can own the entire dessert table like tiny frosted celebrities.




