Table of Contents >> Show >> Hide
- Why Cuticles Matter More Than Most People Realize
- Before You Use a Cuticle Pusher: 5 Rules That Keep Things Safe
- Way #1: Push Back Softened Cuticles for a Cleaner, Longer-Looking Nail
- Way #2: Lift Dead Skin and Cuticle Buildup Off the Nail Plate
- Way #3: Prep Nails for Polish, Gel, Press-Ons, and Even DIY Pedicures
- Common Mistakes People Make With a Cuticle Pusher
- How Often Should You Use a Cuticle Pusher?
- Who Should Be Extra Careful?
- The Bottom Line
- Experiences Related to “3 Ways to Use a Cuticle Pusher”
- SEO Tags
Some beauty tools look dramatic. A curling wand says, “I create bounce.” A jade roller says, “I live on your bathroom shelf and judge your sleep schedule.” A cuticle pusher, meanwhile, looks like a tiny metal spoon and somehow manages to seem both harmless and mildly threatening. But in the right hands, this little tool can seriously upgrade your nail routine.
If you have ever stared at your nails and thought, Why do they look messy two days after a manicure? or Why does my polish chip like it has a personal grudge? the answer may have something to do with cuticle care. A cuticle pusher can help create a cleaner nail outline, lift dead skin from the nail plate, and prep nails for polish, gel, press-ons, or a tidy at-home pedicure. The catch? You need to use it gently. Very gently. This is nail care, not an excavation project.
Below, we will break down the three best ways to use a cuticle pusher, when to use one, how to avoid the most common mistakes, and why your cuticles should be treated like helpful bodyguards instead of unwanted party crashers.
Why Cuticles Matter More Than Most People Realize
Before getting into the “how,” it helps to understand the “why.” Your cuticle is part of your nail’s protective barrier. It helps seal the space between the skin and nail plate, which lowers the chance of irritation and infection. That is why nail experts and dermatology guidance are so consistent on one point: cuticles should not be aggressively cut, ripped, picked, or bulldozed into next week.
That does not mean a cuticle pusher is off-limits. It simply means the tool works best when used with restraint. Think of it as a detail brush, not a pressure washer. The goal is to tidy and loosen dead tissue resting on the nail plate, not damage living skin or create a sore, angry nail fold that makes hand sanitizer feel like punishment.
Before You Use a Cuticle Pusher: 5 Rules That Keep Things Safe
A cuticle pusher is easy to use, but the safest results usually come from a few simple habits. These matter whether you are doing a basic manicure, prepping for gel polish, or trying to make your toes look less wintery.
- Start with soft cuticles, never dry ones. Warm water, a shower, cuticle oil, or cuticle remover helps soften the area so you do not need much pressure.
- Sanitize your tool. If you are using a metal cuticle pusher, clean it before and after use. Sharing nail tools is a bad idea unless they have been properly sanitized.
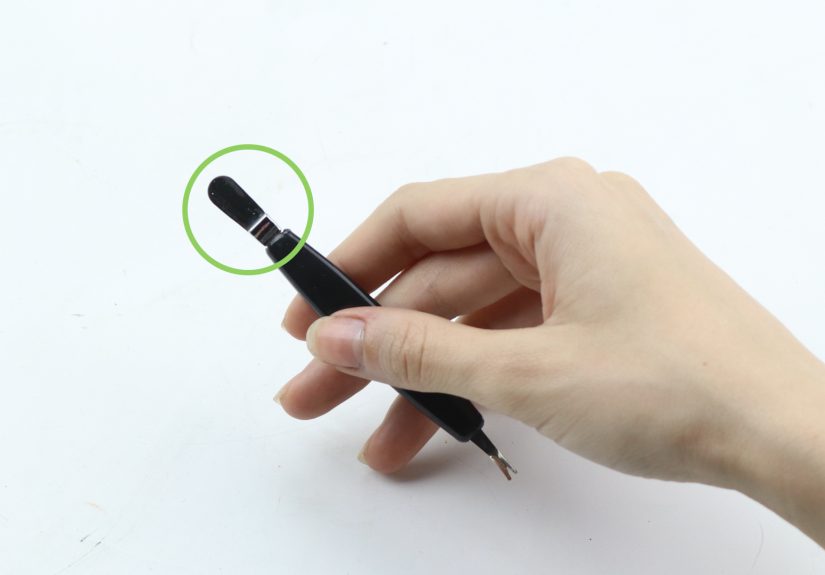
- Use the blunt or curved end first. The rounded end is designed for gentle pushing. Save the sharper side, if your tool has one, for very light cleanup only.
- Never force anything. If it hurts, stings, or feels tight, stop. A cuticle pusher should not feel like a tiny shovel attacking your fingertip.
- Do not cut living cuticle. Loose hangnails or dead bits of skin can sometimes be trimmed carefully, but removing healthy cuticle is where many DIY nail routines go sideways.
Way #1: Push Back Softened Cuticles for a Cleaner, Longer-Looking Nail
The most common use for a cuticle pusher is exactly what the name suggests: gently pushing back cuticles after they have been softened. This creates a neater nail shape and makes more of the nail plate visible, which can make nails appear slightly longer and more polished even before you apply color.
When this works best
This method is most useful when your cuticles have crept forward onto the nail plate, your manicure edges look uneven, or your nails just need a refresh between salon visits. It is also a smart move before applying polish or press-ons, because an overgrown cuticle area can get in the way of a clean finish.
How to do it
Begin by washing your hands and soaking your fingertips in warm water for a few minutes. You can also apply a small amount of cuticle oil or cuticle remover first if your skin is dry or a little stubborn. Once the area is softened, hold the cuticle pusher almost flat against the nail and nudge the cuticle backward using tiny, gentle movements. The pressure should be light enough that you could still describe the experience as “pleasantly fussy” instead of “why did I do this to myself?”
Work slowly around the base of the nail. You do not need to push hard or go far. The idea is to encourage the softened cuticle back into a tidy position, not scrape the life story off your nail bed. When you are done, wipe away any loosened residue and apply cuticle oil or hand cream.
Why this method matters
Gently pushing back softened cuticles can instantly make nails look more symmetrical and cared for. It is one of the easiest ways to improve the look of a DIY manicure without adding extra products or fancy tricks. It is also a surprisingly effective move for people who prefer bare nails but still want their hands to look neat and intentional.
Way #2: Lift Dead Skin and Cuticle Buildup Off the Nail Plate
Here is where a cuticle pusher becomes especially useful. Sometimes the issue is not just that the cuticle sits a little too far forward. Sometimes there is a thin layer of dead tissue stuck to the nail plate itself. That buildup can make nails look dull, create an uneven surface, and interfere with polish adhesion.
This is the second smart way to use a cuticle pusher: to gently lift and loosen dead skin that has attached itself to the nail surface. The keyword here is dead. You are not removing healthy skin. You are helping detach the dry, clingy bits that refuse to leave politely.
When this makes sense
This approach is helpful before painting your nails, applying gel, using nail wraps, or putting on press-ons. It is also useful if you notice a rough crescent of buildup near the base of the nail that seems to collect lint, oils, or polish residue like it is building a tiny museum exhibit.
How to do it safely
After softening the area, use the flat edge of the pusher to glide very lightly across the nail plate near the base. Use short strokes and wipe the tool often. You are not carving. You are coaxing. If the buildup does not lift easily, add more softener or stop and try again another day. Stubborn cuticles are annoying, but they are still not worth damaging the nail surface.
Once the residue is gone, wash or wipe the nail plate clean. If you are about to polish your nails, make sure any oils from cuticle products are removed first. If you are done for the day, finish with a nourishing oil or rich hand cream to keep the area flexible and comfortable.
Why this step can improve your manicure
Dead skin on the nail plate can keep polish from lying flat and may contribute to lifting around the edges. Removing that buildup the gentle way creates a smoother starting point. It is like ironing a shirt before a big meeting, except much smaller and with fewer life consequences.
Way #3: Prep Nails for Polish, Gel, Press-Ons, and Even DIY Pedicures
The third major use for a cuticle pusher is nail prep. This is where the tool earns its place in the manicure kit. A clean, gently prepped cuticle area helps polish sit closer to the base of the nail, improves the overall shape of the manicure, and may help products last longer because there is less oil and tissue sitting in the way.
Used carefully, a cuticle pusher can also help tidy toenails during a pedicure. The same rule applies, though: soften first, push gently, and stop before you turn a simple grooming step into an accidental science experiment.
How to use it for prep
Start by removing old polish and washing your hands. Soften the cuticle area with warm water, oil, or remover. Then use the pusher to gently move back the cuticle and clear any dead tissue from the base and side edges of the nail. If your tool has a pointed or narrower end, use it sparingly to clean around tight corners or under the free edge of the nail only if the design specifically allows for that. No digging. No stabbing. No dramatic monologues.
After that, wipe the nail plate clean so polish, gel, or adhesive can grip properly. Many nail enthusiasts skip this step and then wonder why their manicure lifts early. The answer is often frustratingly simple: the nail was never truly prepped.
Best situations for this method
- Before regular nail polish for a cleaner line near the cuticle
- Before gel polish when you want a neat application and longer wear
- Before press-ons so adhesive has a smoother surface
- Before a pedicure when toenails need gentle cleanup around the base
- Before nail art, when every edge suddenly matters because macro photos are merciless
Common Mistakes People Make With a Cuticle Pusher
Even a good tool becomes a menace when used the wrong way. If you want healthy-looking nails instead of irritated fingertips, avoid these common mistakes:
- Using it on dry cuticles: Dry skin is less flexible and more likely to tear.
- Pushing too hard: More force does not equal better results. It usually equals soreness.
- Doing it too often: Over-manipulating the cuticle area can lead to irritation, redness, or peeling.
- Skipping tool hygiene: Dirty tools can introduce bacteria and create a real problem fast.
- Cutting everything in sight: A tidy manicure does not require removing every bit of skin around the nail.
- Ignoring signs of trouble: If the area is swollen, painful, cracked, or draining, skip DIY nail care and get proper advice.
How Often Should You Use a Cuticle Pusher?
For most people, occasional use is enough. A light session once a week or every other week is usually more than plenty, especially if you are also moisturizing daily. If your cuticles stay soft and healthy, you may need even less than that. Some people do well with nothing more than cuticle oil and a gentle push with a washcloth after a shower.
The key is consistency, not aggression. Healthy nails usually come from small habits done regularly, not from one heroic manicure session where you suddenly decide to fix six months of neglect in twelve minutes.
Who Should Be Extra Careful?
If you have very sensitive skin, eczema around the nails, frequent hangnails, a history of nail infections, diabetes, or poor circulation, be extra cautious with at-home cuticle care. When the skin barrier is already compromised, even a small nick can become a much bigger nuisance. In those cases, the smartest move may be minimal manipulation and a lot of moisturizing.
And if your nails are red, swollen, painful, or showing signs of infection, put the cuticle pusher down. That is not the moment for a DIY manicure. That is the moment for actual medical advice.
The Bottom Line
A cuticle pusher is one of those tools that seems simple until you realize it can either elevate your nail routine or absolutely ruin your afternoon. Used correctly, it has three genuinely helpful jobs: it can gently push back softened cuticles, lift dead skin from the nail plate, and prep nails for smoother, longer-lasting manicures and pedicures.
The best results come from treating the tool with respect. Soften first. Sanitize always. Push lightly. Skip the urge to over-trim. Moisturize afterward. If you follow those rules, your nails can look cleaner, polish can go on more smoothly, and your cuticles can stay healthy instead of filing complaints.
In other words, the cuticle pusher is not a villain. It is just deeply misunderstood.
Experiences Related to “3 Ways to Use a Cuticle Pusher”
The most interesting thing about learning how to use a cuticle pusher is that almost everyone has a small “before and after” story with it. Before they learn the right technique, the tool feels awkward, unnecessary, and a little suspicious. Afterward, it becomes one of those grooming items people quietly rely on all the time.
One common experience is realizing that less pressure creates better results. A lot of beginners assume they need to press hard to “get the cuticle back,” but the first real breakthrough usually happens when they soften the area first and suddenly the tool glides instead of drags. That moment changes everything. Instead of feeling like they are scraping at their nails, they feel like they are refining them. The process becomes faster, cleaner, and much less irritating.
Another common experience shows up during manicure prep. Someone paints their nails, waits proudly for them to dry, and then notices lifting around the base within a day or two. Annoying, right? Once they start using a cuticle pusher to gently clear dead skin from the nail plate first, the difference is obvious. Polish sits better, press-ons fit closer, and the whole manicure looks more polished. It is one of those tiny steps that feels optional until you skip it and your nails immediately reveal your poor decision-making.
There is also the “shower epiphany.” Many people discover that their easiest cuticle-care routine happens right after a warm shower, when the skin is already softened and cooperative. Instead of setting up a full manicure station, they use a cuticle pusher gently for a minute or two, apply oil afterward, and call it a day. That low-effort habit often works better than dramatic once-a-month overhauls.
Pedicures bring a different kind of lesson. Toenails can be tougher, cuticles can be thicker, and people often assume they should just push harder. Then they learn the hard truth: toes are not impressed by impatience. The best pedicure experiences usually come from soaking first, moving slowly, and keeping expectations realistic. A cuticle pusher can help tidy the nail area beautifully, but only if the user respects the same rule that applies to fingernails: gentle beats force every time.
And finally, there is the experience almost every nail DIYer has at least once: overdoing it. Maybe they push too aggressively, trim too much, or decide that every bit of skin near the nail is somehow the enemy. The result is usually tenderness, redness, or that sharp little sting when hand soap hits the area later. It is an unpleasant but memorable teacher. After that, most people become much better at recognizing the difference between helpful maintenance and unnecessary meddling.
That is probably the biggest real-world lesson tied to cuticle pushers. The tool works best when you stop trying to force instant perfection. Healthy-looking nails usually come from patience, clean tools, soft skin, and regular moisturizing. Not from brute strength. Never from brute strength.





