Table of Contents >> Show >> Hide
- Quick primer: what you’re actually testing
- Before you test: a 60-second safety/setup checklist
- Way #1: Plug into the tow vehicle and do a full walk-around test
- Way #2: Use a dedicated trailer light tester (or an LED test connector)
- Way #3: Use a multimeter (or test light) for pinpoint troubleshooting
- Start by isolating: vehicle or trailer?
- Testing a 4-way connector with a multimeter (DC volts)
- Testing the trailer side: ground, continuity, and “where the power stops”
- 1) Verify the trailer ground (seriously, do this first)
- 2) Check for power at the connector, then step down the line
- 3) Inspect and test the connector itself
- 4) Don’t forget bulbs, housings, and frame contact
- A simple troubleshooting flow (when something fails)
- Common “symptom to cause” cheat sheet
- Real-World Experiences and Lessons Learned (extra)
- Conclusion
Trailer lights are one of those things you only notice when they’re not workingusually right after you’ve loaded the trailer, strapped everything down, and told your neighbor, “Yep, we’re rolling!” Then you hit the brakes and realize your trailer is communicating with drivers behind you using the ancient art of… mystery.
Testing trailer lights is fast, cheap, and wildly underrated. It helps prevent roadside stops, reduces the chance of being rear-ended, and makes towing less stressful for everyone sharing the road with you. In the U.S., trailer lighting expectations are shaped by federal safety standards (FMVSS 108) and state rules, so working tail lights, brake lights, and turn signals aren’t “nice-to-haves”they’re basic safety equipment.
Quick primer: what you’re actually testing
Trailer lighting circuits are simple in theory: power leaves the tow vehicle, travels through the connector, feeds each lamp, and returns through a ground connection. In practice, that ground is where many problems begin (more on that soon).
Common trailer connectors (and why it matters)
- 4-way (flat or round): The most common setup for small utility trailers and many boat trailers. It typically supports running lights, left turn/brake, right turn/brake, and ground.
- 5-way: Similar to 4-way but adds an extra function (often reverse/backup or a specific trailer feature on some setups).
- 7-way (blade or round): Often found on travel trailers, campers, and bigger utility trailers. A “fully functional” 7-way can carry lighting plus reverse, electric brake output, and a 12V auxiliary line.
Typical 4-way wire color cheat sheet
Color codes aren’t just triviathey’re your shortcut to diagnosing issues quickly. A common 4-way scheme is:
- White: Ground
- Brown: Running lights / tail lights / side markers
- Yellow: Left turn signal + left brake
- Green: Right turn signal + right brake
Important note: On 7-way connectors, wire colors and pin functions can vary by configuration, so don’t assume every 7-way is wired the same. If you’re troubleshooting, identify the connector type and confirm the function layout for your specific setup before rewiring anything.
Before you test: a 60-second safety/setup checklist
- Park on level ground, set the parking brake, and chock the trailer wheels.
- Connect the coupler (or keep the trailer stable on a jack stand) so it can’t roll.
- Inspect the connector for dirt, corrosion, bent pins, or a loose fit.
- Have a helper if possibleor plan to use hazards/phone camera tricks if you’re solo.
Way #1: Plug into the tow vehicle and do a full walk-around test
This is the quickest “real-world” test because it checks the entire system under normal conditions: vehicle output, connector contact, trailer wiring, and the actual lamps.
Step-by-step walk-around
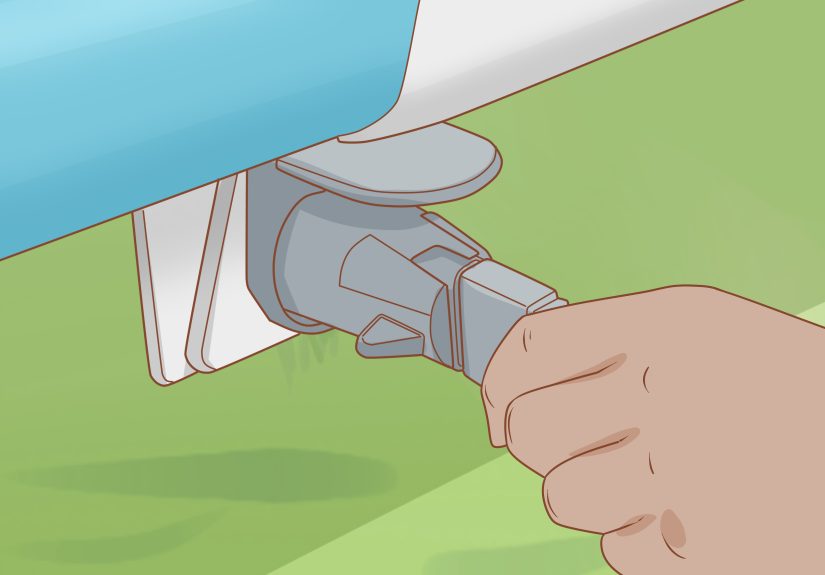
- Plug in the trailer connector firmly. If it feels sloppy or falls out easily, note that for laterit’s a common culprit.
- Turn on running lights/headlights to check tail lights, side markers, and any clearance lights.
- Test left turn signal (watch left rear lamp and any left-side markers that flash).
- Test right turn signal.
- Test brakes (press brake pedal; both rear brake lamps should light steady).
- Test hazards (both sides flash).
- Test reverse lights if your trailer has them (some do, some don’t).
Solo tester hacks (no helper required)
- Use hazard lights for a quick “both sides” check: Turn hazards on and walk behind the trailer. If one side doesn’t flash, you immediately know which circuit to chase.
- Phone camera trick: Prop your phone behind the trailer in video mode, then hit the brakes and signals. Review the clip. It’s like having a helper who never gets bored.
- Reflection trick: Back near a reflective surface (garage door, shop window) and watch the light reflection while toggling signals.
What this test tells you
If everything works: celebrate responsibly (a quiet fist pump is acceptable). If something fails: don’t panicmove to Way #2 or Way #3 to isolate whether the problem is the tow vehicle, the trailer, or (most commonly) a ground/connection.
Way #2: Use a dedicated trailer light tester (or an LED test connector)
Trailer light testers are the “split-the-problem-in-half” tool. They help you quickly answer the most important question: Is the tow vehicle sending the right signals, or is the trailer the issue?
Two common tester styles
- Vehicle-side plug-in tester: Plugs into your vehicle’s trailer socket and uses LEDs to show which functions are live. Great for confirming the vehicle output before you even look at the trailer.
- Trailer-side LED test connector: Some 4-flat connectors have built-in LED indicators that illuminate when functions are present, making setup and diagnosis faster.
How to test the tow vehicle with a plug-in tester
- Plug the tester into the vehicle’s trailer socket (4-way, 7-way, etc.).
- Turn on running lights. Confirm the running-light indicator illuminates.
- Activate left turn, then right turn. Confirm each indicator flashes.
- Press the brake pedal. Confirm brake function shows steady power (or a clear indicator on the tester).
- If equipped, test reverse output (vehicle in reverse with brakes set and wheels chockedsafety first).
If the tester shows the vehicle output is correct but the trailer still has issues, you’ve just saved yourself from “randomly replacing bulbs” and moved straight into trailer-side troubleshooting.
How to test the trailer without hooking up the truck (the “yard test”)
Some testers or DIY setups let you power trailer circuits using a small 12V source (like a battery or jump pack) and an adapter. This is especially handy when the trailer is parked away from the tow vehicleor when you want to verify trailer wiring before you blame the truck.
- Power running lights to confirm tail lights and markers illuminate evenly.
- Power left and right circuits to confirm turn/brake filaments (or LEDs) respond correctly.
- Wiggle the harness gently while poweredif lights flicker, you’re likely dealing with a loose connection, corrosion, or a damaged wire.
What to do if the tester shows “weird” results
- One function works, others don’t: Could be a blown fuse on the vehicle side, a wiring converter issue, or a connector pin not making contact.
- Everything is dead: Start with the connector fit and ground. A disconnected or corroded ground can shut down the party.
- Lights work only when you move the plug: That’s a classic sign of a worn connector, corrosion on pins, or a wire pulling loose behind the socket.
Way #3: Use a multimeter (or test light) for pinpoint troubleshooting
If Ways #1 and #2 tell you something is wrong, Way #3 tells you exactly where it’s wrong. A basic multimeter and/or 12V test light can help you track voltage, confirm grounds, and find shorts or breaks.
Start by isolating: vehicle or trailer?
A reliable approach is to test the tow vehicle socket first. If the correct signals aren’t present at the socket, the trailer can’t magically light itself (unless your trailer is hauntedthen you have bigger problems than wiring).
Testing a 4-way connector with a multimeter (DC volts)
- Set the multimeter to DC volts (20V range is common).
- Confirm ground: Touch the black probe to the ground pin (often paired with the white wire). Touch the red probe to a clean metal point on the vehicle frame. You should see near 0V (you’re checking reference), and you want a solid, stable connection.
- Test running lights: Turn on headlights/running lights. Probe the running-light pin. You should see approximately battery voltage.
- Test left/right turn: Turn on each signal. Probe the left pin, then right pin. You should see pulsing voltage in rhythm with the blinker.
- Test brake output: Press brake pedal. On many 4-way systems, brake shares the left/right circuits, so both should show steady voltage when braking.
Tip: Many troubleshooting guides recommend using a probe-style 12V circuit tester at the plug with a helper activating functions, especially for quick go/no-go checks.
Testing the trailer side: ground, continuity, and “where the power stops”
If the tow vehicle checks out, move to the trailer. This is where the “most common problems” tend to live: poor grounds, corroded connectors, chafed wires, and tired lamp housings.
1) Verify the trailer ground (seriously, do this first)
- Disconnect the trailer from the vehicle.
- Set the multimeter to resistance (ohms).
- Touch one probe to the trailer’s ground pin/contact and the other to bare metal on the trailer frame.
- A good ground should show very low resistance. If resistance is high or inconsistent, clean the ground point down to bare metal, tighten the connection, and consider running a dedicated ground wire to each light housing on older trailers.
Why the obsession with ground? Because a weak ground can cause flickering, dim lights, lights that “cross-talk” (signal makes tail lights blink), or total failure. On boat trailers, repeated water exposure makes corrosion and grounding problems especially common.
2) Check for power at the connector, then step down the line
With the trailer plugged into a known-good vehicle output, check voltage at the trailer-side plug. If it’s good there, move to the first junction box (if you have one), then to the rear harness, and finally to the light housing. The spot where voltage disappears is where you focus repairs.
3) Inspect and test the connector itself
- Look: Green crust, dirt, bent pins, loose fit, cracked insulation, pinched harness.
- Clean: Electrical contact cleaner + small brush.
- Protect: A thin layer of dielectric grease can help resist moisture intrusion (don’t pack the connector full; a little goes a long way).
4) Don’t forget bulbs, housings, and frame contact
If you’re using incandescent bulbs, a burned filament is an easy fix. If you’re using LEDs, failures are less frequent, but wiring and grounding issues still apply. Also, some older-style light housings ground through mounting hardwarepaint, rust, or loose bolts can break that ground path.
A simple troubleshooting flow (when something fails)
- Test the vehicle output (tester or multimeter). If it’s wrong, check fuses and vehicle wiring/converter.
- If vehicle output is good, test the trailer plug and ground.
- If ground is good, check for power at the light housing.
- If power is present but light is dead, suspect bulb/LED module or housing ground.
- If power disappears mid-harness, look for a corroded junction, broken splice, or chafed wire.
Common “symptom to cause” cheat sheet
- All trailer lights out: bad ground, unplugged connector, dead vehicle output/fuse, or severe corrosion at the socket.
- Only one side works: broken wire on that side, failed light module, bad splice, or pin contact issue for that circuit.
- Dim or flickering lights: weak ground, corroded pins, or a poor connection that changes when the trailer flexes.
- Turn signal makes running lights blink: classic ground problem (electricity looks for a return path and gets “creative”).
Real-World Experiences and Lessons Learned (extra)
The most common real-life towing story goes like this: the trailer lights worked last time, so you assume they’ll work this time. Ten minutes later, a friendly stranger pulls up next to you at a light and starts doing hand signals that look like a cross between “your lights are out” and “I’m trying to land a plane.” That’s when testing becomes less of a “nice checklist item” and more of a “why didn’t I do that in the driveway?”
One of the biggest lessons DIY trailer owners run into is that trailer wiring failures are often not dramatic. It’s rarely a spark show or a melted harness (thankfully). It’s usually something boring: corrosion in the plug, a ground ring terminal bolted onto painted metal, or a wire that got lightly pinched by a zip tie and finally broke after a few miles of bouncing. The frustrating part is that these problems can be intermittenteverything works when the trailer is parked, then fails as soon as the frame flexes on a pothole. That’s why the “wiggle test” with the lights powered can be so revealing.
Boat trailer owners tend to learn the ground lesson faster than anyone else. Water plus road salt plus time equals corrosion, and corrosion loves connectors. A trailer can look perfectly fine from ten feet away while the plug pins are quietly growing their own science project. People often replace bulbs first, then replace a light housing, and only later discover the real villain was a crusty ground connection that never had a clean, bare-metal bite on the frame. Once that ground point is cleaned and tightened (or a dedicated ground wire is run to each light), “mysterious” issues often disappear overnight.
Another common experience: upgrading to LED trailer lights and expecting them to be a set-it-and-forget-it miracle. LEDs are greatbright, low-draw, and typically long-lastingbut they don’t magically fix bad wiring. In fact, a marginal connection can sometimes show up more clearly with LEDs because they react instantly to voltage changes. If you install LEDs and start seeing odd flicker or inconsistent behavior, it’s usually a hint to revisit your connectors, grounds, and splices rather than blaming the LEDs themselves.
The best “quality of life” move many experienced towers make is keeping a small trailer-light kit in the vehicle: a compact tester, a multimeter or test light, spare fuses, a few butt connectors, heat-shrink tubing, and a small wire brush. It’s not glamorous gear, but it turns a potential trip-ruiner into a five-minute fix in a parking lot. And if you’re towing at night, that kit can feel like a superpower.
The final lesson is more psychological than electrical: if you’re in a hurry, you’ll skip the light checkand that’s exactly when something will be wrong. Build it into your routine: hitch, chains, plug, lights. Once it’s habit, it’s faster than arguing with a blinking connector on the side of the road.
Conclusion
Testing trailer lights doesn’t require a full workshop, a wiring degree, or a heroic amount of patience. Start simple with a plug-in walk-around. If something’s off, use a tester to split the problem between vehicle and trailer. When you need to get precise, grab a multimeter and follow the voltage step-by-stepespecially checking the ground early.
Do it in the driveway, not on the shoulder. Your future self (and the drivers behind you) will thank you.




