Table of Contents >> Show >> Hide
- Before You Start: Choose the Right Shells
- Materials You May Need
- Way #1: Make a Simple Drilled Shell Pendant Necklace
- Way #2: Make a Wire-Wrapped Shell Necklace
- Way #3: Make a Beaded Shell Necklace
- Tips for Making Your Shell Necklace Look Better Than “Homemade”
- Common Mistakes to Avoid
- Why Shell Necklaces Never Really Go Out of Style
- Conclusion
- Experience Section: What Making a Shell Necklace Feels Like in Real Life
If summer had a dress code, it would absolutely include a shell necklace. There is just something about wearing a tiny piece of the beach that makes even an ordinary Tuesday feel a little more sun-kissed. The good news is that learning how to make a shell necklace is not complicated. You do not need a professional jewelry bench, a dramatic studio with ocean views, or the patience of a saint. You need a few basic supplies, a handful of shells, and a willingness to accept that your first piece may look “artisan,” which is a very flattering way to say “slightly chaotic.”
This guide walks you through three easy and stylish methods: a simple drilled shell pendant, a wire-wrapped shell necklace for shells without holes, and a beaded shell necklace that looks far fancier than it is. Along the way, you will also learn how to choose shells, prep them properly, and avoid the classic beginner mistakes that turn a cute DIY into a tiny pile of coastal regret.
Before You Start: Choose the Right Shells
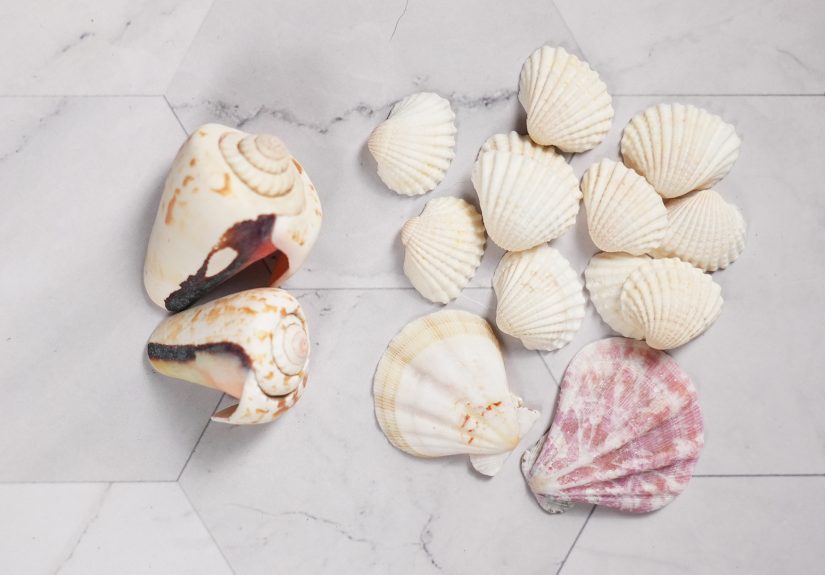
Not every shell is destined for jewelry greatness. Some are too fragile, some are too thick, and some seem sturdy until they crack at the worst possible moment. The best shells for a DIY shell necklace are small to medium, fairly lightweight, and intact without deep chips. Cowries, tiny scallops, olive shells, and small clam shells are all popular choices because they are visually interesting and usually easy to work with.
If you collected your own shells, clean them first and let them dry completely. A gentle scrub with soapy water works well for lightly dirty pieces. If a shell is more stubborn, a short diluted-bleach soak can help brighten it, but do not leave it in forever. Think of bleach like hot sauce: a little can be helpful, too much can ruin dinner. After cleaning, rinse thoroughly and dry the shells on a towel.
One more important note: only use empty shells, and always check local beach rules before collecting. Some places allow small amounts of unoccupied shells for personal use, while others are more restrictive. And if a shell still has a living resident, that shell is not crafting material. It is someone’s apartment.
Materials You May Need
- Clean, dry shells
- Jewelry cord, waxed cord, hemp, leather cord, or chain
- Beading wire or thread
- Jump rings and clasps
- Round-nose pliers and wire cutters
- Small hand drill or rotary tool
- Jewelry wire for wrapping
- Beads, spacers, crimp beads, or accent charms
- Glue designed for jewelry use, if needed
You do not need every item for every method. That is the beauty of this project. You can go delightfully minimal or make something that looks like it belongs in a boutique next to a candle called Ocean Breeze & Better Decisions.
Way #1: Make a Simple Drilled Shell Pendant Necklace
This is the most classic seashell necklace tutorial and a great starting point for beginners. You drill a small hole in the shell, add a jump ring or cord, and turn it into an easy pendant.
Best for
Flat or gently curved shells that are strong enough to handle a small hole.
What You Need
- 1 focal shell
- Small drill or rotary tool
- Sponge and shallow container of water
- Jump ring or cord
- Necklace chain, suede cord, cotton cord, or leather cord
How to Do It
Start by deciding where the hole should go. Usually, the top center of the shell is the safest and most balanced option. If your shell has a natural point or a slight ridge, choose a spot a little below the edge rather than right on it. Drilling too close to the edge is the crafting equivalent of parking on a cliff.
Place a sponge in a shallow container and add enough water to just cover the sponge. Set the shell on the sponge and keep the drilling area barely submerged. This helps keep the drill bit cooler and reduces the chance of cracking. Drill slowly and steadily. Do not rush. Shells are pretty, but they are not emotionally resilient.
Once the hole is made, rinse the shell and let it dry. Then slide on a jump ring or thread your cord directly through the hole. If you want a beachy casual look, use natural cord and tie a few sliding knots. If you want something cleaner and more polished, use a metal jump ring and hang the shell from a fine chain.
Style Ideas
- Pair one white scallop shell with tan leather cord for a clean coastal look.
- Add a tiny freshwater pearl above the shell for a softer, dressier necklace.
- Use a short cord for a choker or a longer chain for a layered pendant style.
This method is ideal if you want a shell pendant necklace that feels simple, wearable, and easy to personalize. It is also a smart option when your shell is beautiful enough to deserve the spotlight all by itself.
Way #2: Make a Wire-Wrapped Shell Necklace
Do not want to drill into your shell? Fair. Some shells are too delicate, too irregular, or just too pretty to attack with tools. That is where wire wrapping comes in. This method creates a little wire “basket” or frame that holds the shell in place and turns it into a pendant without drilling a single hole.
Best for
Irregular shells, thicker shells, delicate keepsake shells, or shells you do not want to damage.
What You Need
- 1 shell
- Jewelry wire, usually 22- or 24-gauge
- Wire cutters
- Round-nose pliers
- Chain or cord
How to Do It
Cut two pieces of wire long enough to wrap around the shell with extra length left for the top loop. Twist part of the wires together to form one side of the frame, then place the shell between the wires. The goal is to position the wires beneath a wider point of the shell so it cannot slip out.
Twist the wire on each side to create a snug basket around the shell. Then bring the wires together at the top and twist them to secure the shell in place. Use round-nose pliers to create a wrapped loop at the top of the pendant, which will hold your chain or cord.
The finished effect can be delicate or bold depending on the wire you choose. Silver wire feels cooler and cleaner. Gold-tone wire gives the necklace a warmer, beach-boutique vibe. Copper wire looks artsy and handmade in the best possible way.
Why This Method Works So Well
Wire wrapping is perfect for shells with no pre-drilled holes. It also gives you more design freedom. You can leave the shell mostly visible, wrap only the edges, or add little spirals and decorative twists if you want the pendant to feel more elaborate. And because the wrap is structural, it turns a loose shell into something securely wearable.
Style Ideas
- Wrap a small spiral shell in gold wire and hang it on a long chain.
- Pair a white shell with copper wire and a suede cord for a boho finish.
- Add one or two tiny accent beads at the top loop for extra color.
If you want shell jewelry ideas that look advanced without requiring a full-on jewelry workshop, wire wrapping is the sweet spot.
Way #3: Make a Beaded Shell Necklace
This method is for anyone who hears “shell necklace” and immediately thinks, “Yes, but can it be a little extra?” A beaded shell necklace combines shells with beads, spacers, knots, or chain for a fuller, more styled piece. It can be delicate and elegant or bright and playful.
Best for
People who want a layered look, multiple textures, or a necklace that feels more like finished jewelry than a simple pendant.
What You Need
- Shell beads, drilled shells, or one focal shell pendant
- Beading wire, thread, or cord
- Accent beads such as pearls, seed beads, glass beads, or stone beads
- Crimps or knots
- Clasp
- Jump rings and pliers
How to Do It
First, decide on your layout before stringing anything. Put the shells and beads on a flat surface and move them around until the design looks balanced. Symmetry works well if you want a classic necklace. An asymmetrical design can feel more modern and collected. If you are using cowrie shell beads, keep them facing the same direction for a cleaner finish.
Choose your stringing material carefully. If you are using heavier shells or mixed beads, beading wire is usually the best choice. If you are going for a softer drape or a more artisanal feel, thread or cord can work beautifully. For delicate shells or beads, knotting between pieces is a smart move because it reduces rubbing and helps prevent damage. It also adds that subtle handmade luxury you see in higher-end jewelry.
String your design, adding knots between key pieces if desired. Finish the ends with crimp beads or a secure knot depending on your material. Add a clasp, and if you are using soft thread, consider adding a wire guardian or French wire near the clasp area for extra durability. That tiny detail makes a big difference in how long the necklace lasts.
Design Combinations That Look Great
- Cowrie shells with white seed beads and gold spacers for a modern beach look
- Small shell beads with freshwater pearls for a softer coastal necklace
- One shell pendant in the center with stone beads on each side for a more polished statement piece
- Mixed shells, glass beads, and a knotted cord for a playful vacation-style necklace
This method is especially good if you want a DIY shell necklace that looks store-bought but still feels personal. It is also perfect for gift-making because you can tailor the colors and materials to the person wearing it.
Tips for Making Your Shell Necklace Look Better Than “Homemade”
Keep the color palette tight
Too many unrelated colors can make even a pretty design feel messy. Choose two or three main tones and repeat them throughout the necklace.
Mix textures, not chaos
Shells already bring organic texture. Pair them with smooth beads, polished metal, or soft cord so the design feels intentional.
Use one focal point
If everything is trying to be the star, the necklace can look cluttered. Pick the main shell, then let the supporting materials do their supporting job.
Check balance before finishing
Lay the necklace flat and make sure both sides hang evenly. A necklace that twists or pulls to one side is annoying to wear and suspiciously dramatic for no reason.
Common Mistakes to Avoid
- Using damp shells: Moisture can interfere with glue, cord, and metal findings.
- Drilling too fast: Slow and steady is the whole game here.
- Ignoring weight: A chunky shell on flimsy cord is a breakup waiting to happen.
- Overdecorating: Sometimes the shell is the whole point. Let it be fabulous.
- Skipping the fit test: Try the necklace on before final trimming or crimping.
Why Shell Necklaces Never Really Go Out of Style
Shell necklaces survive trend cycles because they are nostalgic, wearable, and deeply personal. A shell can remind you of a vacation, a family beach trip, a specific summer, or just the version of yourself who buys mango sunscreen and believes life should include more iced drinks. They can be minimal and modern, or handmade and sentimental. They work with linen dresses, white tees, swimsuits, and even structured blazers if you style them right.
They also tap into something more meaningful: making jewelry from natural materials feels intimate. Mollusk shells are built gradually over time, layer by layer, and that slow-made quality gives them an inherent beauty. When you turn one into jewelry, you are not just making an accessory. You are turning a found object into a story you can wear.
Conclusion
If you have been wondering how to make a shell necklace, the easiest answer is this: start simple, choose a method that fits your shell, and let the design do what shells do best. A drilled pendant is classic and easy. A wire-wrapped shell necklace is perfect when you want to protect a shell without drilling. A beaded shell necklace gives you the most room for creativity and style.
The best part is that none of these methods require perfection. In fact, a little irregularity often makes shell jewelry more charming. These are beach-born materials, not machine-made components. So embrace the tiny quirks, trust your eye, and make something you will actually want to wear. Or gift. Or wear first and then reluctantly gift, which is also a respected crafting tradition.
Experience Section: What Making a Shell Necklace Feels Like in Real Life
There is a reason shell necklace DIY projects stick with people long after the glue dries and the pliers are put away. The experience is bigger than the necklace itself. It starts the moment you choose the shell. Maybe it came from a beach trip you still think about when your inbox gets rude. Maybe it was sitting in a dish on your dresser for two years waiting for its moment. Maybe you bought it from a craft store and gave it an instant backstory because that is what creative people do.
Then comes the process. You spread everything out on the table: shells, cord, beads, tools, a towel, and probably one random object that has nothing to do with jewelry but somehow belongs there now. You test combinations. You hold a shell up to a chain and immediately know it is wrong. You swap the chain for tan cord and suddenly it looks like a boutique piece from a coastal town where everyone has excellent hair. That little transformation is one of the best parts. You are not just assembling materials. You are developing taste in real time.
There is also a very specific satisfaction in solving small creative problems. A shell is too wide, so you try wire wrapping. A bead color feels flat, so you add one pearl and the whole design wakes up. A knot looks awkward, so you retie it, and now it looks intentionally rustic instead of accidentally strange. These tiny decisions are what make handmade jewelry feel so personal. It reflects your eye, your patience, and your willingness to keep fiddling until it feels right.
And then there is the emotional part. Shell necklaces often carry memory better than flashier jewelry. They can remind you of salt air, sunscreen, boardwalk fries, long walks, family trips, or a version of summer that only exists in your head and favorite photos. When you wear one, it does not feel generic. It feels like you made a keepsake useful.
Even gifting a shell necklace has its own magic. A handmade shell pendant can feel thoughtful without being overcomplicated. It says, “I made this for you,” but in a breezy, charming way rather than a high-pressure, “Please cry now” kind of way. That balance is rare. People love receiving something that looks beautiful and also has a story attached to it.
So yes, making a shell necklace is a craft project. But it is also a memory project, a style experiment, and sometimes a tiny vacation for your brain. And honestly, that is a lot of value from one humble shell.





