Table of Contents >> Show >> Hide
- Before You Start: What You’ll Need
- Way 1: The Quick Blot-and-Clean Method for Fresh Vomit
- Way 2: The pH-Neutral Hardwood Cleaner Method
- Way 3: The Enzyme or Oxy Cleaner Method for Lingering Odor
- What Not to Use on Wood Floors
- How to Keep Vomit From Leaving a Stain or Smell
- Final Thoughts
- Experience-Based Tips: What Cleaning Vomit From Wood Floors Really Teaches You
- SEO Tags
Let’s be honest: cleaning vomit from wood floors is not how anyone wants to spend a perfectly good day. But whether the culprit is a carsick kid, a stomach bug, a dog that ate something “interesting,” or the aftermath of a party that went on a little too hard, the mess needs to be handled fast. Wood flooring is beautiful, durable, and worth protecting, but it also has one weakness: it does not love moisture, harsh chemicals, or panic-cleaning with half the bottle under your sink.
That last part matters. When people rush to clean vomit from hardwood, they often make the stain or odor worse by soaking the floor, scrubbing too aggressively, or using cleaners that are too harsh for the finish. The result? A clean-ish floor with a dull patch, streaks, swelling around seams, or a smell that keeps making an unwanted encore.
The good news is that you can clean vomit from wood floors safely if you use the right method for the right kind of mess. In most homes, the smartest approach is simple: remove the solids quickly, use as little moisture as possible, clean with a wood-safe product, and only move to stronger odor-fighting options when the smell lingers. Below are three practical ways to do it without turning a gross cleanup into a floor repair project.
Before You Start: What You’ll Need
Before you go into cleanup mode, gather your supplies so you are not doing that awkward one-hand-paper-towel shuffle across the kitchen.
- Disposable gloves
- Paper towels or absorbent disposable cloths
- A plastic scraper, paper plate, or spoon for lifting solids
- Microfiber cloths or a microfiber mop
- Warm water
- Mild dish soap or a pH-neutral hardwood floor cleaner
- A wood-safe enzyme or oxy-powered cleaner for lingering odor
- A small trash bag
- Optional: a fan for faster drying
If your floor is sealed or finished hardwood, you have more flexibility. If it is unfinished, waxed, or visibly worn through in spots, use even less liquid and test any cleaner in a hidden area first. Wood floors are a little like fancy shoes: they can handle real life, but they do better when you do not treat them like a car tire.
Way 1: The Quick Blot-and-Clean Method for Fresh Vomit
Best for: New messes on sealed hardwood or engineered wood
This is the method to use when the vomit is still fresh and you want to stop staining, odor, and moisture damage before they start. Speed matters here. The longer acidic, protein-heavy mess sits on a wood floor, the more time it has to seep into seams, dull the finish, and leave behind an odor that says, “Surprise, I live here now.”
- Put on gloves. Body-fluid messes should be handled with gloves, even at home. That is the easiest way to avoid direct contact and keep cleanup sanitary.
- Lift, don’t smear. Use paper towels, a plastic scraper, or a disposable plate to scoop up solids. Work from the outside of the mess toward the center so you do not spread it across a larger section of floor.
- Blot the residue. Press dry paper towels or a cloth onto the damp area. Do not scrub yet. Blotting removes liquid instead of driving it into cracks and wood grain.
- Make a mild cleaning solution. Mix a drop or two of dish soap into warm water, or use a small amount of pH-neutral cleaner made for hardwood floors.
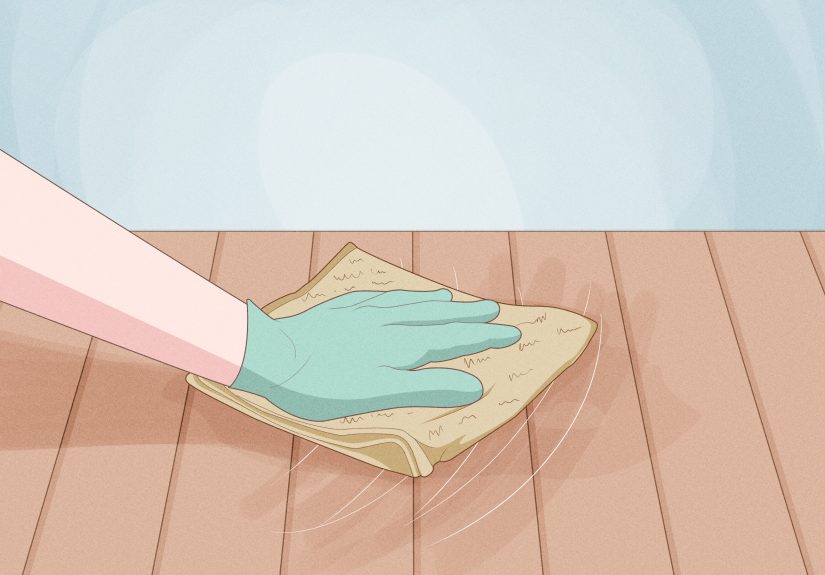
- Wipe with a barely damp microfiber cloth. The cloth should feel damp, not wet. Wipe gently until the film is gone.
- Dry the floor immediately. Follow with a clean, dry microfiber cloth. If needed, point a fan at the spot for 10 to 15 minutes.
Why this works: the first pass is all about removal, not deep cleaning. Fresh vomit is easier to lift before it dries, and a mild solution removes the remaining residue without flooding the floor. This method is also the least risky for wood finishes because it keeps water exposure low.
If the mess landed near board seams, floor vents, or baseboards, pay special attention there. Use folded paper towels to wick moisture out of the edges. On wood floors, the hidden moisture is often the part that causes the drama later.
Way 2: The pH-Neutral Hardwood Cleaner Method
Best for: Sticky residue, dried film, or people who want the safest all-purpose option
If you already removed the gross part but the area still feels tacky, streaky, or vaguely suspicious, a pH-neutral hardwood floor cleaner is usually the safest next move. Many flooring and wood-care brands recommend cleaners made specifically for the finish on your floor because they clean effectively without leaving soap buildup, haze, or chemical damage behind.
This is the method to choose when you are not sure whether a homemade fix will play nicely with your finish. It is also a smart choice for engineered wood flooring, which often looks like solid hardwood on top but can react badly to too much moisture.
- Remove all visible residue first. Even the best cleaner is not magic if chunks are still in the scene.
- Spray the cleaner onto a microfiber cloth or mop pad, not directly onto the floor. This gives you better control and avoids over-wetting one spot.
- Wipe the area in the direction of the wood grain. That helps you clean into the natural texture of the floor without grinding residue around.
- Use a second clean cloth if needed. If the first pad gets dirty fast, switch to a clean one. A filthy cloth just auditions for the role of “moving the problem elsewhere.”
- Dry-buff the area. Finish with a dry microfiber cloth to pick up leftover moisture and restore a more even look.
This method is especially useful when the vomit contained food, dairy, juice, alcohol, or medication residue that leaves a cloudy film behind. A wood-safe cleaner can cut through that layer better than plain water alone. It also reduces the temptation to scrub with something abrasive, which is exactly how finishes get scratched and dulled.
For many households, this is the best everyday answer to how to clean vomit from hardwood floors because it is low-risk, simple, and easy to repeat. If the floor looks normal and smells normal after this, congratulations: the crisis has officially been downgraded from “biohazard” to “bad memory.”
Way 3: The Enzyme or Oxy Cleaner Method for Lingering Odor
Best for: Smells that hang around after cleanup, dried messes, or repeat accidents from pets
Sometimes the visible mess is gone, but the smell is still very much taking up space. That usually means tiny organic residues are still clinging to the surface or sitting inside seams. In that case, a wood-safe enzyme cleaner or an oxy-powered cleaner labeled for hard floors can help break down what ordinary wiping leaves behind.
This is where people often reach for strong bleach, straight vinegar, ammonia, or a kitchen-sink DIY potion. Resist that urge. Harsh chemicals can damage the finish, and heavily acidic or abrasive home remedies can leave you with a clean floor that looks worse than before. Instead, use a product specifically labeled as safe for sealed wood or hard floors and follow the directions carefully.
- Patch-test first. Try the cleaner in a low-visibility area, especially if your floor has a darker stain or older finish.
- Apply lightly. Spray the cleaner onto a cloth or use a controlled amount directly on the affected area if the label allows it. Do not saturate the floor.
- Let it dwell as directed. Odor-control products often need a little time to work. More is not better; correct contact time is better.
- Wipe clean with microfiber. Remove any loosened residue and follow with a dry cloth.
- Repeat once if needed. If the smell improves but does not fully disappear, a second light treatment may solve it.
This method shines when a pet vomits in the same corner more than once, when the mess was discovered after it dried, or when the floor still smells sour after a normal cleaning. Enzyme-based formulas are especially helpful with organic messes because they target the stuff causing the odor, not just the smell floating above it.
If the odor remains after two careful cleanings, the problem may be below the surface. Vomit can seep into board gaps, under trim, or into the subfloor if the finish is worn or the mess sat too long. At that point, surface cleaning may not be enough, and you may need a flooring pro, a refinishing touch-up, or localized board replacement.
What Not to Use on Wood Floors
When people search for how to remove vomit smell from wood floors, they usually find bold DIY advice. Some of it works on tile. Some of it works on concrete. Some of it belongs in the hall of fame for “things that sounded smart at 2 a.m.” Wood is different. Here is what to avoid unless your floor manufacturer specifically says otherwise:
- Too much water: Wood and standing moisture are long-term enemies.
- Steam mops: Heat and moisture can damage the finish and the wood over time.
- Bleach or strong chlorine cleaners: These can discolor or weaken finishes.
- Ammonia-based cleaners: They can be too harsh for many wood surfaces.
- Abrasive scrubbers or steel wool: Great for ruining dinner pans; terrible for wood floors.
- Heavy vinegar or baking soda use: Advice varies online, but many hardwood experts caution that acidic or abrasive DIY cleaners can dull or damage certain finishes.
The safest rule is simple: if a cleaner is not clearly intended for hardwood or sealed hard floors, do not freestyle it on your living room floor during a cleanup emergency.
How to Keep Vomit From Leaving a Stain or Smell
The best way to protect wood floors is to shorten the time between accident and cleanup. The first five minutes matter more than the fanciest cleaner in your cabinet. These habits help:
- Keep paper towels, gloves, and microfiber cloths in an easy-to-reach spot.
- Blot first, wash second.
- Use the least moisture needed to get the floor clean.
- Dry the area right away.
- Choose a wood-safe cleaner instead of experimenting with random DIY mixtures.
- Clean seams, edges, and gaps carefully, since that is where odor likes to hide.
If accidents are common because of pets, young children, or an ill family member, it may be worth keeping a dedicated wood-floor cleaner and an odor-targeting product in the house. The easiest cleanup is the one you are prepared for before someone says, “Uh-oh.”
Final Thoughts
Cleaning vomit from wood floors is unpleasant, but it does not have to become a disaster. For fresh messes, quick blotting and a barely damp cleanup are usually enough. For sticky residue, a pH-neutral hardwood floor cleaner is the safest all-around option. For odors that refuse to leave politely, a wood-safe enzyme or oxy cleaner can help break down what is left behind.
The big takeaway is this: on wood floors, gentleness wins. Fast cleanup, controlled moisture, and the right product will usually solve the problem without harming the finish. So yes, the moment is gross. But with the right method, your floor does not have to look like it remembers it forever.
Experience-Based Tips: What Cleaning Vomit From Wood Floors Really Teaches You
After enough real-life messes, most people learn that cleaning vomit from wood floors is not just about the cleaner you use. It is about the order of operations, the speed of your reaction, and how calm you stay when your brain is yelling, “Absolutely not.” In practice, the people who get the best results are usually not the ones with the fanciest products. They are the ones who know to move fast, use less liquid than they think they need, and stop trying to scrub the floor like they are erasing a crime scene.
One common experience is realizing that paper towels matter more than expected. When a mess first happens, absorbency beats almost everything else. A thick stack of paper towels or disposable cloths can remove a surprising amount of liquid before any cleaner touches the floor. That matters because the less residue left behind, the lower the chance of odor sinking into seams. People often assume the cleaner does the heavy lifting, but really, the first dry removal step is what saves the floor.
Another lesson is that dried messes are sneaky. A floor can look clean from standing height and still smell wrong when the room warms up later in the day. That is especially true near heating vents, along plank gaps, or in homes with pets that return to the same area. In those situations, a second targeted cleaning is usually more effective than one aggressive cleaning session. Slow and precise wins over dramatic and soapy.
There is also the emotional side no one talks about enough: panic makes people over-clean. They dump water, spray too much product, and scrub hard because the mess feels urgent. But wood floors respond better to controlled cleaning than heroic cleaning. A lightly damp microfiber cloth often does more good than a soaked mop ever could. That feels counterintuitive in the moment, but it is one of the biggest differences between cleaning the mess and damaging the floor while trying to clean the mess.
Families with kids learn another truth quickly: it helps to create a mini cleanup kit before you need it. Gloves, paper towels, a wood-safe cleaner, and two microfiber cloths in one basket can turn a miserable surprise into a 10-minute problem instead of a 45-minute household production. Pet owners discover the same thing. If your dog or cat has a sensitive stomach, being prepared matters more than being optimistic.
And finally, experience teaches humility. Sometimes you do everything right and the floor still holds onto a faint odor because the mess reached a seam or an older worn patch in the finish. That does not mean you failed. It just means wood is natural, porous once the finish is compromised, and occasionally dramatic in ways that feel deeply personal. When that happens, a second odor-focused treatment or professional help is the practical next step. The goal is not perfection in the first three minutes. The goal is a clean, dry, normal-looking floor by the end of the day.




