Table of Contents >> Show >> Hide
- Before You Build: What to Know About Pallet Wood
- Way #1: Build a Simple Ground-Level Pallet Planter Box
- Way #2: Build a Tall Patio Planter Box from Pallets
- Way #3: Build a Vertical Pocket Pallet Planter Box
- How to Fill a Pallet Planter Box the Right Way
- Common Mistakes to Avoid
- Which Pallet Planter Box Should You Build?
- Final Thoughts
- Real-World Lessons and Experiences from Building Planter Boxes from Pallets
- SEO Tags
If you have ever looked at an old shipping pallet and thought, “That could either become a charming garden feature or a very splintery regret,” welcome to the club. Pallet wood has become a favorite for DIY gardeners because it is inexpensive, easy to find, and full of rustic character. Better yet, it can be turned into practical planter boxes that work in small patios, sunny backyards, and even awkward little corners that usually collect nothing but leaves and broken dreams.
The trick is not just building a planter box from pallets. The trick is building the right pallet planter box for your space, your plants, and your patience level. Some people want a simple raised box they can throw on the ground and fill with herbs. Others want a tall planter that saves their knees from filing a formal complaint. And then there are the overachievers who want a vertical pallet garden that turns one wall into a living salad bar.
In this guide, you will learn three practical ways to build a planter box from pallets, plus how to choose safe pallet wood, what soil mix works best, which plants actually like these boxes, and what mistakes send many DIY projects straight to the “well, that was educational” category.
Before You Build: What to Know About Pallet Wood
Before you pick up a drill, inspect your pallet like a detective in work gloves. Not every pallet belongs in a garden. For a pallet planter box, choose clean, dry pallets with readable treatment markings. Avoid anything that smells strange, has dark oily stains, or looks like it survived a forklift duel.
Look for the right markings
For garden projects, the safest rule is simple: use pallets that are clearly stamped and skip anything suspicious. Heat-treated pallets are the most popular option for DIY pallet garden projects. If a pallet is unmarked, it may be harmless, but it is not worth guessing when soil, vegetables, and moisture are involved.
Give it a safety makeover
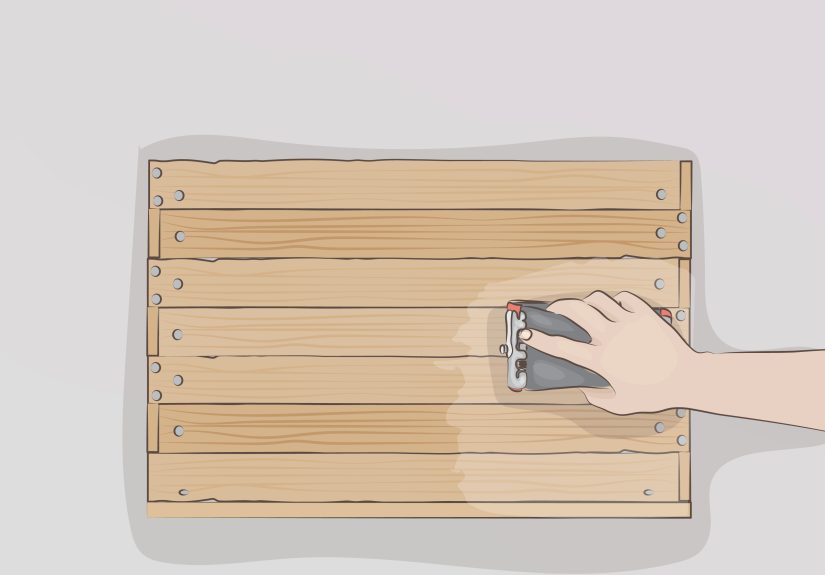
Pull loose nails, hammer down anything sticking up, and sand rough edges. Pallet wood loves to act tough until it introduces itself to your hands. A quick sanding session makes the planter safer, cleaner-looking, and much easier to paint or seal on the outside.
Basic tools and materials
You do not need a full workshop that looks like a home improvement show set. For most builds, you can get by with:
- 1 to 3 clean pallets
- Drill/driver
- Exterior screws
- Hammer and pry bar
- Hand saw or circular saw
- Sandpaper or power sander
- Landscape fabric
- Potting mix or raised-bed soil
- Optional: plywood, legs, brackets, paint, casters, or chicken wire
Way #1: Build a Simple Ground-Level Pallet Planter Box
This is the easiest pallet planter box to build and the best choice for beginners. Think of it as the “weekend win” version. It sits on the ground, has an open bottom, and works well for herbs, lettuce, spinach, marigolds, and compact flowers.
Best for
Backyards, garden edges, beginner DIYers, and anyone who wants a rustic raised planter box without spending much money.
How it works
You break down one or two pallets, use the thicker pieces for corner support, and attach slats around the sides to create a rectangular box. Because it sits directly on soil, roots can grow downward and drainage is naturally better than in a fully enclosed container.
Step-by-step
- Choose your size. A practical starter size is around 4 feet long by 2 to 3 feet wide. Keep the width reachable from both sides.
- Break down the pallet. Remove slats carefully with a pry bar. Save the straightest boards for visible sides and the thickest pieces for corner posts.
- Cut four corner supports. These become the skeleton of the box.
- Build two short sides first. Screw pallet slats horizontally into two corner supports.
- Attach the long sides. Connect the two end panels using more slats.
- Level the location. Place the box in a sunny, well-drained spot.
- Prep the ground. Loosen the soil underneath with a spade. If weeds are aggressive, use cardboard or breathable fabric under the box.
- Fill the box. Use a mix of raised-bed soil, compost, and lightweight organic matter.
Why this method works
This design is forgiving. Because the planter box is open to the ground, it drains well, stays cooler than a fully enclosed patio planter, and gives roots more room. It is also easier to correct if your boards are not perfectly straight. Pallet wood is rarely famous for behaving itself, so that matters.
Best plants for this box
Lettuce, basil, parsley, cilantro, chives, arugula, kale, nasturtiums, and shallow-rooted annual flowers all do nicely here. If you want tomatoes or peppers, build deeper walls or plant dwarf varieties.
Way #2: Build a Tall Patio Planter Box from Pallets
If you want a planter that looks polished and saves your back, this is the one. A tall pallet planter box works on patios, decks, porches, and small outdoor spaces where you want neat lines and easy access. It is especially handy for herbs, strawberries, lettuce, and decorative mixed plantings.
Best for
Small spaces, patios, renters who want a movable garden, and gardeners who do not enjoy kneeling every 15 minutes.
How it works
You dismantle pallet wood and build a freestanding box with a bottom, inner frame, and four legs. This turns scrap pallet boards into something that looks surprisingly intentional, like you knew what you were doing the entire time.
Step-by-step
- Create your frame. Build four sturdy corners using doubled pallet stringers or joined boards.
- Choose the height. A planter around waist height is comfortable for herbs and greens.
- Build the box section. Attach slats to form the front, back, and sides.
- Add a bottom. Use closely spaced slats or plywood with drainage holes.
- Line the interior. Add landscape fabric to hold the soil while allowing water to escape. You can also line only the sides if your wood is especially rough.
- Reinforce everything. Tall planters get heavy fast. Add cross braces if needed.
- Optional upgrades. Casters, a lower shelf, or a small trellis can make the planter even more useful.
- Fill with lightweight mix. Do not use dense garden soil alone. It turns heavy, compacted, and grumpy.
Why this method works
This planter gives you control. You can place it where sunlight is best, keep it away from wet ground, and make it look more finished than a basic pallet box. A tall raised planter also improves accessibility and keeps many pests from reaching your greens before you do.
Planting tips for tall planters
Use this build for herbs, lettuce blends, baby greens, compact peppers, strawberries, and shallow-rooted flowers. If you want to grow larger crops, make sure the soil depth is generous. Fruiting vegetables are divas about root space and will absolutely let you know.
Way #3: Build a Vertical Pocket Pallet Planter Box
This is the smart choice when floor space is limited. A vertical pallet garden turns one pallet into a standing planter with planting pockets. It is part planter box, part living wall, and part “wow, you made that from shipping wood?”
Best for
Balconies, fences, patios, small yards, herbs, strawberries, trailing flowers, and shallow-rooted greens.
How it works
Instead of filling the entire pallet like one giant dirt sandwich, you create contained planting sections. Landscape fabric, a solid back, and sometimes chicken wire help stabilize the soil and plants. This keeps everything from sliding downward into one muddy pile.
Step-by-step
- Choose a solid pallet. A standard pallet works well for this style.
- Sand and inspect it. Remove splinters, nails, and other hazards.
- Add backing. Secure plywood to the back, and optionally the ends, using exterior screws.
- Staple landscape fabric. Line the interior so the soil stays put.
- Create pockets. Use the existing slats as planting levels, or add more slats to deepen the planting rows.
- Fill with potting mix. Do this while the pallet is horizontal.
- Add plants. Tuck herbs, strawberries, lettuce, or annual flowers into the pockets.
- Stand it up carefully. Secure it to a wall, post, or sturdy support before fully committing to vertical life.
Why this method works
A vertical pallet planter box saves space and adds visual impact. It is also ideal if you want a decorative herb wall near a kitchen door or a privacy feature on a patio. Just remember that vertical planters dry out faster, so they need more frequent watering than ground-level boxes.
Best plants for vertical pallet gardens
Think shallow-rooted and lightweight: thyme, oregano, basil, chives, leaf lettuce, spinach, strawberries, petunias, pansies, and trailing herbs. Giant tomatoes are not invited to this party.
How to Fill a Pallet Planter Box the Right Way
A beautiful DIY planter box can still fail if the soil is wrong. One of the most common mistakes is shoveling in heavy yard soil and expecting plants to clap politely. Container-style planters need a lighter mix that drains well and still holds moisture.
A simple soil recipe
Try this easy blend:
- 50% high-quality raised-bed or potting mix
- 30% compost
- 20% aeration material such as coconut coir, pine fines, or perlite
For larger ground-level boxes with open bottoms, you can blend more native soil into the lower layer. For tall or vertical planters, keep the mix light. Your future self, who may need to move the planter one day, will be grateful.
Common Mistakes to Avoid
Using the wrong pallet
If the pallet is dirty, unmarked, chemically questionable, or looks like it was rescued from a suspicious alley behind a factory, walk away.
Making the box too wide
A planter box that is too wide becomes a mini obstacle course. Keep it narrow enough that you can reach the center without stepping into the soil.
Ignoring drainage
Plants hate wet feet almost as much as DIYers hate warped boards. Add drainage holes, use breathable liner material where needed, and never trap water at the bottom.
Choosing the wrong crops
Match plant size to planter depth. Herbs and greens are easygoing. Large fruiting crops want more depth, more feeding, and more support.
Overdecorating too early
Paint is fun. Fancy hardware is fun. But get the structure solid first. The best-looking planter in the world is still a failure if it wobbles like a folding chair at a family reunion.
Which Pallet Planter Box Should You Build?
If you are a beginner, build the ground-level box. It is the simplest, cheapest, and most forgiving. If you want a clean patio look and easier access, choose the tall planter. If you are short on space and want big visual impact, go vertical.
There is no single best pallet planter box. There is only the best one for your yard, your plants, and your available level of ambition on a Saturday morning.
Final Thoughts
Building a planter box from pallets is one of those DIY projects that feels practical and satisfying at the same time. You get a useful garden feature, you reuse material that might have been tossed aside, and you create something that can produce herbs, flowers, greens, or strawberries for months. That is a pretty impressive career change for a pallet.
Start with safe wood, keep the design simple, respect drainage, and choose plants that fit the planter instead of forcing a giant vegetable garden into a small wooden box. Whether you go with a classic raised pallet planter, a tall patio box, or a vertical herb wall, the secret is the same: build sturdy, fill smart, and let the plants do the bragging.
Real-World Lessons and Experiences from Building Planter Boxes from Pallets
The most valuable lesson people learn from building a pallet planter box is that the project always looks easier before the first board comes off the pallet. On paper, it sounds wonderfully simple: find free pallets, screw them together, add soil, and suddenly you are the kind of person who casually harvests herbs before dinner. In real life, the first surprise is usually the wood itself. Pallet boards are rarely perfect. Some are twisted, some split at the ends, and some seem personally offended by being asked to come apart neatly. That is why experienced DIY gardeners usually stop chasing perfection early. They work with the best boards they have, trim the ugly ends, and save the strongest pieces for the frame. Once that mindset clicks, the project becomes more fun.
Another common experience is realizing that placement matters almost as much as construction. Many first-time builders put their pallet planter box wherever it looks cute, then discover the spot gets three hours of sunlight, poor airflow, and a puddle every time it rains. After one disappointing growing cycle, they move the box to a brighter, better-drained area and suddenly the plants look like they signed a better contract. Sunlight, drainage, and convenience all matter. If the planter is too far from a hose or daily walking path, it may get ignored. If it is near the kitchen door, it gets watered, admired, and harvested more often.
People also learn quickly that not every plant has the same personality. Herbs, lettuce, and strawberries are usually the stars of pallet planters because they tolerate shallower soil and smaller root zones. Tomatoes, by contrast, often behave like demanding houseguests. They want deeper soil, regular feeding, staking, and more water than beginners expect. That does not mean they are impossible, only that many gardeners have better early success with compact crops. A pallet project feels a lot more rewarding when it produces usable herbs in a few weeks instead of one stressed tomato plant staging a silent protest.
Watering is another big lesson. Tall and vertical pallet planters dry out faster than new builders expect, especially in hot weather. Many people start with hand watering, then eventually switch to a simple drip line, watering wand, or daily routine. The difference is noticeable. Consistent moisture produces steadier growth, fewer crispy leaves, and less drama overall. In the end, most pallet planter builders come away with the same conclusion: the best design is not the fanciest one. It is the one you can maintain easily, enjoy looking at, and use often enough that the project becomes part of everyday life rather than a one-weekend experiment.




