Table of Contents >> Show >> Hide
- Why Toothpaste Can Work on Sneakers
- Quick Reality Check: When You Should (and Shouldn’t) Use Toothpaste
- What You’ll Need
- Step-by-Step: How to Clean Sneakers with Toothpaste
- Material Notes: Adjust the Method for Your Sneaker Type
- Common Mistakes That Make Sneakers Look Worse
- When Toothpaste Isn’t Enough: Smarter Options for Stubborn Stains
- Don’t Forget the Laces and Insoles (They Matter More Than You Think)
- How to Keep Sneakers Cleaner Longer
- FAQ: Toothpaste Sneaker Cleaning
- Real-World Experiences: What People Learn After Trying the Toothpaste Trick (Extra Notes)
- Conclusion
Toothpaste isn’t just for your teeth. In a pinch, it can also rescue a pair of sneakers that look like they lost a mud-wrestling match. The idea is simple: many toothpastes contain gentle abrasives and cleaning agents that can lift scuffs and grimeespecially on rubber soles and plastic-y edgeswithout requiring a chemistry degree or a trip to the sneaker spa.
But (and there’s always a “but”): toothpaste is not a magical shoe eraser for every material. Used the right way, it’s a surprisingly solid DIY move. Used the wrong way, it can leave residue, dull finishes, or make you whisper, “Why did I do that?” into a minty-fresh sneaker.
Why Toothpaste Can Work on Sneakers
Most basic, non-gel white toothpastes are mildly abrasivethink “polishing paste,” not “sandpaper.” That mild grit can help lift surface scuffs on rubber midsoles and toe bumpers. Many formulas also include surfactants (cleaning agents) that help loosen dirt so it can be wiped away.
Best use cases: rubber soles, white midsoles, toe caps, and small scuffs on durable uppers (like canvas). If your goal is to make white edges look less tragic before you walk into brunch like nothing happenedthis method is for you.
Quick Reality Check: When You Should (and Shouldn’t) Use Toothpaste
Use toothpaste when:
- You’re cleaning rubber soles, white midsoles, or plastic trim.
- You’re spot-cleaning canvas sneakers and you can do a small test patch.
- You need a fast refresh and you don’t have specialized sneaker cleaner.
Skip toothpaste when:
- Your shoes are suede or nubuck (water + scrubbing = heartbreak).
- The leather has a delicate finish (it can dull or discolor).
- You only have gel toothpaste or heavily dyed toothpaste (blue swirls are cuteuntil they stain).
- Your sneakers have specialty coatings, reflective layers, or printed designs you don’t want to risk.
What You’ll Need
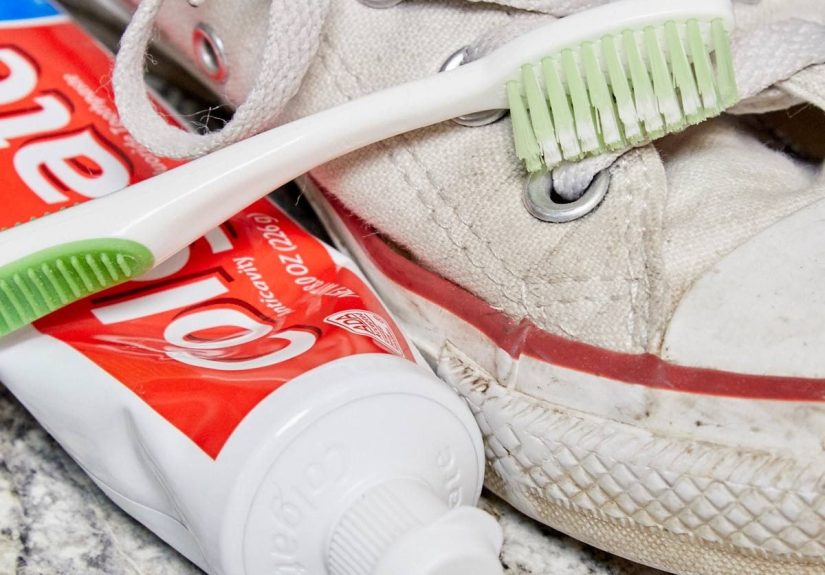
- Non-gel white toothpaste (basic is best)
- An old toothbrush or small soft-bristle brush
- Clean cloths or paper towels
- A small bowl of warm water
- (Optional) Mild dish soap or laundry detergent for pre-cleaning
- (Optional) Magic-eraser-style sponge for rubber scuffs
Step-by-Step: How to Clean Sneakers with Toothpaste
This is the “do it once, do it right” versionfast enough for a weeknight, careful enough to avoid turning your sneakers into a science project.
1) Remove laces and knock off loose dirt
Take out the laces and (if removable) insoles. Then use a dry brush or an old toothbrush to flick off loose dirt, dust, or dried mud. You want to remove grit first so you don’t grind it into the material while scrubbing.
2) Spot-test if you’re touching the upper
If you plan to use toothpaste on anything other than rubber (like canvas or leather), test it on a hidden area firstbehind the tongue or near the heel. Wait a few minutes, wipe, and check for discoloration.
3) Dampen the brush
Lightly dampen your toothbrush. Not dripping. Not soaked. Just enough moisture to help the toothpaste spread without becoming foamy goo.
4) Apply toothpaste and scrub gently
Squeeze a small amount onto the brush (or directly onto scuffs on rubber). Scrub in small circles with gentle pressure. On rubber soles, you can be a little more confident. On uppers, go slow and keep pressure light.
5) Let it sit (briefly)
For tough scuffs, let the toothpaste sit for about 10–15 minutes. This gives the cleaners time to loosen grime so it wipes away more easily. Don’t leave it on for hoursdried paste can be annoying to remove, especially on textured fabric.
6) Wipe clean and rinse carefully
Use a damp cloth to wipe away the toothpaste. Rinse the cloth frequently so you’re lifting dirt instead of redecorating the shoe. For rubber, you can use a slightly wetter cloth. For canvas or leather, keep moisture controlled.
7) Air drystuff for shape
Let sneakers air dry at room temperature. Avoid direct heat (like a hair dryer) and avoid intense sun if you’re worried about yellowing or warping. Stuff the toes with paper towels to help them keep their shape while drying.
Material Notes: Adjust the Method for Your Sneaker Type
Rubber soles and white midsoles
This is where toothpaste shines. It’s great for scuffs, sidewalk grime, and that mysterious gray film that appears on white soles like it pays rent.
Canvas sneakers
Toothpaste can help with spot-cleaning, but be gentle and wipe thoroughly. If the canvas is heavily stained, a mild detergent solution may work better as a first step, with toothpaste reserved for the rubber trim.
Leather sneakers
Proceed with caution. Many cleaning pros recommend gentler methods for leatherlike mild soap and water on a soft clothbecause abrasives can dull the finish. If you do try toothpaste, keep it to the rubber and avoid the leather panels unless you’ve tested carefully.
Mesh and knit uppers
These can be delicate. Toothpaste can get trapped in texture and be hard to rinse out. Consider mild detergent and water instead, using gentle brushing and blotting.
Suede and nubuck
Hard no. Use suede-specific tools and cleaners (like suede erasers/brushes) and keep water to a minimum.
Common Mistakes That Make Sneakers Look Worse
- Using gel toothpaste: it’s often less effective for scuffs and can leave residue.
- Using colored toothpaste: dyes can stain fabric and textured rubber.
- Scrubbing like you’re sanding a deck: too much pressure can rough up materials or remove finish.
- Over-wetting uppers: especially risky for leather and suede-adjacent materials.
- Heat drying: can warp shoes, loosen glue, or create uneven discoloration.
When Toothpaste Isn’t Enough: Smarter Options for Stubborn Stains
If toothpaste improves things but your sneakers still look like they’ve seen things… you’ve got other practical options that are commonly recommended by cleaning and shoe-care guides.
Mild soap or laundry detergent + warm water
This is the “works on most things” approach. It’s especially good for general grime on uppers. Use a soft brush or cloth, clean gently, then wipe with a clean damp cloth to remove soap.
Baking soda paste
Baking soda and water makes a gentle paste that can lift stains on certain materials. Some guides also suggest baking soda with vinegar or hydrogen peroxide for whitening on appropriate materialsbut those combos should be used carefully and kept away from leather and suede unless a trusted care source says it’s safe.
Magic-eraser-style sponge (for rubber scuffs)
These sponges can be very effective on rubber soles and midsoles. Use light pressurethink “polish,” not “power scrub.”
Diluted bleach (canvas onlyand carefully)
Some cleaning instructions allow diluted bleach for white canvas shoes, but it’s not a universal recommendation. Bleach can yellow rubber trim or damage non-canvas materials. If you go this route, follow a reputable method and keep it strictly to canvas.
Don’t Forget the Laces and Insoles (They Matter More Than You Think)
Clean shoes with dirty laces is like washing your car and leaving a pigeon on the hood. You can hand-wash laces in mild soapy water, rinse, and air dry. Some care guides also recommend washing laces (and removable insoles) in a pillowcase or mesh bag on a cold, delicate cyclethen air drying completely before putting them back.
How to Keep Sneakers Cleaner Longer
- Spot-clean quickly: the faster you handle a stain, the less it bonds to the material.
- Rotate pairs: giving shoes rest days reduces grime buildup and odor.
- Store smart: keep them dry, avoid crushing, and use tissue or shoe trees for shape.
- Use protectant spray (material-appropriate): especially helpful for canvas and some leathers.
- Do “sole maintenance”: a quick wipe of midsoles after wear keeps grime from building up.
FAQ: Toothpaste Sneaker Cleaning
Will toothpaste damage my shoes?
It can if you use the wrong type (gel, colored), scrub aggressively, or apply it to delicate materials like suede. On rubber soles, it’s generally low-risk when used gently and wiped thoroughly.
Is whitening toothpaste better?
Not always. Whitening formulas can be more abrasive. That might help on rubber scuffs, but it can be riskier on uppers. If you’re using toothpaste on anything other than rubber, choose a basic white paste and keep pressure light.
How often can I do this?
Occasional spot-cleaning is fine, especially on soles. If you’re scrubbing uppers frequently, switch to gentler methods (mild soap, soft cloth) so you don’t wear down the material over time.
Why do my white soles look yellow?
Yellowing can come from oxidation, aging materials, trapped dirt, or product residue. Gentle cleaning helps, but true de-yellowing can be a separate processand some methods (like strong chemicals or heat/sun tricks) can backfire if used incorrectly.
Real-World Experiences: What People Learn After Trying the Toothpaste Trick (Extra Notes)
Here’s the honest, real-life pattern many DIY sneaker cleaners run into: toothpaste is fantastic for the “I just need these to look presentable” moment, and less fantastic as a deep-clean miracle for every stain known to humanity. People tend to love it most for rubber solesthe part of the shoe that collects scuffs like souvenirs. The first time you wipe away a gray mark from a white midsole and it actually disappears, it feels like you unlocked a secret level of adulthood.
Where people get tripped up is expecting toothpaste to behave the same way on fabric uppers. On canvas, it can help with small stains, but it’s also easy to leave chalky residue behind if you don’t wipe thoroughly. A common “lesson learned” is that cleanup matters as much as scrubbing: multiple passes with a clean damp cloth usually beat one aggressive rinse. If someone tries toothpaste on textured knit or mesh, they often discover that the paste loves hiding in tiny holes like it’s playing hide-and-seek. That’s when folks switch tacticsmild soap, a softer brush, and more blotting than scrubbing.
Another frequent experience: people go too hard with the toothbrush. It’s understandabledirty shoes can inspire dramatic emotionsbut hard scrubbing can rough up rubber edges or fuzz fabric. The more successful approach is usually slower: gentle circles, small areas, and a second round if needed. Think “patient detail work,” not “power washing a driveway.”
Timing also comes up a lot. Letting toothpaste sit for a short window (about 10–15 minutes) often boosts results on scuffs, but leaving it on too long can make removal annoying. Several DIYers end up doing a “wipe, re-wet, wipe again” routine because dried paste turns into a powdery filmespecially around textured midsoles. The takeaway: set a timer, clean something else for a few minutes (like the laces), then come back before the paste becomes cement.
Speaking of laces: people are consistently surprised by how much cleaner shoes look when laces are washed. Even if the sneaker itself is only moderately improved, fresh laces make the entire shoe look more “intentional.” It’s like putting a clean shirt on after a haircutsuddenly, the vibe is different. Many DIY cleaners also learn the value of stuffing shoes with paper towels while drying; it helps shoes hold their shape and reduces that limp, damp look.
The biggest “real-world” win is using toothpaste as a targeted tool. People who keep it to rubber and scuffs tend to rave about it. People who try to toothpaste their way through suede, delicate leather finishes, or heavy ground-in stains tend to write it off. In other words: toothpaste is a great supporting actor, not the entire cast. Use it where it shines, pair it with gentle soap when needed, and your sneakers will look like they’ve had a refreshing comeback toureven if they’re still technically the same shoes that walked through that suspicious puddle.
Conclusion
Using toothpaste to clean sneakers is a smart, budget-friendly trickespecially for brightening rubber soles and wiping out scuffs when you’re short on time. Stick with non-gel white toothpaste, scrub gently, wipe thoroughly, and air dry. For delicate materials, treat toothpaste as a “maybe” and rely on mild soap-and-water methods instead. Done right, your sneakers won’t just look cleanerthey’ll look like they made better choices than they actually did.




