Table of Contents >> Show >> Hide
- Why Turn a Coffee Table Into a Menu Chalkboard?
- Best Coffee Tables for This DIY Project
- Materials and Tools You Will Need
- Step-by-Step: How to Repurpose a Coffee Table Into a Menu Chalkboard
- Step 1: Decide the Final Form
- Step 2: Clean the Table Thoroughly
- Step 3: Repair Scratches and Dents
- Step 4: Sand for Adhesion
- Step 5: Tape Off the Frame
- Step 6: Prime the Surface
- Step 7: Apply Chalkboard Paint
- Step 8: Paint or Finish the Frame
- Step 9: Let the Chalkboard Cure
- Step 10: Season the Chalkboard
- Design Ideas for a Coffee Table Menu Chalkboard
- Lettering Tips for a Better-Looking Menu
- Practical Uses Beyond Menus
- Maintenance: How to Keep the Chalkboard Looking Good
- Common Mistakes to Avoid
- Budget-Friendly Styling Upgrades
- Experience Notes: What This Project Teaches You
- Conclusion
Somewhere in a garage, basement, thrift store corner, or “I’ll deal with that later” pile, an old coffee table is waiting for its second act. Maybe the legs are wobbly. Maybe the finish has more scratches than a cat-owned sofa. Maybe it once held remotes, cold pizza, and a suspiciously permanent coffee ring. Good news: that tired table does not need to become landfill confetti. With a little sanding, paint, imagination, and chalk dust, you can transform a forgotten coffee table into a charming menu chalkboard that looks like it came from a cozy café, farmhouse kitchen, wedding reception, or backyard brunch where everyone pretends they casually make rosemary lemonade.
A repurposed coffee table to menu chalkboard project is one of those DIY ideas that feels both practical and oddly magical. You are not simply painting wood black. You are turning furniture into communication. Tonight’s dinner menu, weekly meal plan, party drinks list, farmers market specials, birthday message, holiday countdown, or “please stop opening the fridge every nine minutes” reminder can all live on one reusable surface. It is eco-friendly, budget-friendly, beginner-friendly, and just dramatic enough to make guests say, “Wait, you made that?” which is the official anthem of successful DIY.
Why Turn a Coffee Table Into a Menu Chalkboard?
Repurposing furniture is not just about saving money, although saving money is always welcomeespecially when paint prices and coffee prices seem to be competing in an Olympic event. The bigger appeal is creative reuse. Instead of buying a generic chalkboard sign, you can build one with character. Coffee tables often have broad, flat tops, sturdy frames, decorative edges, shelves, drawers, or legs that can be reimagined into a freestanding or wall-mounted chalkboard menu.
This project works beautifully for homes, small cafés, food trucks, pop-up shops, craft booths, weddings, family command centers, and outdoor parties. A coffee table top can become the main chalkboard panel. The frame can be painted, stained, distressed, or waxed. The legs can be removed, shortened, reused as supports, or transformed into a rustic easel-style stand. If the table has a lower shelf, that piece can become a second sign for drinks, desserts, chores, or a “yes, we are out of snacks” announcement.
Best Coffee Tables for This DIY Project
Not every table is equally ready for chalkboard greatness, but many can work with the right preparation. Solid wood coffee tables are usually the easiest to refinish because they sand well, hold primer, and often have attractive trim. Veneer tables can also work, but they need gentle sanding because the top layer may be thin. Laminate or glossy manufactured wood requires extra attention to adhesion, which means cleaning, scuff sanding, and using a bonding primer before applying chalkboard paint.
Look for These Features
A good candidate has a flat central surface, a stable frame, and enough thickness to support hanging hardware if you plan to mount it. Raised edges are a bonus because they create a built-in frame around the chalkboard area. Decorative carved details can make the finished piece feel custom, while simple modern tables can become sleek menu boards for minimalist kitchens or small business displays.
Avoid These Red Flags
Skip tables with severe water damage, soft swollen particleboard, active mold, or structural cracks that cannot be repaired. If the piece is old and painted, use caution before sanding. Older painted furniture may contain lead-based paint, so testing or professional advice is smart before disturbing the surface. DIY is fun; mystery dust is not.
Materials and Tools You Will Need
Before you begin, gather your supplies so the project does not turn into twelve separate trips to the hardware store, also known as the traditional DIY pilgrimage. You do not need a professional workshop, but you do need patience, ventilation, and a workspace where paint drips will not become part of your flooring’s personality.
Basic Supplies
- Old coffee table or coffee table top
- Mild soap, degreaser, or furniture cleaner
- Lint-free cloths or tack cloth
- Sandpaper or sanding sponge, usually medium and fine grit
- Wood filler for dents, holes, or deep scratches
- Painter’s tape
- Bonding primer, especially for glossy, laminate, or stained surfaces
- Chalkboard paint
- Paint roller, foam roller, or quality brush
- Optional frame paint, chalk-style paint, stain, wax, or protective topcoat
- Regular chalk for seasoning the board
- Hanging hardware, hinges, chain, or easel supports if needed
Step-by-Step: How to Repurpose a Coffee Table Into a Menu Chalkboard
The best DIY projects are part planning, part painting, and part pretending you totally meant to get primer on your elbow. Follow these steps for a durable, attractive chalkboard menu that can handle dinner plans, party notes, and repeated erasing.
Step 1: Decide the Final Form
First, choose how the chalkboard will be used. Will it hang on a kitchen wall? Lean against a buffet table? Stand outside a café? Sit on a countertop? Your answer affects everything: whether you remove the legs, reinforce the back, add hardware, or keep part of the original table structure.
For a wall menu board, remove the legs and lower shelf, then use the tabletop as the main panel. For an event sign, keep the tabletop and attach folding legs or an easel support. For a freestanding kitchen menu, shorten the legs and let the table become a low display board near a breakfast nook. For a rustic restaurant-style sign, use the tabletop vertically and frame it with the original apron or trim.
Step 2: Clean the Table Thoroughly
Paint does not like grease, wax, dust, or old furniture polish. Clean the table with mild soap and water or a degreasing cleaner, then let it dry completely. Pay special attention to corners, carved trim, and the underside if you plan to paint the entire frame. A clean surface helps primer and paint bond better, which is DIY language for “less crying later.”
Step 3: Repair Scratches and Dents
Fill deep scratches, screw holes, and dents with wood filler. Let it dry according to the product instructions, then sand the patched areas smooth. Run your hand over the surface. If you can feel a bump, chalk will find it, announce it, and make your lettering look like it hit a pothole. A smooth surface is especially important for chalkboard paint because writing and erasing work best on an even finish.
Step 4: Sand for Adhesion
Lightly sand the surface to dull glossy finishes and give primer something to grip. You do not always need to remove every bit of old finish. The goal is to scuff, smooth, and remove loose material. After sanding, wipe away all dust with a tack cloth or damp lint-free cloth. Dust under paint creates texture, and not the charming kind.
Step 5: Tape Off the Frame
If your coffee table has a raised border or decorative trim, tape around the chalkboard writing area. This keeps the menu surface crisp and lets you paint the frame a different color. Black chalkboard with a warm wood frame feels classic. White or cream trim looks farmhouse. Deep green, navy, or charcoal creates a modern café mood. A distressed frame gives the piece a vintage market sign personality.
Step 6: Prime the Surface
Primer is the quiet hero of furniture painting. On raw wood, it helps create an even base. On stained wood, it helps reduce bleed-through. On laminate or glossy surfaces, a bonding primer can make the difference between a finish that lasts and one that peels like a bad sunburn. Apply thin, even coats and let the primer dry fully. If the surface feels rough, sand lightly and wipe clean before painting.
Step 7: Apply Chalkboard Paint
Stir the chalkboard paint well. Apply it with a foam roller for the smoothest finish, using thin coats rather than one thick layer. A brush can work for edges and corners, but a roller usually leaves fewer visible strokes across the writing area. Follow the paint manufacturer’s drying and recoating directions. In many projects, two or three thin coats create better coverage and a more durable writing surface than one heavy coat.
Keep your strokes consistent. If you roll the first coat vertically, consider rolling the next coat horizontally to improve coverage. Avoid overworking the paint once it starts to tack up. Let each layer dry as directed. This is the part where patience becomes a tool, right next to the roller and the snack you forgot you left on the workbench.
Step 8: Paint or Finish the Frame
Once the chalkboard surface is protected or dry enough to tape carefully, finish the frame. Chalk-style paint can give the border a soft matte look, while latex or acrylic furniture paint can offer a smoother, more durable finish. Stain works well if the wood grain is attractive. If you want a vintage look, lightly distress edges after painting, focusing on corners and raised details where real wear would naturally happen.
Step 9: Let the Chalkboard Cure
This step matters. Chalkboard paint may feel dry long before it is ready for writing. Many chalkboard paint products require a curing period before use. Rushing this stage can cause permanent ghost marks or weak erasing performance. Let the board cure fully according to the product label before writing your first menu.
Step 10: Season the Chalkboard
Before writing on the board, season it by rubbing the side of a piece of regular chalk over the entire chalkboard surface. Then erase it with a dry cloth or chalkboard eraser. This leaves a fine layer of chalk dust in the surface pores and helps future writing erase more evenly. It may feel strange to cover your beautiful new board in chalk immediately, but trust the process. It is like stretching before exercise, except the chalkboard does not complain.
Design Ideas for a Coffee Table Menu Chalkboard
Once the board is built, the fun part begins: styling it. Your repurposed coffee table menu chalkboard can be rustic, modern, playful, elegant, or full-on “farmhouse brunch with tiny jam jars.” The design should match how and where you plan to use it.
Farmhouse Kitchen Menu Board
Paint the frame warm white, soft gray, sage green, or weathered blue. Add small hooks along the bottom for keys, measuring spoons, or reusable grocery bags. Write the weekly dinner plan in sections: Monday through Sunday, leftovers, snacks, and grocery reminders. This works especially well for families who ask “What’s for dinner?” while standing directly in front of dinner.
Café-Style Menu Sign
Use a black chalkboard surface with a stained wood or matte black frame. Add hand-lettered headings such as “Today’s Specials,” “Fresh Bakes,” “Coffee Bar,” or “Soup of the Day.” For small cafés or pop-up food stands, a repurposed coffee table chalkboard can offer a stylish, low-cost alternative to printed signage.
Wedding or Party Menu Board
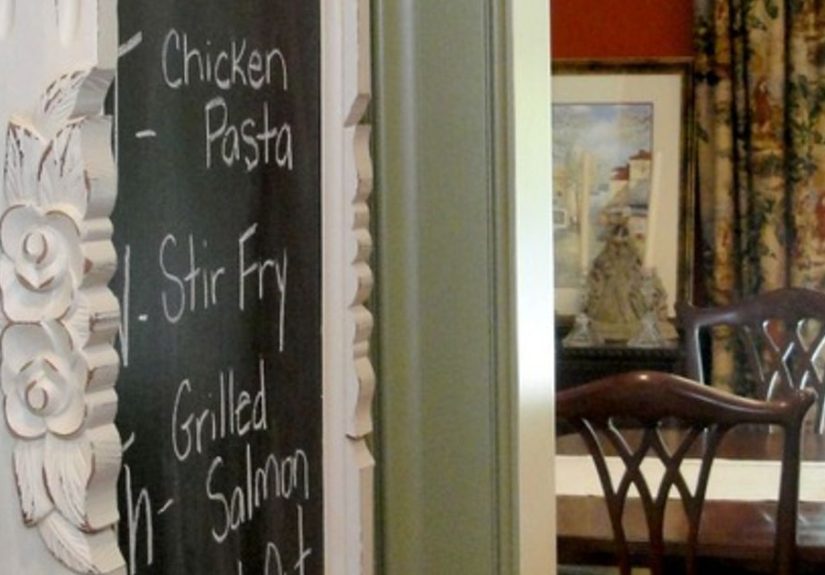
A decorative coffee table top can become a beautiful event sign. Use white chalk marker-style lettering for a clean look, or regular chalk for easy changes. Add floral garlands, ribbon, or small battery-powered lights around the frame. Write the dinner menu, signature cocktails, seating instructions, or dessert list. Bonus: after the party, the board can become home décor instead of sitting in a closet with seventeen extra votive candles.
Kids’ Snack Station Board
A smaller coffee table top can become a cheerful snack menu for a playroom or homeschool area. Paint the frame in a bright color and divide the board into sections for snacks, activities, reminders, and doodles. Use regular chalk for younger kids and avoid placing the board where chalk dust will fall directly onto food surfaces.
Lettering Tips for a Better-Looking Menu
You do not need to be a professional hand-lettering artist. You simply need a plan and a willingness to erase. Start by sketching the layout lightly with chalk. Use a ruler or painter’s tape as a temporary guide for straight lines. Mix large headings with smaller descriptions. Leave white space so the board does not look like it is yelling the soup options at people.
Try simple combinations: block letters for headings, cursive for accents, and small caps for details. Add easy illustrations such as coffee cups, leaves, arrows, stars, bread loaves, or little swirls. If you are nervous, print your words on paper, shade the back with chalk, tape the paper to the board, trace the letters, and then fill them in. This transfer trick gives you guide lines without needing advanced drawing skills.
Practical Uses Beyond Menus
Although “menu chalkboard” is the star keyword here, this project can do much more. In a kitchen, it can hold meal plans, grocery lists, recipe notes, or seasonal quotes. In a dining room, it can announce wine pairings, brunch spreads, or holiday courses. In a home office, it can become a task board. In a shop, it can display prices, promotions, class schedules, or customer messages.
For short-term rentals or guest rooms, use the chalkboard to welcome visitors and list Wi-Fi details, checkout reminders, local restaurant suggestions, or house rules in a warmer way than a laminated sheet. For backyard gatherings, set it near the drink station with a list of mocktails, lemonade flavors, or barbecue sides. People love knowing what is available, and they love it even more when the sign looks like it belongs in a magazine spread.
Maintenance: How to Keep the Chalkboard Looking Good
A chalkboard menu is meant to be used, erased, rewritten, and admired. To keep it looking fresh, erase with a soft dry cloth or chalkboard eraser after each use. For deeper cleaning, use a slightly damp cloth only after the paint has fully cured and follow the product guidance. Avoid soaking the surface. Water and repurposed furniture have a complicated relationship, and it is best not to invite drama.
If ghosting appears, clean gently and re-season the board. If the writing surface becomes scratched or dull after heavy use, lightly sand, wipe clean, and add another thin coat of chalkboard paint. A well-made board can be refreshed many times, which is one of the reasons this project is so satisfying.
Common Mistakes to Avoid
Skipping Surface Prep
The fastest way to ruin a furniture painting project is to treat prep like an optional side quest. Cleaning, sanding, filling, and priming help the final surface look smoother and last longer. Even paints known for easy application perform better on a clean, stable surface.
Using Thick Paint Coats
Thick coats may seem efficient, but they can dry unevenly, show roller marks, or create a gummy finish. Thin coats are more controllable and usually produce a better writing surface.
Writing Too Soon
Chalkboard paint needs proper curing time. If you write before it is ready, the first words may leave stubborn marks. Waiting is boring, yes, but permanent “Taco Tuesday” ghosting is also not ideal unless every day is spiritually Taco Tuesday.
Forgetting to Season the Board
Seasoning helps prevent the first writing from embedding too strongly into the surface. Always cover the board with chalk, erase it, and then begin your design.
Budget-Friendly Styling Upgrades
A repurposed coffee table to menu chalkboard project can stay wonderfully affordable. Use leftover paint for the frame. Salvage hardware from old furniture. Add thrifted hooks, cup pulls, or drawer handles to hold chalk. Attach a small ledge from scrap wood. Use jute rope for rustic hanging. Add peel-and-stick felt pads to the back if the board will lean against a wall.
You can also create seasonal looks without repainting the whole piece. Tie greenery to the top for winter, add faux citrus garland for summer, clip mini flags for birthdays, or use removable vinyl labels for permanent section headings. The chalk surface changes; the frame provides personality.
Experience Notes: What This Project Teaches You
The most memorable part of turning a coffee table into a menu chalkboard is how quickly the object changes identity. At first, it is just a tablepossibly scratched, ignored, and emotionally attached to an old living room rug. Then the legs come off, the surface gets cleaned, the frame is taped, and suddenly you can see the sign hidden inside it. That moment is why people get hooked on furniture repurposing. It feels like rescuing potential.
One useful experience from projects like this is that the surface tells the truth. If you rush sanding, every ridge appears later. If you leave dust behind, the paint texture exposes it. If you skip primer on a glossy table, the finish may scratch more easily. The project is forgiving, but it rewards careful preparation. A smooth chalkboard is not born in the painting stage; it starts during cleaning, patching, and sanding.
Another lesson is that chalkboard paint behaves best when you treat it like a finish, not just a color. Black paint and chalkboard paint are not the same thing. A good chalkboard surface needs even coverage, enough curing time, and proper seasoning. The first time you rub chalk across the entire freshly painted board, you may feel like you are ruining it. You are not. You are preparing it for real use. After seasoning, chalk lettering usually looks softer, erases better, and feels more natural.
Design-wise, the best boards often keep the original table’s character. A nick in the frame, a carved edge, a chunky leg turned into a support, or a lower shelf reused as a chalk ledge can make the final piece more interesting than a store-bought sign. Perfection is not the goal. Charm is the goal. A repurposed coffee table menu chalkboard should look intentional, useful, and a little bit storied.
In real home use, this project becomes surprisingly practical. A weekly menu board can reduce repeat questions, organize grocery planning, and make ordinary dinners feel a little more special. Writing “pasta night” on a chalkboard somehow feels more official than shouting it from the kitchen. For parties, a menu chalkboard helps guests know what is being served without asking the host every six minutes. For small businesses, it creates a handmade, approachable feel that printed signs sometimes lack.
There is also a fun emotional effect. Repurposed pieces invite conversation. Someone will ask where you bought it. Someone else will say they have an old table in their garage. Then everyone starts imagining what else could become a sign, shelf, bench, bar cart, or plant stand. That is the contagious joy of upcycling: one finished project makes ordinary objects look less disposable and more like raw material.
The biggest practical tip from experience is to plan the chalk storage before calling the project done. A beautiful menu board without a chalk holder is like a kitchen without a spatula: technically functional, but mildly annoying. Add a small ledge, cup hook, drawer pull, tiny basket, or magnetic tin if the surface allows. Keep a microfiber cloth nearby for quick erasing. These small details turn the board from decorative to genuinely useful.
Finally, expect the board to evolve. Your first lettering layout may be simple. Your second may include borders. By the fifth dinner party, you may be drawing tiny pies, arrows, and suspiciously fancy ampersands. That is part of the charm. A repurposed coffee table to menu chalkboard is never really finished; it keeps changing with your meals, seasons, celebrations, and household jokes. Not bad for a coffee table that once had one job and still managed to collect cup rings.
Conclusion
A repurposed coffee table to menu chalkboard is more than a weekend craft. It is a smart way to save old furniture, create custom home décor, and add personality to everyday routines. With proper cleaning, sanding, priming, chalkboard paint, curing, and seasoning, a worn-out table can become a reusable menu sign for kitchens, parties, cafés, markets, and family spaces. The project is approachable for beginners but flexible enough for experienced DIYers who want to add distressing, decorative frames, hooks, shelves, or hand-lettered designs.
The real beauty of this project is its mix of usefulness and charm. It helps organize meals, welcomes guests, supports entertaining, and gives old furniture a new purpose. Instead of buying another mass-produced sign, you create something with history, function, and a little chalk-covered personality. And if anyone compliments it, feel free to act humble for exactly three seconds before saying, “Thanks, I made it.” That is part of the reward.





