Table of Contents >> Show >> Hide
- What Exactly Are OOK 50652 Small Sawtooth Hangers?
- When Small Sawtooth Hangers Are the Right Move (and When They’re Not)
- How to Install OOK 50652 on a Wooden Frame (Without Donating a Finger)
- How to Hang the Frame on the Wall and Get It Level on the First Try
- Gallery Wall Tips That Make You Look Suspiciously Competent
- Troubleshooting: The Five Most Common Sawtooth Problems (and Fixes)
- Alternatives to Sawtooth Hangers (When OOK 50652 Isn’t the Best Fit)
- Conclusion
- Real-World Experiences: What People Actually Run Into (and How They Solve It)
There are two types of people in this world: (1) those who hang a frame once, step back, and whisper “nailed it,” and
(2) those who hang a frame three times, invent four new words, and end up living with “slightly haunted” wall art forever.
If you’d like to join Team #1, OOK 50652 Small Sawtooth Hangers are a surprisingly mighty little shortcutespecially
for lightweight wooden frames that didn’t come with hardware in the first place.[1]
This guide breaks down what the OOK 50652 set is, when it’s the right choice (and when it’s absolutely not), and how to get
that “museum-straight” look without turning your wall into Swiss cheese. We’ll keep it practical, a little funny, and very
focused on the stuff that actually prevents the dreaded crooked-frame stare-down.
What Exactly Are OOK 50652 Small Sawtooth Hangers?
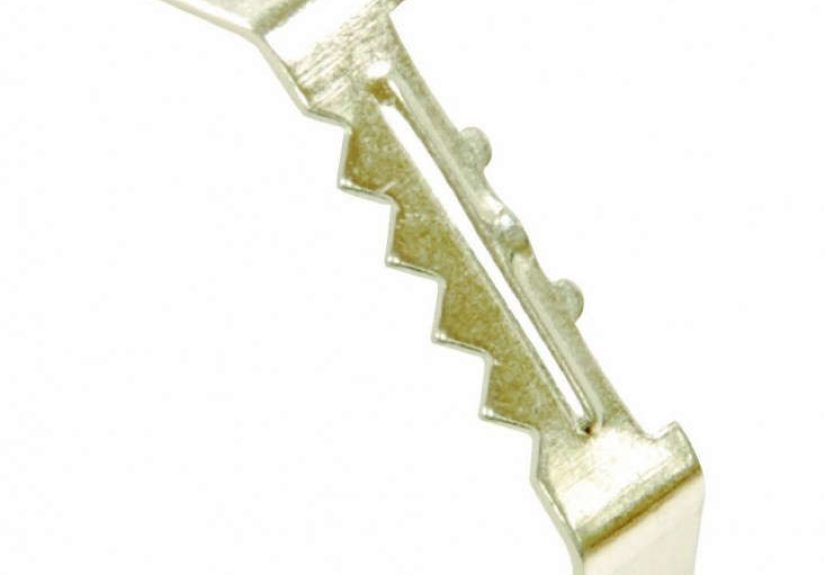
Sawtooth hangers are small, toothed metal strips that attach to the back of a frame. The “teeth” catch on a nail or screw head,
letting you nudge the frame left or right until it’s level. They’re popular because they’re fast, low-profile, and forgiving
unlike measuring “by vibes” and hoping for the best.[6]
The OOK 50652 kit in plain English
- It’s designed for wooden frames that don’t already have hanging hardware.[2]
- Packaged in a reusable storage tin (the kind you’ll keep because it’s too useful to throw away).[2]
- Common retail versions list 25 sets in a tin; marketplace listings also describe 25 hangers with nails included.[2][3]
- OOK positions sawtooth hangers as quick to install and “self-leveling” for straighter hangs.[1]
Quick note: you’ll see OOK 50652 sold in different bundle sizes depending on the retailer (single tin, multi-pack, or bulk/case listings).
The “50652” identifier is the anchor; the packaging quantity is what tends to vary.[2][3]
When Small Sawtooth Hangers Are the Right Move (and When They’re Not)
Great for
- Lightweight photo frames (think: your 8x10s, 11x14s, and “cute but not expensive” prints).
- Wood frames with a flat back where a small hanger can sit snugly.
- Fast swapsseasonal décor, kids’ art, or a gallery wall you rearrange twice a year “just for fun.”
Not great for
-
Heavy art, mirrors, or anything that would cause heartbreak if it fell. Multiple guides put typical sawtooth use in the
lightweight category (often around ~20 pounds, sometimes cited up to ~25 depending on the specific hanger). Always
default to the packaging rating and err conservative.[6][7][11] -
Frames that are very wide and prone to tilting forward. You can stabilize with pads and/or additional hardware, but sometimes
picture wire or a French cleat is the grown-up answer.[4][5] - Priceless items. If the frame contains something irreplaceable, choose sturdier hardware (D-rings + wire, cleats, or a rated wall hanger system).[4][7]
A helpful reality check: adding a second sawtooth hanger can increase stability, but you shouldn’t treat weight ratings as “stackable.”
Two regular hangers don’t automatically equal double the safe load. Think “less wobble,” not “infinite strength.”[11]
How to Install OOK 50652 on a Wooden Frame (Without Donating a Finger)
Installation is simple, but “simple” is how most home improvement injuries beginso let’s do it smart.
The basic idea is: center the hanger, keep the teeth oriented to catch properly, and fasten it securely to the frame back.[6][12]
Tools you’ll actually use
- Tape measure or ruler
- Pencil
- Small hammer (for the tiny nails, if included)
- Optional: painter’s tape (for holding the hanger in place and protecting your fingers)
Step-by-step
- Find the top center of the frame. Measure the frame width, divide by two, and mark the center on the back top rail.[6]
-
Position the hanger. Place the sawtooth hanger on the back near the top rail so it can bear the load without splitting the wood.
Keep it centered horizontally; avoid placing it so high that the nails barely bite into the wood.[6] -
Temporary “third hand” trick: use a small strip of painter’s tape to hold the hanger in place while you fasten it.
This saves your fingers and your vocabulary.[11] -
Fasten the hanger. Tap in the provided nails (or use the appropriate fasteners) until snug. If your frame wood is very hard,
pre-piercing with an awl can help, but go gentlethis is tiny hardware, not a deck build.[12] - Check alignment. The hanger should sit flat and centered. If it’s off, fix it nowcrooked hardware makes every later step harder.[6]
Pro tip: if the frame is wide (roughly over 24 inches), you may prefer two hangers for stabilitybut measure carefully so both sit level and symmetrical.[6][11]
How to Hang the Frame on the Wall and Get It Level on the First Try
The wall side matters just as much as the frame side. A sawtooth hanger works best with a fastener that has a head the teeth can catch
not a finish nail that disappears into drywall like it’s trying to escape responsibility.[4][12]
1) Pick the wall fastener that matches your wall and your frame
- Drywall + light frame: a headed nail or small picture hook is common. Angle the nail slightly upward for better holding power.[12]
- Drywall + you want more security: use a screw with a properly rated anchor.[12]
- Stud available: a wood screw into a stud is a strong, simple solution.[12]
2) Use the “drop measurement” so your frame lands exactly where you want
- Hold the frame where you want it to live and make a light mark at the top center of the frame.[7]
-
Measure the distance from the center of the sawtooth to the top of the frame. Many frames are roughly around a half-inch,
but measure your actual frameyour wall deserves accuracy.[7] - From your top-center wall mark, measure down that same distance and mark the spot for the nail/screw.[7]
- Install your fastener, leaving just enough head exposed for the sawtooth to catch (a small gap is often recommended rather than driving it flush).[12][11]
- Hang the frame, then gently nudge left/right on the teeth until level.[6]
3) The classic “57-inch on-center” rule (a museum trick that works at home)
If you’re not sure how high to hang it, a widely used guideline is placing the center of the artwork around
57 inches from the floora standard often associated with galleries and a comfortable eye level for many rooms.[8]
Home improvement guides also commonly recommend measuring carefully and leveling rather than eyeballing it.[4]
4) Stop the “top-tilt” with felt pads
If your frame leans forward or scuffs the wall, stick small felt pads on the bottom corners. It helps the frame sit flatter and protects paint,
especially on slightly textured walls.[5][12]
Gallery Wall Tips That Make You Look Suspiciously Competent
Plan the layout before you commit
For multiple frames, sketching and taping paper templates to the wall helps you visualize spacing before you put holes in anything.
Big-box DIY guides suggest tracing frames, cutting paper patterns, and taping them up to refine layout and spacing.[4]
Use the toothpaste trick when measuring feels like a chore
For tricky placements, a tiny dab of white toothpaste on the sawtooth contact point can transfer a mark to the wall when you press the frame gently in place.
It’s oddly effective and can reduce “oops, wrong spot” holesjust wipe the wall afterward.[9][10]
Keep your hardware strategy consistent
Mixing hanger types can make a gallery wall harder to align because each hardware type has a different “drop.”
If you’re using sawtooth hangers for a set, measure each frame’s drop (don’t assume they’re identical) and mark accordingly.[7][12]
Troubleshooting: The Five Most Common Sawtooth Problems (and Fixes)
Problem 1: The frame keeps sliding out of level
This can happen with a single center hanger over time. Try a second hanger for stability on wider frames, or switch to D-rings with wire for better long-term leveling on larger pieces.[6][4]
Problem 2: The hanger won’t “catch” the nail
The nail head may be too small or too flush. Use a fastener with a proper head and leave a small gap so the sawtooth teeth can grab securely.[4][12]
Problem 3: The frame sits crooked even though the nail is “right”
Check if the sawtooth hanger was mounted off-center or tilted on the frame back. A slightly crooked hanger becomes a permanently crooked hang.
Recenter and reinstall the hanger if needed.[6][12]
Problem 4: The frame leans forward
Add felt pads to the lower corners (bonus: wall protection). If the frame is heavy and still leans, consider sturdier wall hardware or a different hanging method.[5][4]
Problem 5: You’re hanging something heavy “because it looks fine”
It might look fine right now. Gravity, however, is playing the long game. If the piece is heavy or valuable, use hardware rated for the weight (wire + D-rings, cleat systems, or appropriate wall hangers).[4][6][7]
Alternatives to Sawtooth Hangers (When OOK 50652 Isn’t the Best Fit)
- D-rings + picture wire: better for heavier or wider frames; easier to level on the wall with two support points.[4][5]
- French cleats: great for heavy, wide art and for keeping frames tight to the wall; often used for substantial weights depending on the system.[4]
- Damage-free hanging systems: useful for rentals and frequent swaps (check the rating and surface requirements).[5]
Conclusion
OOK 50652 Small Sawtooth Hangers are the kind of humble hardware that quietly upgrades your whole “hanging pictures” experience: quick install, easy adjustment,
and a tidy tin that keeps everything from scattering into the junk drawer void.[2][3]
The key is using them in the right lanelightweight frames, headed fasteners, and careful placement. Measure the drop, hang near eye level, and let the teeth do what they were born to do: bite and behave.
Real-World Experiences: What People Actually Run Into (and How They Solve It)
In the real world, sawtooth hangers become “the solution” for about 80% of the frames that show up in your life unexpectedly:
a friend hands you a print, your kid brings home a masterpiece titled “Blue Scribble #7,” or you buy a frame that looks fancy but arrives with exactly zero hanging hardware.
That’s where a small kit like OOK 50652 gets used the mostbecause it’s faster to install a sawtooth than to run to the store again (and again).
One common experience: people love how quickly a sawtooth hanger lets them hang a frame, then immediately discover the dark side of “quick”
they eyeballed the nail location. The frame ends up an inch lower than planned, or slightly off-center, and suddenly they’re staring at the wall like it personally betrayed them.
The fix is almost always the same: measure the drop from the sawtooth to the top of the frame and transfer it to the wall.
Once you do that one time, you’ll feel like you unlocked a cheat code. (It’s not magic. It’s just math.)
Another classic: the frame goes up straight… for about a day. Then it slowly shifts a hair to the left, like it’s trying to escape the room.
This happens more often with a single center hanger on a wider frame. People usually solve it by adding small felt pads on the bottom corners to reduce wall slip,
or by switching to two hangers for stability. The important lesson most DIYers learn the hard way: adding hangers can help keep things steady, but it doesn’t mean you can hang a
“definitely-too-heavy” frame and call it safe. Stability and weight rating are not the same thing.
If you’ve ever tried hanging frames in a tight hallway, you’ve probably experienced the “I can’t step back far enough to see if it’s straight” problem.
People handle this by using painter’s tape to mark the top line or by relying on a level balanced on the frame. The more clever crowd uses a quick transfer trick:
a tiny dab of white toothpaste on the sawtooth contact point to mark the exact nail spot. It sounds silly until it saves you from drilling two unnecessary holes.
The wall doesn’t care if you used precision tools or dental hygiene productsit only cares that you stopped guessing.
Gallery walls create their own special kind of chaos. In practice, most people start with a plan, then drift into “let’s just hang this one and see.”
The best outcomes usually come from laying everything out first (paper templates or floor staging), keeping spacing consistent, and measuring each frame’s drop.
Frames that look identical on the front can have slightly different hardware placement on the back, and that’s how you end up with a row of frames that “almost” lines up.
The real-world fix is annoyingly simple: treat every frame like it’s unique, measure each one, and don’t assume.
Finally, there’s the storage factoran underrated reason people like kits that come in a tin. Nails and tiny hangers are basically engineered to vanish.
When they live in a reusable container, you’re far more likely to keep the set together and actually use it for the next frame. That’s how OOK 50652 often turns into
the quiet hero of weekend home projects: it’s there when you need it, it doesn’t demand special tools, and it keeps your walls looking intentional rather than “we tried.”





