Table of Contents >> Show >> Hide
- Why a Compost Tumbler Works So Well
- Step 1: Set Up Your Tumbler for Success
- Step 2: Learn the Golden RuleGreens + Browns
- Step 3: What NOT to Put in Your Tumbler (Unless You Love Problems)
- Step 4: Prep Your Scraps So They Break Down Faster
- Step 5: Load Your Tumbler the Smart Way (Batch Beats Drip-Feed)
- Step 6: MoistureAim for “Wrung-Out Sponge,” Not “Swamp”
- Step 7: Turning ScheduleHow Often Should You Spin It?
- Step 8: TemperatureShould You Monitor It?
- Step 9: Troubleshooting Common Compost Tumbler Problems
- Step 10: How Long Does Compost Take in a Tumbler?
- Step 11: How to Tell When Compost Is Finished
- Step 12: Harvesting and Using Your Compost
- Seasonal Tips: Summer Heat and Winter Slowdowns
- Quick-Start “Cheat Sheet” for Compost Tumbler Success
- Real-World Experiences: What Using a Compost Tumbler Feels Like (and What People Learn the Hard Way)
- Conclusion
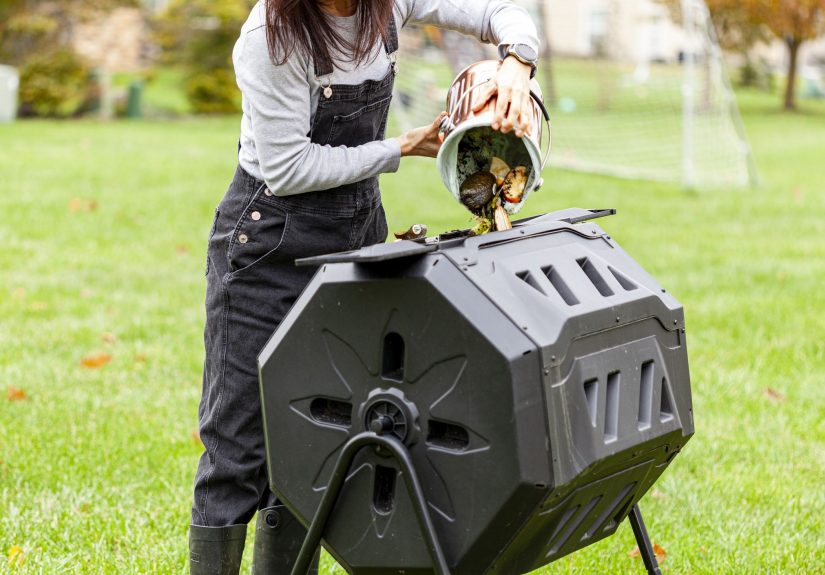
A compost tumbler is basically a tiny, rotating “soil factory” that turns your banana peels and yard mess into
dark, crumbly garden gold. It’s cleaner than an open pile, faster than the “I’ll-turn-it-someday” method,
and way less likely to attract the neighborhood raccoon union.
But tumblers aren’t magic. They’re more like a slow cooker: you still need the right ingredients, the right
moisture, and a little stirring. This guide walks you through the whole processsetup, loading, turning,
troubleshooting, harvesting, and using finished compostso your scraps actually become nutrients instead of
a soggy science project.
Why a Compost Tumbler Works So Well
Composting is controlled decomposition. You’re feeding oxygen-loving microbes a balanced diet of carbon
(“browns”) and nitrogen (“greens”) plus water. In exchange, they break everything down into stable compost
that improves soil structure, water retention, and nutrient availability.
A tumbler helps because it:
- Keeps things contained (fewer pests, less mess).
- Makes aeration easy (turning the drum mixes in oxygen quickly).
- Heats faster than many neglected open pilesif you load and manage it correctly.
The tradeoff: tumblers can get too wet and go anaerobic (stinky) if you dump in lots of kitchen scraps without
enough dry browns. They also have limited volume, so “batch composting” usually works better than adding a
little every day forever.
Step 1: Set Up Your Tumbler for Success
Pick the right spot
Put your tumbler somewhere convenient. If it’s inconvenient, you’ll treat it like a treadmill: you’ll swear you’ll
use it daily, and then you’ll keep walking past it like it’s not there. A good spot is near the kitchen door or
garden path, with decent drainage under it. Partial sun is fine, but full blazing sun can dry compost out faster
in hot weather.
Know your tumbler type: single vs. dual chamber
- Single-chamber tumblers are simple but work best when you fill them, let them finish, then empty.
- Dual-chamber tumblers let you “cook” one side while you start loading the other.
Add a “starter” (optional, but helpful)
You don’t need fancy compost activator. A scoop of finished compost, garden soil, or old leaf mold introduces a
healthy microbial community. It’s like inviting skilled cooks into your kitchen instead of hoping random strangers
show up and make dinner.
Step 2: Learn the Golden RuleGreens + Browns
Compost tumbler success usually comes down to one thing: balance.
What counts as “greens” (nitrogen-rich)
- Fruit and vegetable scraps
- Coffee grounds and filters
- Tea bags (check for plastic mesh)
- Fresh grass clippings (use carefullycan mat and get slimy)
- Plant trimmings
What counts as “browns” (carbon-rich)
- Dry leaves (a tumbler’s best friend)
- Shredded cardboard (no glossy coatings)
- Shredded paper (non-glossy)
- Straw or dried plant stems
- Sawdust from untreated wood (small amounts; it’s very carbon-heavy)
How much greens vs. browns?
A practical home-compost rule is roughly 2–3 parts browns to 1 part greens by volume. The deeper science
is carbon-to-nitrogen balance; many composting references aim around the neighborhood of a 30:1 carbon-to-nitrogen
ratio for efficient decomposition. Don’t worryyou don’t need a calculator and a lab coat. You just need to keep it
from becoming either a dry leaf mummy (too many browns) or a fruit-soup swamp (too many greens).
Step 3: What NOT to Put in Your Tumbler (Unless You Love Problems)
Many backyard systemsespecially tumblersare not suited for everything. The biggest troublemakers are foods that
attract pests, create odors, or break down poorly in small enclosed systems.
- Avoid: meat, fish, dairy, oils/grease, and greasy prepared foods.
- Avoid: pet waste (pathogen risk).
- Be cautious: weeds with seeds or aggressive roots (you may spread them if compost doesn’t get hot enough).
- Be cautious: diseased plants (best to trash them unless you’re sure you can hot-compost thoroughly).
Stick with plant-based scraps and yard waste, and you’ll have a calmer, cleaner tumbler life.
Step 4: Prep Your Scraps So They Break Down Faster
Smaller pieces compost faster because microbes have more surface area to work on. You don’t need to mince your
lettuce with a chef’s knife (unless that’s your hobby), but you should:
- Chop or tear big scraps (melon rinds, corn cobs, thick stems).
- Shred cardboard and paper.
- Crush eggshells so they don’t hang around for three years like tiny fossilized boats.
A tumbler also benefits from bulking materialdry leaves, small twigs, or coarse brownsto keep air pockets
open so the mix doesn’t compact into a dense lump.
Step 5: Load Your Tumbler the Smart Way (Batch Beats Drip-Feed)
Here’s a common tumbler mistake: adding a little food scrap every day forever. That keeps resetting the clock,
because compost finishes best when you stop adding new raw material and let the batch “cook.”
A simple batch-loading method
- Start with a brown base (a few inches of dry leaves or shredded cardboard).
- Add greens (kitchen scraps, coffee grounds, etc.).
- Cover with browns every time you add greens. This helps reduce odors and keeps fruit flies from throwing a house party.
- Keep loading until the drum is about 2/3 to 3/4 full. Don’t pack it tightair matters.
- Then stop adding and let it process. (If you have a dual chamber, start filling the other side.)
Step 6: MoistureAim for “Wrung-Out Sponge,” Not “Swamp”
Moisture is the sneaky variable that makes tumblers either wonderful or horrifying. The target is the classic
“wrung-out sponge” feel: damp to the touch, but not dripping. Too dry and microbes slow down. Too wet and oxygen
disappears, odors show up, and your compost starts auditioning for a role as “mysterious sludge” in a horror movie.
Easy moisture check
Grab a handful of the mix and squeeze:
- Ideal: feels damp; maybe a couple drops come out.
- Too dry: no moisture, crumbly, compost isn’t warming.
- Too wet: water trickles out; smells sour or rotten.
Fixes
- If too wet: add dry leaves, shredded cardboard, or paper; mix; leave the door cracked briefly (if safe) to vent moisture.
- If too dry: add a little water (a cup at a time), or add wetter greens; turn to distribute moisture.
Step 7: Turning ScheduleHow Often Should You Spin It?
Turning adds oxygen and mixes materials. In a tumbler, turning is literally rotating the drum. Research and
extension guidance commonly suggests that tumblers can heat and decompose faster with regular turningoften around
a couple times per weekrather than barely turning at all.
A practical turning routine
- During active composting (first couple of weeks): turn 2–3 times per week.
- After it’s heating well: keep turning 1–2 times per week to maintain oxygen and mix moisture.
- Don’t overdo it: constant turning can cool the mass and slow heating in small systems.
Tip: when you add new material during the loading phase, give it a few spins to bury scraps and mix browns in.
Once you stop adding new material, keep the turning consistent.
Step 8: TemperatureShould You Monitor It?
You don’t need to obsess, but temperature can tell you a lot. When conditions are right, compost warms up as
microbes work. In a tumbler, temperatures may not stay as high as a large open pile (volume matters), but you can
still get good active decomposition.
If you want to geek out in a helpful way, use a compost thermometer. If the pile never warms, it usually means:
not enough greens, too dry, too wet/anaerobic, or not enough volume in the drum.
Step 9: Troubleshooting Common Compost Tumbler Problems
Problem: It smells bad
Bad odors usually mean not enough oxygen and/or too much moisture. Fix it by adding browns,
turning to aerate, and avoiding piles of wet fruit scraps without dry cover.
Problem: It’s wet and clumpy (like compost lasagna)
This is classic tumbler behavior when kitchen scraps dominate. Add dry leaves, shredded cardboard, or coarse
bulking material, then mix thoroughly. Going forward, cover every greens addition with browns.
Problem: It’s dry and not breaking down
Add water gradually and mix. Also check your greens inputif it’s mostly dry leaves and paper, microbes are
basically trying to cook dinner with only crackers.
Problem: It’s not heating up
- Not enough nitrogen: add greens (coffee grounds help).
- Too dry: moisten to the wrung-out sponge level.
- Too wet/anaerobic: add browns and aerate.
- Too little material: compost needs enough mass to hold heatload closer to 2/3–3/4 full for best results.
Problem: Fruit flies or pests
Always bury food scraps in browns. Keep lids latched. Avoid meat/dairy/grease. If fruit flies appear, pause adding
new scraps, add a thick brown “cap,” and spin to cover everything.
Step 10: How Long Does Compost Take in a Tumbler?
It depends on temperature, ingredient size, moisture, and balance. Under good conditions, you might get usable
compost in 4–8 weeks. In cooler weather or with chunkier materials, it can take longer.
A very common and effective approach is:
- Loading phase: 1–3 weeks (until 2/3–3/4 full)
- Active phase: 2–6 weeks (turn regularly)
- Curing phase: 2–4 weeks (less turning, let it stabilize)
Step 11: How to Tell When Compost Is Finished
Finished compost looks and smells like good soil:
- Color: dark brown
- Texture: crumbly, not slimy
- Smell: earthy (like a forest floor), not sour or ammonia-ish
- Appearance: original ingredients mostly unrecognizable (some eggshell bits and small woody pieces are normal)
If it still looks like yesterday’s salad, it needs more time, better balance, or smaller ingredient size.
Step 12: Harvesting and Using Your Compost
Harvesting
Many tumblers have a door. Put a tarp or bin underneath, open the hatch, and scoop out the compost. If it’s
unevensome finished, some notscreen it through a simple garden sieve or hardware cloth. Return the bigger
pieces to the tumbler as “starter” for the next batch.
How to use compost in your garden
- Top-dress beds: spread 1–2 inches and let worms do the mixing.
- Mix into soil: blend a few inches into the top layer before planting.
- Mulch alternative: a thin layer around plants (not piled against stems).
- Potting mix booster: mix compost with potting soil (don’t use 100% compost for most containers).
Compost isn’t a “miracle fertilizer” in the instant, high-nitrogen sense. It’s more like a long-term soil upgrade:
improved structure, better water handling, and a steady release of nutrients as soil life continues working.
Seasonal Tips: Summer Heat and Winter Slowdowns
In hot weather, tumblers can dry out quicklyespecially if they’re in full sun. Check moisture more often and add
browns in smaller, frequent layers to prevent soggy zones from rotting fruit.
In winter, composting slows when temperatures stay low. You can still add materials, but don’t expect fast results.
Turning may be reduced during sustained freezing periods; focus on maintaining balance and moisture, then let spring
temperatures restart the microbial party.
Quick-Start “Cheat Sheet” for Compost Tumbler Success
- Always add browns with every greens addition (aim ~2–3:1 browns to greens by volume).
- Keep moisture like a wrung-out sponge.
- Turn 2–3 times per week during active composting.
- Batch compost: fill, then stop adding and let it finish.
- Avoid meat, dairy, grease, and pet waste.
- Chop/shred materials to speed breakdown.
Real-World Experiences: What Using a Compost Tumbler Feels Like (and What People Learn the Hard Way)
If you’re new to a compost tumbler, the first experience most gardeners have is a burst of optimism. The tumbler is
clean, contained, and promises a future where your trash can is mysteriously lighter. Week one often starts with
heroic intentions: “I will compost EVERYTHING.” Then reality shows up holding a bag of soggy melon peels.
The most common early lesson is that kitchen scraps are not “the whole compost story.” Many people discoververy
quicklythat tumblers can turn into a damp, heavy lump if you add lots of fruit and vegetable waste without enough
dry browns. The fix is usually simple: stockpile browns before you begin. A trash bag of dry leaves, a box of
shredded cardboard, or a paper-shredder pile becomes your secret weapon. Once you get in the habit of tossing in a
“brown blanket” every time you add scraps, the tumbler stops smelling questionable and starts smelling like…well,
dirt. Which is the goal.
Another classic experience is the “compost doesn’t look like compost” moment. People expect finished compost to
appear overnight as perfectly uniform, fluffy black soil. In reality, compost often finishes unevenly. Eggshell
fragments linger. A stubborn avocado pit acts like it’s paying rent. Twigs stick around longer than you’d like.
Most gardeners learn to screen compost, return the larger pieces, and accept that the tumbler is a systemone batch
feeds the next. That loop is part of why tumbler composting gets easier over time.
Many tumbler users also notice a rhythm: the drum heats best when it’s loaded enough to hold warmth, but still airy
enough to breathe. People who “drip-feed” tiny amounts daily often report slow progress, while those who load to
about two-thirds full and then let the batch cook see faster results. It’s an oddly satisfying milestone the first
time you decide, “Okay, no more scraps in this chamber. It’s compost time,” and then actually stick to it.
There’s also a very relatable turning habit that develops. Some folks turn the tumbler like it’s a Vegas slot
machineevery time they walk bythen wonder why it isn’t heating. Others forget turning exists until a month later.
Most eventually land on something like a twice-a-week routine, because it fits normal life: maybe a quick spin on
Tuesday and Saturday. The experience becomes less like “a project” and more like brushing your teethsmall, regular,
and surprisingly effective.
Finally, the best “experience moment” is harvesting day. The first time you open the hatch and a dark, earthy smell
comes outforest-floor smell, not garbage smellit feels like you cheated the universe. Your scraps didn’t rot in a
landfill; they turned into something your garden will genuinely love. And once you spread that compost around
tomatoes or mix it into a bed and see better soil texture and healthier plants, a compost tumbler stops being a
gadget and becomes part of how you garden.
Conclusion
A compost tumbler can be one of the easiest ways to recycle kitchen scraps and yard waste into nutrient-rich compost
as long as you treat it like a system, not a magic box. Keep a steady supply of browns, aim for wrung-out sponge
moisture, turn it consistently, and compost in batches so a mix can actually finish. Do that, and you’ll turn “trash”
into an honest-to-goodness soil upgrade your plants can use all season long.





