Table of Contents >> Show >> Hide
- Why Cookie Doneness Is So Easy to Misjudge
- The Universal Cookie Doneness Checklist
- How to Test Different Types of Cookies for Doneness
- Drop Cookies: Chocolate Chip, Oatmeal, and Similar Classics
- Sugar Cookies and Cutout Cookies
- Peanut Butter Cookies
- Dark Cookies: Chocolate, Molasses, and Gingerbread
- Shortbread and Butter Cookies
- Thumbprint Cookies and Sandies
- Macaroons
- Biscotti
- Bar Cookies, Blondies, and Brownie-Style Cookies
- Large, Thick, or Stuffed Cookies
- When the Toothpick Test Helps and When It Absolutely Does Not
- Common Mistakes That Lead to Overbaked or Underbaked Cookies
- A Foolproof 5-Step Routine for Testing Cookie Doneness
- Final Thoughts: The Best Doneness Test Is the One That Matches the Cookie
- Experience-Based Notes from Real Kitchens
Cookies are sneaky little things. One minute they look pale, puffy, and suspiciously underbaked. The next minute they are crisp enough to double as coasters. That is why learning how to test cookies for doneness matters more than memorizing a bake time from a recipe card that may have been written for a different oven, a different pan, and possibly a parallel universe where no one gets distracted by the smell of brown butter.
If you have ever pulled a tray too early and ended up with cookie puddles, or left it in just a bit too long and created crunchy regret, you are not alone. The good news is that most cookies leave clues. The trick is knowing which clues matter for which kind of cookie. A soft chocolate chip cookie should not look done the same way a biscotti does. A peanut butter cookie behaves differently from a sugar cutout. A dark molasses cookie can fool your eyes. And cookie bars? They belong in their own dramatic category.
This guide breaks down the best ways to test any kind of cookie for doneness, from classic drop cookies to shortbread, bars, cutouts, crinkles, macaroons, and more. By the end, you will know what to look for, what to touch, what not to trust, and when to stop staring into the oven window like it is a crystal ball.
Why Cookie Doneness Is So Easy to Misjudge
The biggest reason cookies are tricky is simple: they continue baking after you take them out of the oven. That residual heat from the hot pan keeps cooking the bottoms and centers for a few minutes. In baking terms, that is called carryover cooking. In real life, it is the reason a cookie that looked slightly soft on the tray can turn out perfect five minutes later.
Another problem is that not all cookies show doneness the same way. Pale butter cookies may be done before they look brown. Chocolate cookies hide their browning. Peanut butter cookies already start brownish, so color is not always helpful. Bar cookies can be set around the edges and still gooey in the center. In other words, the toothpick test is not a universal superhero. Sometimes it saves the day. Sometimes it just stares blankly while your cookies overbake.
That means the best way to test cookies for doneness is to use a combination of signs: edge color, center texture, surface sheen, firmness, bottom color, aroma, and cooling behavior.
The Universal Cookie Doneness Checklist
Before we get into cookie-by-cookie specifics, start with these broad signs. They work for most recipes and will instantly make you a better cookie baker.
1. Look at the edges first
The edges usually finish baking before the center. For many cookies, the best signal is that the edges look set and lightly golden. Not dark brown. Not deeply toasted. Just lightly golden and no longer wet-looking.
2. Check whether the center still looks raw or just soft
Soft is good for many cookies. Raw is not. A soft center usually looks puffed or slightly underdone but no longer shiny-wet. A raw center looks glossy, loose, or almost like batter. If the middle is still glistening like it is asking for another minute, it probably needs one.
3. Watch the surface sheen
Many cookies lose their shiny look as they finish. That change from glossy to more matte can be a reliable clue, especially for drop cookies, sugar cookies, and bar-style doughs.
4. Gently test firmness
If the recipe allows it, lightly tap or nudge the edge with a spatula. If the edge feels set and the cookie does not slosh around like pudding in a tiny sweater, it is probably close. Be careful here because hot sugar is not forgiving.
5. Peek at the bottom when needed
For cookies that stay pale on top, such as shortbread, thumbprints, sandies, or some sugar cookies, gently lift one edge with a thin spatula. A lightly golden bottom often tells the truth when the top is still being mysterious.
6. Trust the cooling period
A cookie that seems too soft right out of the oven may firm up beautifully after three to five minutes on the sheet. If it holds together after a short rest, you probably nailed it.
How to Test Different Types of Cookies for Doneness
Drop Cookies: Chocolate Chip, Oatmeal, and Similar Classics
For drop cookies, the classic doneness signs are set edges and soft centers. The edges should be lightly browned, while the middle can still look a little puffy or slightly underdone. This is especially true if you want chewy cookies rather than crunchy ones.
Chocolate chip cookies are usually done when the edges or bottoms are golden and the tops look mostly set. If you want a softer center, pull them when the middle still looks a touch soft. If you bake until the entire top looks fully firm, you may end up with a crisp cookie. Neither is wrong. It just depends on your goal.
Oatmeal cookies follow similar logic. Look for light browning around the edges and a center that is set, not wet. Once the edges go dark, the line between “hearty” and “hockey puck” gets very thin.
Sugar Cookies and Cutout Cookies
Sugar cookies are a little more delicate because many bakers want them pale, tender, and smooth enough for decorating. In that case, you are not looking for deep color. You are looking for edges that appear firm and cookies that look set without being melty or soft in the middle.
For rolled cutout cookies, the best result often comes when the edges are just barely turning golden but the overall cookie is still light in color. If you wait for strong browning across the top, you may dry them out. If you need a second check, peek underneath. A lightly browned bottom usually confirms they are done.
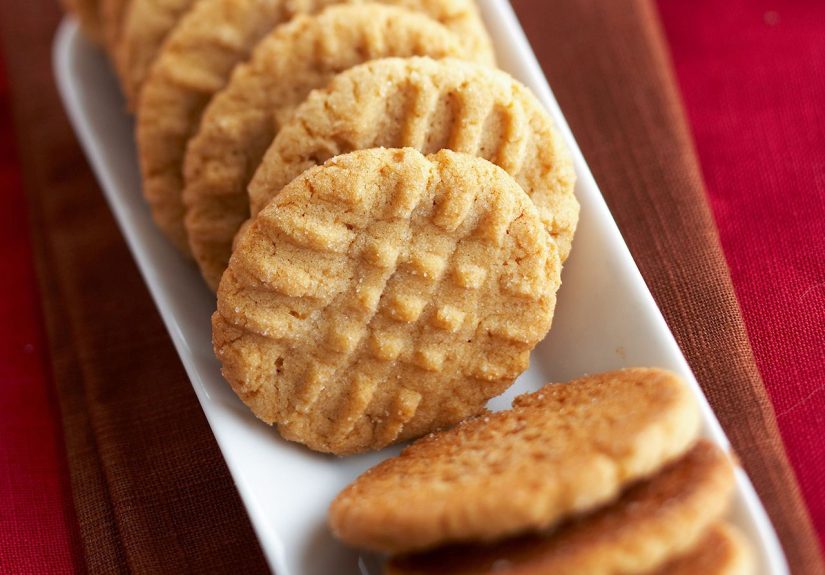
Peanut Butter Cookies
Peanut butter cookies love to fool people because the dough itself is tan or golden before it even enters the oven. That means “look for browning” is not always enough. Focus on the edges. They should be light brown and set. The cookie should also look less shiny on top and feel a little firmer if nudged gently.
One more thing: peanut butter cookies continue to firm up as they cool. Pulling them slightly earlier is usually better than overbaking them into dry little frisbees.
Dark Cookies: Chocolate, Molasses, and Gingerbread
Dark cookies are the trickiest because you cannot rely on color. Chocolate cookies can be done long before your eyes believe it. Molasses and gingerbread doughs already look brown. That is why touch and texture matter more here.
For dark cookies, gently tap the edge or press it very lightly with a spatula. If it feels set, you are likely there. The tops may still look soft, and that is okay. Crinkle cookies are a special case: you want the surface cracked and the edges dry-looking, while the center stays soft.
If you wait until a dark cookie looks fully dry all over, you often overshoot the sweet spot.
Shortbread and Butter Cookies
Shortbread is subtle. It is not supposed to look dramatic. Many shortbread recipes are done when the bottom is lightly golden and the center feels set. Some pieces, especially wedges or rounds, can be fragile when warm, so lifting them too early is risky. In those cases, look for firm centers and faint color at the edges or underside.
Shortbread should not usually emerge dark brown unless the recipe is aiming for a very toasted style. Pale gold is your friend.
Thumbprint Cookies and Sandies
These buttery cookies often look done from the top before the bottoms are fully baked. A quick peek underneath can help. If the bottom is lightly browned and the cookie holds its shape, it is ready. If the bottom is still pale and soft, give it a little longer.
Macaroons
Coconut macaroons are usually done when they are just firm to the touch but still soft in the middle. The outside may get a little golden, especially on the ridges or tips. The goal is a cookie with structure, not a dried-out coconut rock.
Biscotti
Biscotti are baked twice, which means their doneness test is different from nearly every other cookie. After slicing and returning them to the oven, the cut sides should dry out and firm up. If you poke the side and it feels soft like cake, it needs more time. If it feels firm with a slight give, you are in crunchy-cookie territory. If it feels fully firm, it is ready for maximum dunkability.
Bar Cookies, Blondies, and Brownie-Style Cookies
Bar cookies deserve their own rules. For cakier cookie bars, a toothpick can help. You are usually looking for moist crumbs, not wet batter. For gooey blondies or fudgy brownie-style bars, timing and edge cues matter more than a perfectly clean toothpick.
Look for edges that are set and beginning to pull slightly from the pan, while the center still has a little softness. Crumb-topped bars are usually done when the topping turns light golden. If the middle still ripples dramatically when the pan moves, it is probably not ready.
Large, Thick, or Stuffed Cookies
Bakery-style cookies, stuffed cookies, and giant cookies need extra patience. The outer edge may look ready long before the center is baked through. Here, your best clue is a fully set outer ring with a center that looks soft but not raw. Give thick cookies plenty of resting time on the pan after baking. That final set often happens outside the oven.
When the Toothpick Test Helps and When It Absolutely Does Not
The toothpick test is useful for cake-like bars, blondies with a cakier structure, and some soft, puffy cookies. If it comes out with moist crumbs, you are usually in a good place. If it comes out coated in wet batter, keep baking.
But for classic chewy drop cookies, the toothpick test is not always helpful. You can pierce a soft center that would have turned perfect during cooling and convince yourself the tray needs more time. That is how many good cookies become dry cookies. So use the toothpick mostly for bars and cakier bakes, not as your one-size-fits-all cookie judge.
Common Mistakes That Lead to Overbaked or Underbaked Cookies
Only trusting the timer
Recipe times are a range, not a commandment carved in stone. Start checking a couple of minutes early, especially with a new oven or pan.
Using a hot baking sheet for the next batch
If you load dough onto a hot pan, the cookies may spread before they properly set. That changes both shape and bake time. Let the pan cool before round two.
Ignoring your pan and liner
Dark pans, parchment, silicone mats, and sheet material can all affect browning and time. Two kitchens can use the same dough and get different results just because one pan runs hotter or the liner slows browning.
Waiting for soft cookies to feel firm in the oven
If you want chewy cookies, do not wait until the centers feel fully firm while they are still in the oven. They will finish setting as they cool.
Eating raw dough to “check” doneness
Resist the temptation. Raw flour and raw eggs can carry harmful germs. Underbaked does not mean safe-to-snack straight from the bowl. If you want edible dough, use a product specifically labeled safe to eat raw.
A Foolproof 5-Step Routine for Testing Cookie Doneness
- Set your timer for 2 minutes earlier than the shortest suggested bake time.
- Check the edges first for firmness and light browning.
- Look at the center for “soft but set,” not glossy and wet.
- If needed, lift one cookie gently to inspect the bottom or tap an edge with a spatula.
- Let the tray rest for 3 to 5 minutes before deciding whether the texture is right.
That routine works because it uses multiple signals instead of relying on one dramatic gesture. Baking is less about wizardry and more about pattern recognition with butter.
Final Thoughts: The Best Doneness Test Is the One That Matches the Cookie
If there is one thing to remember, it is this: there is no single best way to test every cookie for doneness. The right method depends on the style of cookie in front of you. For drop cookies, trust set edges and soft centers. For sugar cookies, look for structure more than color. For dark cookies, use touch. For bars, use edge cues and sometimes a toothpick. For biscotti, check firmness after the second bake. For shortbread, look underneath or watch for a set center.
Once you stop asking every cookie to behave the same way, baking gets easier. Your trays get more consistent. Your cookies get better. And your odds of serving something that tastes like toasted cardboard drop dramatically, which is really all any of us want from life.
Experience-Based Notes from Real Kitchens
One of the most relatable experiences in cookie baking is realizing that the “perfect” bake time in a recipe is really just a starting point. Home bakers often discover this the hard way. The first tray comes out too pale, the second tray goes a minute longer and turns out perfect, and the third tray mysteriously bakes faster because the kitchen is warmer, the sheet pan is still slightly hot, or someone lined the pan differently. That is why cookie doneness is often learned through repetition rather than a stopwatch alone.
A very common real-world pattern goes like this: a baker follows a chocolate chip cookie recipe that says 10 to 12 minutes. At 10 minutes, the cookies still look soft in the middle, so the tray stays in. At 12 minutes, they look safer. By the time they cool, though, the centers are no longer chewy. They are crisp. On the next batch, the baker pulls them at 10 and a half minutes even though the centers look slightly underdone. Suddenly the texture is exactly right. That tiny adjustment teaches a bigger lesson: cookies often finish their last bit of baking on the sheet, not in the oven.
Another frequent experience happens with sugar cookies. People often wait for obvious browning because that feels reassuring. But decorated sugar cookies usually taste and look better when pulled earlier, when the edges are barely colored and the tops still look pale but set. Bakers who learn this once rarely go back. The cookies hold their shapes better, stay more tender, and do not turn into crunchy little ornaments.
Dark cookies create their own kind of drama. Many bakers assume chocolate or molasses cookies need extra time because they cannot easily see browning. Then the cookies cool into dry, cakey discs. Experienced bakers eventually switch methods. Instead of looking for color, they tap the edge, watch for the surface to lose its wet sheen, and trust the cookie to finish setting during cooling. It feels weird the first time. Then it feels brilliant.
There is also the classic “sacrificial test cookie” strategy, which deserves respect. Smart bakers often bake one or two cookies first before committing a full tray. That mini test reveals whether the dough spreads too much, whether the oven runs hot, and what the best doneness cue looks like for that exact recipe. It is a humble move, but it saves entire batches.
And then there is the pan lesson, which almost everyone learns eventually. The same dough baked on a dark sheet, a shiny pan, parchment, or a silicone mat can behave differently. Many bakers think they messed up the recipe when really they just changed the equipment. Once you experience how much pans and liners affect browning, you become less obsessed with exact minutes and more focused on visual cues.
That is the real secret behind testing any kind of cookie for doneness: experience teaches you to notice patterns. The edges speak first. The center tells you what the final texture will be. The pan changes the pace. Cooling finishes the story. And after enough batches, you stop guessing and start knowing. That is when cookie baking gets really fun.





