Table of Contents >> Show >> Hide
- What Is Fabric Stenciling?
- Supplies You Need To Stencil A Pillowcase
- Choose The Right Pillowcase
- Pre-Wash And Iron The Pillowcase
- Plan Your Design Before Painting
- Protect The Back Of The Pillowcase
- Secure The Stencil
- Use The Right Amount Of Paint
- How To Stencil A Pillowcase Step By Step
- Best Paint For Stenciling Pillowcases
- Design Ideas For A Stenciled Pillowcase
- How To Prevent Paint Bleeding
- How To Stencil Multiple Colors
- How To Fix Common Stenciling Mistakes
- How To Heat-Set A Stenciled Pillowcase
- How To Wash A Stenciled Pillowcase
- Safety And Comfort Tips
- Creative Variations To Try
- Experience Notes: What You Learn After Stenciling A Few Pillowcases
- Conclusion
Stenciling a pillowcase is one of those DIY projects that looks fancy enough to impress guests but is secretly friendly enough for beginners. It is the craft-world equivalent of making boxed brownies and adding sea salt on top: easy, affordable, and somehow sophisticated. With the right stencil, fabric paint, and a little patience, a plain pillowcase can become custom bedroom decor, a handmade gift, or a seasonal accent that did not require you to sell a kidney at a boutique home store.
The best part? You do not need to be a professional artist. A stencil does most of the drawing for you, which means your main job is to keep the fabric flat, use light layers of paint, and resist the urge to rush. That last part is important. Paint has a way of punishing impatience, usually by bleeding under the stencil and creating what can only be described as “abstract regret.”
In this guide, you will learn how to stencil a pillowcase from start to finish, including what supplies to use, how to prepare the fabric, how to prevent paint bleeding, how to heat-set the design, and how to wash your finished pillowcase without turning your masterpiece into laundry confetti.
What Is Fabric Stenciling?
Fabric stenciling is the process of applying paint through a cut-out design onto fabric. The stencil acts as a guide, creating clean shapes, letters, borders, or patterns. On a pillowcase, stenciling works especially well because the surface is flat, manageable, and easy to customize.
You can stencil a single monogram, a repeating floral pattern, a quote, geometric shapes, holiday artwork, or a modern minimalist design. Whether your style is farmhouse, boho, coastal, cottagecore, or “I saw this on Pinterest at 1:00 a.m.,” there is a stencil design that fits.
Supplies You Need To Stencil A Pillowcase
Before you start, gather everything in one place. Nothing ruins a peaceful craft session faster than realizing your paintbrush is missing while your stencil is already taped down.
Basic Materials
- Plain cotton or cotton-blend pillowcase
- Fabric stencil
- Fabric paint or acrylic paint mixed with fabric medium
- Stencil brush, foam pouncer, or small sponge
- Painter’s tape or stencil tape
- Cardboard, freezer paper, or plastic sheet for inside the pillowcase
- Paper towels
- Iron and pressing cloth
- Scrap fabric for testing
Optional Tools
- Measuring tape or ruler
- Water-soluble fabric pencil
- Spray adhesive for stencils
- Craft knife for custom stencil designs
- Cutting machine for vinyl stencils
- Small detail brush for touch-ups
Choose The Right Pillowcase
The easiest pillowcase to stencil is made from smooth cotton or a cotton-polyester blend. These fabrics usually accept paint well, hold detail nicely, and are easy to wash. Linen can also look beautiful, especially for rustic or relaxed designs, but its texture may create a softer edge. Silk and satin are trickier because they are slippery and delicate, so beginners should save those for later.
Light-colored pillowcases are the most beginner-friendly because fabric paint shows up clearly. White, cream, beige, pale gray, and pastel pillowcases are excellent choices. Dark pillowcases can work too, but you will need opaque fabric paint or metallic paint designed to stand out on deeper fabric colors.
Pre-Wash And Iron The Pillowcase
Always pre-wash the pillowcase before stenciling. New fabric may contain sizing, softeners, dust, or finishing chemicals that can interfere with paint adhesion. Wash it without fabric softener, then dry it completely. Fabric softener may make your pillowcase feel fluffy and luxurious, but it can also make paint behave like it has commitment issues.
After washing, iron the pillowcase until it is smooth. Wrinkles under a stencil are not charming. They create gaps, bumps, and uneven paint marks. A flat fabric surface is the foundation of a crisp stencil design.
Plan Your Design Before Painting
Do not place the stencil randomly and hope for the best. That strategy works for tossing socks into a drawer, not for decorating fabric. Lay the pillowcase flat and decide where the design should go. Common placements include the center, one corner, a border along the opening, or a repeating pattern across the entire front.
If you are stenciling words or a monogram, use a ruler to keep everything straight. Mark light guide points with a water-soluble fabric pencil. For repeating patterns, measure the spacing between stencil placements so the final look feels intentional instead of “my coffee kicked in halfway through.”
Protect The Back Of The Pillowcase
Slide a piece of cardboard, freezer paper, or plastic inside the pillowcase before painting. This creates a firm working surface and prevents paint from bleeding through to the back layer. Smooth the pillowcase over the insert so there are no folds or ridges.
This step is small but mighty. Without an insert, paint can seep through the front and leave surprise marks on the back. Surprise parties are fun. Surprise paint stains are not.
Secure The Stencil
Place the stencil where you want the design. Tape the edges with painter’s tape or stencil tape. If the stencil has delicate details, a light coat of repositionable spray adhesive on the back can help keep it flat. Let the adhesive become tacky before placing it on the fabric, and avoid spraying too much.
The stencil should sit snugly against the pillowcase. Any lifted edges give paint an invitation to sneak underneath. If your stencil includes thin lines, letters, or small shapes, press those areas gently before painting.
Use The Right Amount Of Paint
The golden rule of stenciling a pillowcase is simple: less paint is better. Load your brush or sponge, then blot most of the paint onto a paper towel before touching the stencil. The tool should feel almost dry. This dry-brush method helps prevent bleeding and gives you more control.
If the first layer looks too light, do not panic. Build the color with multiple thin coats instead of one thick coat. Thick paint may look satisfying for three seconds, but then it can seep under the stencil, dry stiff, or crack after washing.
How To Stencil A Pillowcase Step By Step
Step 1: Wash, Dry, And Iron
Start with a clean, dry pillowcase. Iron it smooth so the fabric lies flat. Pay extra attention to the area you plan to stencil.
Step 2: Insert Cardboard
Place cardboard or freezer paper inside the pillowcase. This keeps paint from soaking through and gives your brush a stable surface.
Step 3: Position The Stencil
Lay the stencil in place. Use a ruler if needed, then secure it with tape. Make sure the design is straight and firmly attached.
Step 4: Load And Blot The Brush
Dip your stencil brush, sponge, or pouncer into fabric paint. Blot the excess paint onto a paper towel until the tool is lightly coated.
Step 5: Apply Paint Gently
Use an up-and-down pouncing motion or a light circular motion. Keep the brush vertical and avoid dragging it sideways under the stencil edges.
Step 6: Add Thin Layers
Let each light layer build the color gradually. If you want stronger coverage, apply another thin coat rather than flooding the stencil.
Step 7: Lift The Stencil Carefully
Once the painted area is covered, peel the stencil straight up while the paint is still slightly wet. This helps prevent dried paint from pulling or cracking at the edges.
Step 8: Let The Paint Dry
Place the pillowcase flat and let it dry fully. Overnight drying is ideal, especially if the design has multiple colors or thicker areas.
Step 9: Heat-Set The Design
After the paint is dry, follow the paint manufacturer’s instructions for heat-setting. Usually, this means placing a pressing cloth over the design and ironing it without steam. Heat-setting helps bond the paint to the fabric and improves washability.
Step 10: Wash With Care
Wait at least 24 to 72 hours before washing, depending on your paint instructions. Turn the pillowcase inside out, wash gently in cold water, and avoid harsh bleach.
Best Paint For Stenciling Pillowcases
Fabric paint is the easiest option because it is made to remain flexible after drying. It moves with the fabric better than regular craft paint. If you already have acrylic paint, you can mix it with fabric medium to improve softness and durability.
For pillowcases, choose soft fabric paint whenever possible. Puffy paint and dimensional paint can look fun, but they may feel uncomfortable if the pillowcase is used for sleeping. If the pillow is decorative only, you have more freedom to experiment with texture, metallic finishes, or bold layered effects.
Design Ideas For A Stenciled Pillowcase
A stenciled pillowcase can be subtle, playful, elegant, or wildly dramatic. Here are a few ideas to inspire your project:
- Monogram pillowcase: Add initials to one corner for a classic hotel-inspired look.
- Botanical border: Stencil leaves, vines, or flowers along the pillow opening.
- Modern geometric pattern: Use triangles, arches, dots, or lines for a clean contemporary style.
- Kids’ room design: Try stars, dinosaurs, rainbows, moons, or playful letters.
- Seasonal pillowcase: Create pumpkins for fall, snowflakes for winter, or lemons for summer.
- Quote pillowcase: Use short phrases like “Sweet Dreams” or “Nap Queen.” Choose wisely. Pillowcases have opinions.
How To Prevent Paint Bleeding
Paint bleeding is the most common stenciling problem, but it is usually preventable. First, use very little paint. Second, keep the stencil flat and secure. Third, apply paint with gentle tapping instead of brushing aggressively across the surface.
If you are using a large stencil, tape the edges and consider adding small pieces of tape inside open areas where possible. Work from the outside of each cut-out shape toward the center. This helps push paint away from the stencil edge instead of under it.
Testing is also important. Before painting the actual pillowcase, try the same stencil and paint on scrap fabric. This gives you a preview of color, texture, and technique. Think of it as a tiny rehearsal before opening night.
How To Stencil Multiple Colors
For multi-color designs, use one brush or sponge per color. This keeps colors clean and prevents accidental muddy blending. Let one color dry slightly before adding another if the stencil areas are close together.
If the design has overlapping layers, start with the lightest color first and finish with darker details. For example, in a floral design, stencil pale green leaves first, then add darker green accents, then finish with flowers. Metallic accents should usually go last so they stay bright and crisp.
How To Fix Common Stenciling Mistakes
Paint Bled Under The Stencil
If the mistake is small, let the paint dry and touch up the edge with a tiny brush and matching background paint if available. If the pillowcase is white, a small amount of opaque white fabric paint may help clean up the area.
The Design Looks Too Light
Reposition the stencil carefully and add another thin layer. Do not overload the brush. A second light coat usually looks better than one heavy coat.
The Stencil Shifted
Stop painting immediately. Lift the stencil, wipe any wet paint from the back, and realign it. If the shift created a shadow effect, you can sometimes turn it into an intentional layered look. Crafting calls this “creative recovery.” Everyone else calls it “saving the project.”
The Paint Feels Stiff
Stiffness often happens when too much paint is applied. Next time, use softer fabric paint, thinner layers, or fabric medium. For the current project, wash gently after the paint has fully cured to help soften the fabric slightly.
How To Heat-Set A Stenciled Pillowcase
Heat-setting helps make the design more durable. Once the paint is completely dry, place a clean pressing cloth over the stenciled area. Set the iron to the temperature recommended for the fabric and paint. Do not use steam unless the paint instructions specifically allow it.
Press the iron over the design in sections. Avoid sliding the iron directly over exposed paint. The pressing cloth protects both the pillowcase and your iron. Nobody wants a permanent floral stencil on the ironing plate unless the iron is also joining the craft club.
How To Wash A Stenciled Pillowcase
After the paint has cured, turn the pillowcase inside out before washing. Use cold water and a mild detergent. Choose a gentle cycle and skip bleach. Air drying is best, but low-heat tumble drying may be safe if the paint label allows it.
If the pillowcase is decorative and rarely used, it may only need occasional spot cleaning. If it is used for sleeping, wash it regularly but gently. A well-stenciled pillowcase can last through many washes when the fabric is prepared, painted, cured, and cleaned correctly.
Safety And Comfort Tips
Work in a well-ventilated area, especially if you use spray adhesive or fabric spray paint. Protect your table with plastic, craft paper, or an old towel. Keep paint away from eyes and skin, and wash your hands after crafting.
If the pillowcase will be used for sleeping, keep the design away from the center where your face rests. A corner design, border, or outer edge placement is more comfortable. Also choose soft fabric paint rather than thick dimensional paint.
Creative Variations To Try
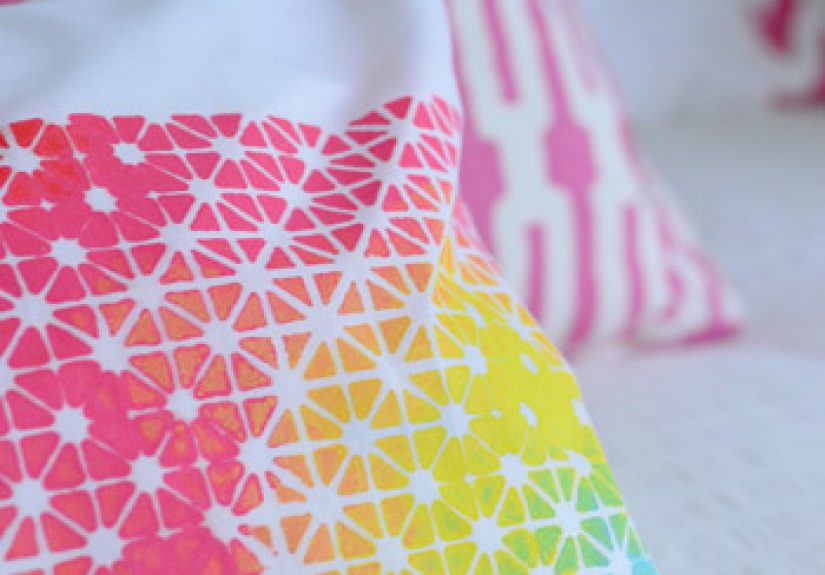
Once you master basic pillowcase stenciling, you can experiment with different effects. Try ombré stenciling by blending two similar colors from light to dark. Create a distressed look by using a nearly dry brush and uneven pressure. Add a border using painter’s tape and repeat a small stencil along the edge.
You can also combine stenciling with embroidery, fabric markers, or iron-on details. For example, stencil a wreath shape and embroider small accents around it. Or stencil a name and add tiny painted stars around the letters. The pillowcase is your canvas, and luckily, it is much cheaper than actual art school.
Experience Notes: What You Learn After Stenciling A Few Pillowcases
After making a few stenciled pillowcases, one lesson becomes very clear: the project is simple, but the details matter. The first pillowcase often teaches you more than any tutorial. You may discover that your brush had too much paint, your stencil needed more tape, or your “perfectly centered” design was actually leaning like it had just heard bad news. That is normal. Fabric stenciling rewards patience and small adjustments.
One helpful experience is to always test the paint color on scrap fabric first. Paint can look different on fabric than it does in the bottle. A navy blue may dry softer, a metallic gold may need two coats, and white paint on dark fabric may require extra opacity. Testing also shows whether the fabric absorbs paint quickly. Thin cotton may drink paint faster than expected, while tighter weaves may keep the color sitting on top longer.
Another lesson is that stencil placement can completely change the final look. A centered design feels bold and decorative, while a corner design feels subtle and elegant. A border along the pillowcase opening can make a basic pillowcase look like custom bedding. If you are making a gift, a small monogram in one corner often looks more polished than a large design across the whole front. Bigger is not always better, despite what throw-pillow aisles at home stores seem to believe.
The brush also matters more than beginners expect. A foam pouncer is great for dots, bold shapes, and fast coverage. A stencil brush gives more control for detailed patterns. A makeup sponge can work in a pinch, but it may hold too much paint unless you blot carefully. The real trick is not the tool itself but how dry it is when it touches the stencil. When in doubt, blot again. Your paper towel should look like it did more painting than the pillowcase at first.
Working slowly around the stencil edges also improves results. Many people start in the center, but cleaner edges often come from gently pouncing around the cut-out borders first, then filling the middle. This approach helps define the shape without forcing paint underneath. If the stencil is large, hold one section down with your fingers while painting nearby. Just keep your fingers clean, unless fingerprint accents are part of your artistic vision.
Heat-setting is another step that becomes easier with practice. The key is to wait until the paint is fully dry. Rushing with an iron can smear or transfer paint onto the pressing cloth. Use gentle pressure, keep the iron moving from section to section, and avoid steam. After heat-setting, the design usually feels more finished and secure.
Finally, handmade pillowcases have a charm that store-bought versions rarely match. Slight variations are not failures; they are proof that a real person made the piece. A tiny uneven edge or softer corner can make the pillowcase feel warm and personal. The goal is not machine-level perfection. The goal is a pillowcase that looks beautiful, fits your style, and makes your bed, couch, or guest room feel a little more thoughtful.
Conclusion
Learning how to stencil a pillowcase is an easy way to turn plain fabric into personalized home decor. With a clean pillowcase, a secure stencil, soft fabric paint, and light layers, you can create crisp designs without advanced art skills. The most important tips are simple: pre-wash the fabric, use a cardboard insert, blot excess paint, apply thin coats, let the design dry fully, and heat-set it before washing.
Whether you want a custom monogram, a seasonal accent, a handmade gift, or a stylish bedroom update, fabric stenciling gives you creative freedom without a complicated setup. Start with one pillowcase, learn from the process, and soon every plain textile in your house may begin to look suspiciously stencil-worthy.




