Table of Contents >> Show >> Hide
- Before You Touch the Paw: A 30-Second Safety Check
- Step 1: Set Up a “Cat Spa” (Translation: Good Lighting + Zero Drama)
- Step 2: Calm the Patient and Protect the Staff (That’s You)
- Step 3: Do a Quick Paw Scan (Look Before You Touch)
- Step 4: Gently Restrain (The Burrito Method Is a Classic for a Reason)
- Step 5: Rinse First (Because Sometimes the Problem Is Just Dirt)
- Step 6: Soak to Loosen Debris (A Little Warm Water Goes a Long Way)
- Step 7: Remove Only What’s Superficial and Easy to Grab
- Step 8: Clean the Area and Protect the Paw (Lightly, Temporarily)
- Step 9: Prevent Licking and Monitor for 48 Hours
- Special Situations (Because Cats Love to Be Complicated)
- Prevention: Make Paw Checks a Normal Part of Life
- FAQ: Quick Answers to Common “Help!” Moments
- Real-Life Experiences: What Actually Helps (and What Absolutely Doesn’t)
- Conclusion
Cats are basically tiny, furry stunt performersuntil a speck of grit gets wedged between their toes and suddenly
they’re limping like they just finished a marathon on LEGO. Debris stuck in a cat paw is common: litter clumps,
burrs, tiny pebbles, sticky sap, even a rogue thorn. The good news? Many superficial bits can be removed safely at
home if your cat is calm and the debris is easy to reach. The important news? If it’s deep, bleeding, infected, or
your cat is in serious pain, it’s a “call the vet” situationnot a “let me become an amateur podiatrist” situation.
Below is a practical, cat-parent-friendly, vet-aligned guide in nine steps. The vibe is calm, the lighting is good,
and the bribery (treats) is fully legal in all 50 states.
Before You Touch the Paw: A 30-Second Safety Check
Stop and call your veterinarian (or urgent care) first if you notice any of the following:
- Heavy bleeding, a deep cut, or a puncture wound (especially if you can’t see the full object).
- A nail partially torn off, hanging, or bleeding heavily.
- Swelling, heat, pus, a bad smell, or your cat won’t let you get near the paw.
- The debris is embedded (you’d have to “dig” to get it out) or it looks like glass/metal.
- Sudden, severe lameness, crying, hiding, or refusing to bear weight.
- Chemicals on the paw (cleaners, solvents, antifreeze, strong adhesives)or your cat is licking at it nonstop.
When in doubt, choose the safer option: professional help. Deep foreign material can cause infection, abscesses,
or ongoing pain if it isn’t removed and cleaned properly.
Step 1: Set Up a “Cat Spa” (Translation: Good Lighting + Zero Drama)
Choose a small, quiet room with a door you can close (bathroom = classic). You want bright light, a stable surface,
and minimal escape routes. Gather supplies before you pick up your cat so you’re not holding a squirmy fur torpedo
while rummaging for tweezers.
Helpful supplies:
- A clean towel (or two)
- Good light (lamp/flashlight) and, if you have it, a magnifying glass
- Saline or warm water + mild soap
- Clean tweezers (and/or a soft, damp cloth)
- Gauze pads and self-adhesive wrap (optional for temporary protection)
- Cat treats (the higher the value, the higher your success rate)
- An e-collar/cone (if your cat is a champion paw-licker)
Step 2: Calm the Patient and Protect the Staff (That’s You)
If your cat is stressed or painful, they may bite or scratchno matter how deeply you love them. Speak softly,
move slowly, and consider recruiting a helper. If your cat is already hissing, growling, or panicking, don’t
escalate into a wrestling match. Take a break and call your vet for guidance.
Pro tip: give a treat before you start. This isn’t briberyit’s “establishing diplomatic relations.”
Step 3: Do a Quick Paw Scan (Look Before You Touch)
Look at the paw from multiple angles. Cats can trap debris:
- Between toes
- Along the edges of paw pads
- In fur around the toes (especially if the fur is longer)
- Near the nail beds
Watch for clues: excessive licking, limping, holding the paw up, or a “don’t touch my foot, peasant” reaction when
you approach.
Step 4: Gently Restrain (The Burrito Method Is a Classic for a Reason)
Many cats do best with a gentle “towel wrap.” Place your cat on the towel, wrap snugly around the body, and leave
one paw out at a time. The goal is comfort and control, not immobilization via rage.
If your cat is calm, you may not need the wrap. If your cat is not calm, the wrap can prevent sudden escape launches
that end with you wearing a new set of “decorative scratches.”
Step 5: Rinse First (Because Sometimes the Problem Is Just Dirt)
Before reaching for tweezers, try the least invasive approach:
- Rinse the paw with lukewarm water (not hot).
- Use a soft, damp cloth to wipe the pads and between toes.
- If debris is stuck in fur, gently separate fur strands with your fingers while rinsing.
If the paw is muddy or sandy, a gentle wash with mild soap can help. Avoid harsh products. Also, skip alcohol and
hydrogen peroxidethese can irritate tissue and delay healing.
Step 6: Soak to Loosen Debris (A Little Warm Water Goes a Long Way)
If the debris is stubborn (think dried litter clump or tiny grit wedged in a pad crease), soaking can soften it.
Use a shallow bowl with lukewarm water and let the paw soak for a few minutes. Keep it short and sweetmany cats
consider soaking a personal insult.
If there’s mild swelling and your cat tolerates it, an Epsom salt soak may be soothing. Don’t force it. A stressed cat
plus a water bowl equals chaos.
Step 7: Remove Only What’s Superficial and Easy to Grab
This is the big rule: only remove debris you can clearly see and easily grasp. If you’d have to dig,
squeeze, or “go fishing,” stop.
How to remove common debris:
- Burrs/plant bits: Use fingers or tweezers to lift away from fur, then rinse.
- Small pebble/grit between toes: Gently separate toes and lift it out with tweezers.
- Splinter/thorn tip visible: Grasp the end and pull in the same direction it enteredslowly.
- Litter clump: Soak to soften, then gently crumble offdon’t yank fur.
If your cat yelps, the object breaks, or it won’t budge with gentle effort, stop and call your vet. A partially removed
foreign body can be worse than one you didn’t touch.
Step 8: Clean the Area and Protect the Paw (Lightly, Temporarily)
After removal, clean the paw to reduce irritation and infection risk:
- Rinse with saline or lukewarm soapy water, then rinse again with plain water.
- Pat dry with a clean towelespecially between toes.
If there’s a small abrasion, you may be tempted to apply human antibiotic ointment. Don’t do that unless your veterinarian
specifically approves it for your catmany cats lick it off, and some products can cause problems if ingested.
Bandaging (optional): If the paw pad is mildly scraped and your cat keeps stepping in litter, a light temporary bandage can help.
It should be snug enough to stay on but not tight. If toes swell, the bandage may be too tight and should come off immediately.
If your cat panics, chews at it, or can’t walk normally, remove it and reassess.
Step 9: Prevent Licking and Monitor for 48 Hours
Your cat’s plan after you clean the paw is often: “Great, now I’ll lick it for 45 minutes straight.” Excessive licking can
irritate tissue and introduce bacteria.
For the next two days:
- Keep your cat indoors and reduce high-jump activities.
- Check the paw 2–3 times daily for swelling, redness, discharge, limping, or heat.
- Use an e-collar if licking is intense.
- Keep the litter box clean (dirty litter + tiny cuts = bad combo).
If limping doesn’t improve, if the paw looks worse, or if a wound continues bleeding or stays open, it’s time to see your vet.
Special Situations (Because Cats Love to Be Complicated)
Sticky Stuff: Sap, Gum, Tar
Sticky substances can trap fur and pull painfully when removed. Don’t rip it off. Start with warm water and gentle wiping.
If it’s still stuck, call your vet for the safest next step. Some oily products can help loosen sticky substances, but you must
prevent licking and make sure anything used is pet-safe. Never use solvents or harsh cleaners.
Ice Melt, Sidewalk Salt, and “Why Is My Cat’s Paw Crusty?”
In winter, de-icers can irritate paws and can also cause stomach upset if licked off. If you suspect ice melt or salt exposure:
rinse paws with warm water, dry thoroughly, and monitor for drooling, vomiting, or irritation. If symptoms appear, contact your vet.
Foxtails and Other “Traveling” Plant Bits
Some plant awns (like foxtails) can migrate under the skin and cause infection. If you suspect a foxtail, see swelling, or notice a
draining spot between toes, don’t try to dig it outget veterinary help.
Chemicals or Strong Adhesives on the Paw
If a paw contacted a chemical (cleaner, antifreeze, pesticide, strong glue), your priorities are: prevent licking, rinse with lukewarm water,
and call your veterinarian. If you believe a toxic substance is involved, you can also contact a poison control resource for pets right away.
Prevention: Make Paw Checks a Normal Part of Life
The easiest debris removal is the one you never have to do. Try these habits:
- Weekly paw checks: quick look at pads, between toes, and nails.
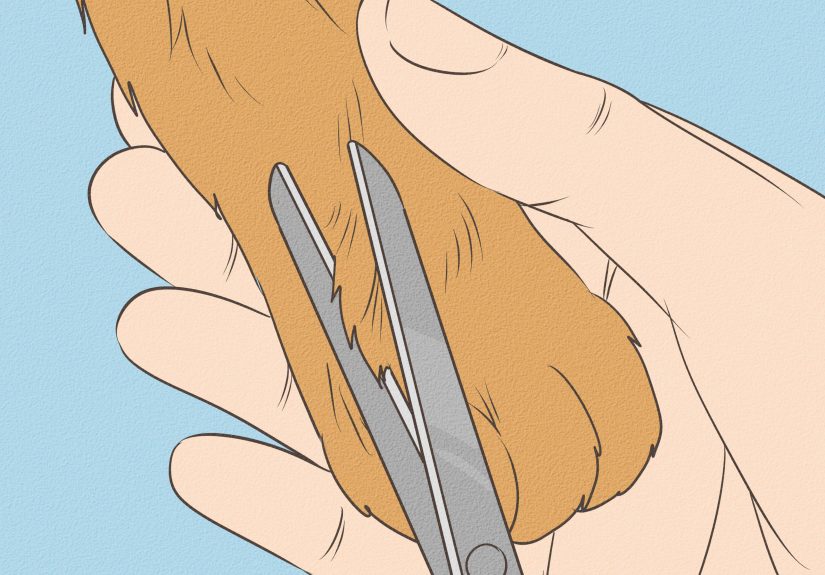
- Trim excess toe fur: long fur can trap litter and burrs (ask a groomer or vet if unsure).
- Keep floors tidy: vacuum small debrisespecially near entryways.
- Use cat-safe litter: and clean the box often to reduce clumping residue on paws.
FAQ: Quick Answers to Common “Help!” Moments
How do I know if it’s debris or an injury?
Debris often causes sudden licking and mild limping that improves once removed. Injuries may involve bleeding, swelling, heat,
obvious pain, or persistent limping. When it’s unclear, assume caution and consult your vet.
Can I use human antiseptic or peroxide?
Avoid alcohol and hydrogen peroxide. They can damage delicate tissue and delay healing. Stick with gentle rinsing and vet-approved products.
My cat won’t let me touch the pawwhat now?
Stop and call your vet. Forced handling can make fear worse and can lead to bites/scratches. Your vet can advise next steps and may use safe
restraint or sedation if needed.
When is it an emergency?
Heavy bleeding, a deep puncture, a visible embedded object, sudden severe pain, chemical exposure, or signs of systemic illness (like vomiting,
extreme lethargy, or collapse) warrant urgent care.
Real-Life Experiences: What Actually Helps (and What Absolutely Doesn’t)
Over the years, most “stuff in the paw” moments follow the same script: you notice a weird limp, your cat pretends nothing is wrong,
then dramatically licks the paw like it owes them money. The most common culprit in many homes is litterespecially the kind that
clumps like it’s training for a strongman competition. The trick that tends to work best is surprisingly boring: a short soak, gentle crumble,
rinse, and dry. If you try to peel off a dried clump without softening it first, you often pull fur, annoy your cat, and earn a look that says,
“This betrayal will be remembered.”
Another frequent offender is tiny grit tracked in from shoes. You usually won’t see a big rockmore like a speck lodged in a crease
of the pad. Bright light is everything here. A phone flashlight angled from the side can reveal texture changes that overhead light hides. When you
do spot it, rinsing first often floats it out. Tweezers are for the moments when you can clearly grasp the bit without pinching skin. If your cat
flinches every time you touch near it, that’s your cue to stop and consider that it may be embedded.
The “I didn’t know that could happen” category includes burrs and tiny plant stickers. Cats that explore balconies, patios, or
grassy yards can pick up hitchhikers in the toe fur, and they cling like they signed a lease. What helps most is separating the fur gently with
your fingers first, then using tweezers to lift the burr away from the skin. If you go straight in with tweezers and tug, you risk pulling hair
and turning a simple removal into a 5-star customer complaint (filed via yowling).
The “please don’t do this” list is short but important. First, don’t dig. People dig because they want to help, but digging increases trauma,
drives debris deeper, and can introduce bacteria. Second, don’t use harsh cleaners. It’s tempting to “sterilize” with whatever is under the sink,
but paws are sensitive and cats lick everything. Third, don’t underestimate licking. Even minor irritation can snowball if your cat
obsessively licks the area. In real life, using an e-collar for a day can be the difference between “problem solved” and “why is the paw angry again?”
Finally, the most underrated success strategy is prevention-by-habit. If you do quick paw checks when your cat is already relaxedafter naps, during
cuddle time, while they’re purring like a small engineyour cat learns that paw handling isn’t automatically followed by Unpleasant Events. Then when
you do need to remove debris, it feels less like a crisis and more like a mildly inconvenient spa appointment. With snacks. Always with snacks.
Conclusion
Most minor debris in a cat paw can be handled with a calm setup, gentle rinsing, and careful removal of only what’s visible and easy to grasp.
The moment you see deep embedding, heavy bleeding, significant swelling, discharge, chemical exposure, or persistent limping, it’s time to involve
your veterinarian. When you keep things gentle, clean, and low-stress, you’ll protect both your cat’s paws and your own skinbecause nobody wants
a bonding moment that ends with a bandaid on you.





