Table of Contents >> Show >> Hide
- Why Butterfly Origami Is Such a Great Beginner Craft
- What You Need Before You Start
- How to Make a Butterfly Origami: Step-by-Step
- How to Make Your Butterfly Origami Look Better
- Common Butterfly Origami Mistakes and How to Fix Them
- Fun Ways to Use a Paper Butterfly
- Butterfly Origami for Kids and Beginners
- A Little History Behind Butterfly Origami
- Frequently Asked Questions
- Final Thoughts
- Experiences People Often Have When Learning Butterfly Origami
If you have one square sheet of paper and five-ish minutes, you have everything you need to make a butterfly origami that looks way fancier than its humble beginnings suggest. That is the magic of origami: one moment it is just paper lying there like it pays no bills, and the next moment it is a butterfly ready to perch on a bookshelf, a greeting card, a gift topper, or a suspiciously proud houseplant.
This guide walks you through an easy butterfly origami method that is friendly to beginners but still elegant enough to make you feel like you should be wearing a kimono in a sunlit craft studio. We will cover what paper works best, how to make each fold step by step, what to do when your butterfly looks more like a crumpled nacho, and how to make the finished model look polished. You will also find practical decorating ideas, common mistakes to avoid, and a longer section on real-life experiences people often have while learning this paper craft. Whether you are crafting with kids, making spring decorations, or just looking for a screen-free hobby that does not require glitter in your carpet forever, butterfly origami is a smart place to start.
Why Butterfly Origami Is Such a Great Beginner Craft
There are a lot of reasons people start with an origami butterfly instead of diving straight into something dramatic like a paper dragon. First, it is approachable. You only need one square of paper, a flat surface, and a little patience. Second, the result is actually pretty. A beginner project that looks charming is rare in the crafting world. Usually, beginner crafts look like they were made during a power outage. Butterfly origami is the exception.
It is also useful. Once you know how to make a paper butterfly, you can use it in all kinds of ways: wall decor, party backdrops, scrapbooks, classroom displays, bookmarks, handmade cards, gift wrapping, or even table settings. Some people make one butterfly. Other people make twelve and suddenly have a mobile hanging over a reading nook. This is how paper hobbies escalate.
Another reason butterfly origami is popular is that it gives you quick feedback. If your folds are neat, the butterfly comes together beautifully. If your folds are messy, the model lets you know immediately. It is honest, but not rude about it.
What You Need Before You Start
Basic Supplies
- 1 square sheet of paper
- A clean, flat surface
- Your fingers for creasing
- Optional: a ruler or bone folder for extra-sharp folds
- Optional: a tiny dot of glue if your paper is slippery
The Best Paper for Butterfly Origami
The easiest choice is standard origami paper in a 6 x 6-inch square. That size is beginner-friendly because it is large enough to hold comfortably but small enough to shape into a delicate butterfly. If your paper has color on one side and white on the other, even better. Two-tone paper helps you see the folds more clearly while you are working, and it gives the finished butterfly more visual character.
Thin paper usually folds more easily than thick cardstock. If the paper is too thick, the middle of the butterfly can become bulky and stubborn. If it is too flimsy, the wings may not hold their shape. For beginners, lightweight origami paper is the sweet spot. You can also practice with square-cut printer paper, wrapping paper, magazine pages, or old book pages if you want a vintage look. Just avoid super-dark patterns at first, because busy prints can hide the fold lines and make you question your life choices halfway through step four.
How to Make a Butterfly Origami: Step-by-Step
The method below creates a graceful, beginner-friendly butterfly. Read through the whole sequence once before starting. Origami is much easier when your brain knows what your hands are about to be asked to do.
Step 1: Start With the Colored Side Up
Place your square paper on the table with the colored side facing up. Fold it in half horizontally, crease well, and unfold. Then fold it in half vertically, crease, and unfold. You should now see a cross on the paper.
These early folds are not just warm-up exercises. They create the structure that helps the butterfly collapse neatly later, so take a few extra seconds to make the creases clean and centered.
Step 2: Turn the Paper Over
Flip the paper so the colored side is now facing down. This is where the butterfly starts pretending it is still just a plain square. Do not trust it. Transformation is underway.
Step 3: Fold Both Diagonals
Fold the paper diagonally one way, crease, and unfold. Then fold it diagonally the other way, crease, and unfold again. At this point, your paper should have vertical, horizontal, and diagonal crease lines. It may look like a map to a hidden treasure. In a way, it is.
Step 4: Collapse the Paper Into a Triangle Base
Using the creases you already made, collapse the paper inward so it forms a triangular base. If you are new to origami, this shape is often called a waterbomb base. To do it, gently push the left and right sides inward while bringing the top down. The paper should naturally fold into a flat triangle with layered flaps.
This is the step where beginners most often pause, squint, and rotate the paper like it owes them money. That is normal. Move slowly and let the creases guide the paper. Do not force anything.
Step 5: Fold the Top Layer Corners Up
With the triangle base positioned so the open end is at the bottom, take the top layer corners and fold them upward to meet the top point. This creates a shape that starts suggesting the upper wings of the butterfly.
Line the edges up carefully. If one side is higher than the other, your butterfly will still exist, but it may look like it flew through a wind tunnel.
Step 6: Turn the Model Over
Flip the entire model over. Keep it aligned and flat. The paper should still look compact and triangular, but now you are working on what will become the body and lower wing shaping.
Step 7: Lift the Bottom Corner Up
Take the bottom corner of the top layer and gently lift it upward past the top edge. Do not flatten the whole model as if you are making another triangle. Instead, create a soft center fold while allowing the sides to remain slightly open. This is the move that gives the butterfly more dimension and character.
If this step feels delicate, that is because it is. Think “encourage” rather than “manhandle.” Origami responds better to calm negotiation.
Step 8: Fold the Top Tip Down
Once the bottom corner extends above the top edge, fold that little tip down over the top edge and crease it firmly. This helps lock the model in place. Then turn the butterfly over again.
If your paper is slippery and the fold will not hold, a tiny dot of glue underneath the flap is acceptable. Purist origami fans may gasp softly into the distance, but your butterfly will stay together, and that is what matters.
Step 9: Shape the Wings
Gently fold the wings inward toward you to shape the butterfly. You are not making a sharp structural fold here. You are giving the model a finished, fluttery look. Adjust both wings until they feel balanced and natural.
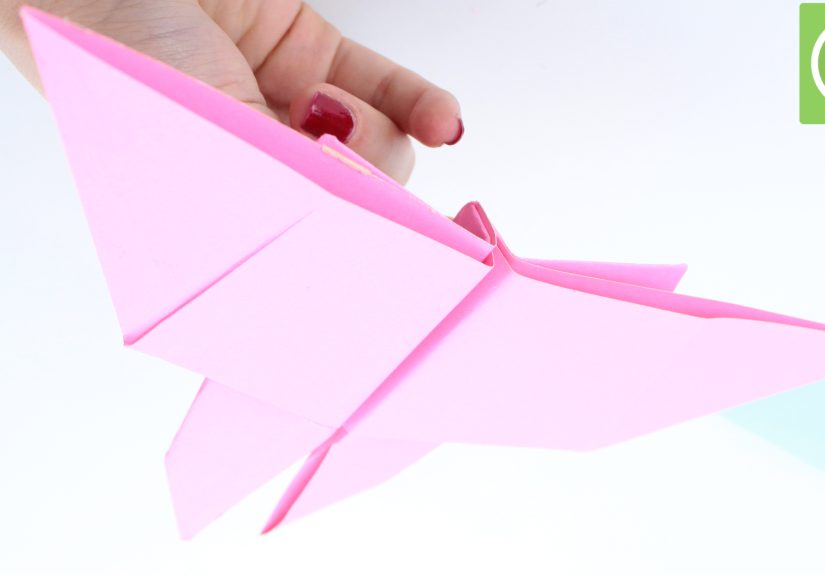
And there you have it: an origami butterfly that started as a square and ended up looking like it might ask to be displayed near a sunny window.
How to Make Your Butterfly Origami Look Better
Use Crisp Creases
Neat creases matter more than speed. A slow butterfly with precise folds will almost always look better than a rushed one. Press each fold firmly with your fingertip or the edge of a ruler.
Keep the Paper Aligned
Before pressing a crease, line up the corners and edges carefully. Once a fold is made, paper remembers it. Origami is many things, but forgiving is not its strongest personality trait.
Choose the Right Color
Bright solids, soft pastels, floral patterns, and double-sided paper all work beautifully for butterfly origami. If you want a natural look, try yellow, orange, blue, or white. If you want a dramatic look, black with metallic accents can be gorgeous.
Shape the Wings Gently
The final wing shaping is what makes the butterfly look alive. A butterfly with totally flat wings can look a bit stiff. A slight curve makes it more graceful.
Common Butterfly Origami Mistakes and How to Fix Them
The Paper Will Not Collapse Properly
This usually means the pre-creases were not made clearly enough. Go back to the horizontal, vertical, and diagonal folds and sharpen them before trying again.
The Wings Look Uneven
Check whether the early folds were centered. Uneven wings often start with a tiny alignment problem in the first few steps. Refold from the beginning if needed. Yes, that is mildly annoying. Yes, it is worth it.
The Butterfly Keeps Opening Up
Your final locking fold may not be sharp enough, or your paper may be too thick or slippery. Re-crease the locking flap firmly. If necessary, use a tiny bit of glue hidden under the top fold.
The Middle Looks Too Bulky
This can happen with heavy paper. Switch to lighter origami paper, especially if you plan to make several butterflies for decor.
Fun Ways to Use a Paper Butterfly
Once you know how to make a butterfly origami, it becomes one of those crafts you keep returning to because it is so adaptable. You can tape several to a wall for a spring display, hang them from thread to make a mobile, glue them onto a handmade card, or attach them to wrapped gifts instead of a bow. Smaller butterflies look lovely tucked into potted plants, and medium-size ones can be turned into party decor for birthdays, baby showers, classroom events, or bridal tables.
They are also surprisingly effective as little “extras.” A notebook looks cuter with a butterfly paper clip. A photo frame looks more personal with one tucked in the corner. A plain package becomes ten times more charming when there is a paper butterfly sitting on top like it owns the place.
Butterfly Origami for Kids and Beginners
If you are teaching children how to make butterfly origami, start with larger paper, such as 6 x 6 or even 8 x 8 inches. Bigger paper makes the folds easier to see and handle. Demonstrate one fold at a time, and let kids complete each step before moving on. The most important goal is not perfection. It is enjoyment, confidence, and a finished butterfly they feel proud of.
For group settings like classrooms or library programs, it helps to pre-fold the first crease or two for very young children. You can also use paper with one patterned side and one plain side so the fold direction stays obvious. If attention spans are short, turn the finished butterflies into a quick art project by adding them to a poster board garden scene, a reading corner display, or a spring bulletin board.
A Little History Behind Butterfly Origami
Butterfly forms have a special place in the history of paper folding. Traditional Japanese butterfly folds are among the earliest representational origami designs and are associated with ceremonial use. That historical connection gives the butterfly model a little extra charm. It is not just cute decor. It belongs to a long paper-folding tradition that blends craft, symbolism, and elegant design.
Modern butterfly origami now comes in many versions, from very easy beginner models to highly detailed artistic interpretations. That range is part of why this craft remains so popular. You can begin with a simple butterfly today and still have more advanced versions to try later when your confidence grows.
Frequently Asked Questions
What size paper is best for an origami butterfly?
A 6 x 6-inch square is the easiest size for most beginners. It gives you enough room to make accurate folds without producing a huge model.
Can I use regular printer paper?
Yes, as long as you cut it into a square first. Printer paper is good for practice, though true origami paper is usually easier to shape cleanly.
How long does it take to make one?
Once you understand the steps, an easy butterfly origami can take about five to ten minutes. Your first one may take longer, especially during the collapsing step.
Do I need glue?
No, not usually. Traditional origami relies on folds alone. But if your paper is slippery or the model keeps popping open, a tiny hidden dab of glue can help.
What is the easiest way to improve?
Make three butterflies in a row using different papers. By the third one, your hands will understand the sequence better, and your folds will almost always look cleaner.
Final Thoughts
Learning how to make a butterfly origami is one of those small creative wins that pays off quickly. It is inexpensive, relaxing, portable, and surprisingly elegant for such a simple paper craft. Better yet, it works for almost every age and occasion. You can make one while drinking coffee, teach a room full of kids to make ten, or create a whole flutter of butterflies for decor that looks thoughtful and handmade instead of store-bought and bland.
The secret is not speed. It is attention. Crisp folds, patient hands, and paper that is easy to work with will get you much farther than rushing through the steps. Once you have made your first butterfly, try experimenting with smaller squares, patterned paper, or groups of butterflies in matching colors. Before long, you may find little paper butterflies appearing on gift boxes, notebooks, walls, and plant pots around your home. That is when you know the hobby has officially moved in.
Experiences People Often Have When Learning Butterfly Origami
One of the most common experiences people have when learning butterfly origami is underestimating it. They see a small paper butterfly and think, “Oh, that looks easy.” Then they reach the collapsing step and suddenly become very respectful of geometry. That shift is part of the fun. Butterfly origami is simple enough for beginners, but it still gives you a satisfying little challenge. You feel your brain and hands learning to work together in real time.
Many beginners also discover that their first butterfly is not their best butterfly. The first one is usually the “learning butterfly.” It might have one wing slightly higher than the other, a chunky center, or folds that do not quite line up. The second one is usually much better. By the third one, people often get that wonderful crafting moment where the sequence starts to feel natural instead of mysterious. That moment is addictive. It makes you want to keep going, not because you have to, but because improvement becomes visible so quickly.
Parents and teachers often report that butterfly origami works especially well in group settings because it feels creative without becoming chaotic. Unlike messy paint projects or glitter-heavy crafts that permanently redesign the carpet, origami is tidy. Kids can focus on one step at a time, compare colors, trade papers, and still walk away with something they are proud to show off. Even when the butterflies are imperfect, children tend to love them because each one looks a little different. A slightly crooked paper butterfly still feels magical when you made it yourself.
Another common experience is discovering that the craft becomes more relaxing than expected. Adults often start making butterfly origami because they want decorations, a classroom activity, or a rainy-day project for children. Then halfway through, they realize the folding itself is the reward. Repeating creases, aligning edges, and shaping the wings can feel calming in a way that is hard to explain until you try it. It is one of those analog hobbies that slows your brain down without making you bored.
People also tend to get unexpectedly ambitious after learning one butterfly. At first, the goal is “I just want to make one that looks decent.” A little later, the goal becomes “What if I made a dozen in different colors and hung them over the window?” Then someone decides to add them to gift wrapping, greeting cards, party decor, place settings, or a nursery wall. Butterfly origami has a sneaky habit of becoming decoration, then collection, then mild obsession. A harmless obsession, to be fair, but still an obsession.
There is also the experience of choosing paper and realizing it changes everything. Some people love bold solids because the shapes look crisp and graphic. Others prefer floral prints, metallic papers, or vintage book pages. A butterfly made from soft pastel paper feels delicate and springlike, while one made from a map page or sheet music feels artsy and unexpected. That discovery often makes people enjoy the project even more, because each butterfly becomes a tiny design choice, not just a repeated exercise.
Perhaps the best experience of all is the moment someone else notices the butterfly and asks, “Wait, you made that?” It is such a small object, but it carries that special handmade quality people respond to immediately. It feels thoughtful. It feels personal. And because it begins as nothing more than a square sheet of paper, the finished butterfly has that satisfying little spark of transformation that makes crafting so rewarding in the first place.





