Table of Contents >> Show >> Hide
- Why Cork Board Works for Hiding Laundry Hookups
- Safety and Code Reality Check Before You Build
- Design Options: 4 Smart Ways to Hide Laundry Hookups With Cork Board
- Tools and Materials Checklist
- Step-by-Step Tutorial: Build a Hinged Cork Hookup Cover
- Step 1: Map every critical utility point
- Step 2: Measure the concealment area (and add access margin)
- Step 3: Locate studs and choose mounting method
- Step 4: Build a lightweight frame
- Step 5: Attach cork board to frame
- Step 6: Add hinge side and opening direction
- Step 7: Add latch and soft-stop points
- Step 8: Build in airflow intelligence
- Step 9: Test emergency access
- Step 10: Finish for style
- Step 11: Add utility organization
- Step 12: Recheck clearances after one laundry cycle
- Mistakes to Avoid (Because DIY Regret Is Real)
- Budget, Timing, and Difficulty
- Frequently Asked Questions
- Conclusion
- Real-World Experience Notes (Extended 500+ Words)
Laundry hookups are the visual equivalent of a printer cable in a minimalist office: functional, important, and not exactly winning any beauty contests.
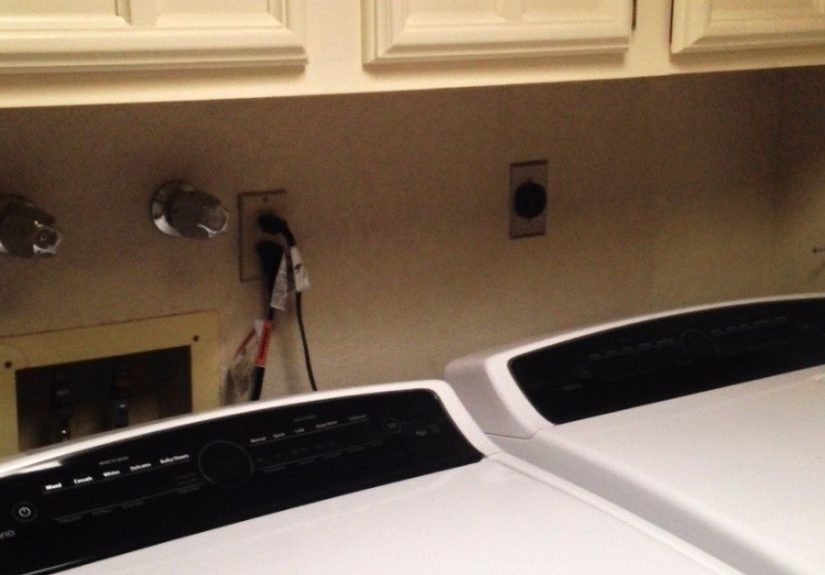
If your washer and dryer hookups are exposed in a hallway, kitchen alcove, mudroom, or tiny laundry closet, you already know the problem. Valves, hoses,
drains, vents, and power cords can make a clean room look unfinished. The good news? You can hide laundry hookups with cork board in a way that looks stylish,
stays practical, and still allows quick access when you need repairs.
In this guide, you’ll learn a design-forward, safety-first DIY approach to creating a removable cork board cover for laundry hookups. We’ll walk through layout,
ventilation, clearance rules, moisture control, mounting methods, and real-life mistakes to avoid. This isn’t about “just covering stuff and hoping for the best.”
It’s about building a smart access system that keeps your laundry room functional and photo-ready.
Bonus: cork board is naturally warm-looking, pin-friendly, and renter-friendlier than full built-in cabinetry. So yes, you can hide the plumbing and still keep
your stain-removal cheat sheet pinned right in front of you.
Why Cork Board Works for Hiding Laundry Hookups
1) It disguises utility clutter without permanent construction
Traditional solutions like built-in cabinets or framed utility closets can be expensive and invasive. Cork board lets you create a visual screen that feels intentional
but remains easy to remove when a plumber, appliance tech, or your future self needs access.
2) It doubles as functional storage
Unlike plain panels, cork gives you active wall space. You can pin care labels, laundry schedules, missing-sock wanted posters, shopping lists, and
“Do Not Dry This Sweater Again” reminders.
3) It suits multiple design styles
You can paint a frame for a modern look, stain trim for farmhouse style, wrap edges in fabric for a soft utility-room vibe, or keep it natural for a Scandinavian feel.
Translation: cork board can hide plumbing while still matching your home’s personality.
Safety and Code Reality Check Before You Build
A cork cover should conceal hookups, not block maintenance or create a hazard. Read this section like your dryer depends on itbecause it does.
Dryer vent rules matter more than aesthetics
Dryer exhaust systems are intended to vent moisture to the outdoors, and the duct setup has specific requirements in residential code and manufacturer installation guidance.
Keep your cover clear of vent terminations, do not crush ducting, and never block airflow paths with tightly sealed decorative panels.
Leave service clearances
Most installations need breathing room around appliances for ventilation and service access. A common benchmark from manufacturer guidance is rear clearance for vent elbows
and minimal side/top spacing. If your cover forces hoses or ducts to kink, it’s not a design featureit’s a future repair bill.
Control moisture in laundry zones
Laundry rooms produce heat and humidity. Indoor-air guidance consistently recommends moisture control and keeping indoor humidity in a healthy range.
Your cork panel should not trap damp air against drywall. Build in small air gaps and keep the area dry after leaks or spills.
Protect against hose failures
Washer hoses are wear items. Use a cover design that lets you quickly inspect valve connections and hose condition. A “hidden but unreachable” hookup
is a bad combo when leaks happen at 11 p.m.
Design Options: 4 Smart Ways to Hide Laundry Hookups With Cork Board
Option A: Hinged Cork Access Panel (Best all-around)
Build a lightweight wood frame, attach cork board to the front, and hinge one side to the wall or a vertical cleat. Add a magnetic catch on the opposite side.
This creates a door-like access panel that opens in seconds.
Option B: Sliding Cork Screen (Best for tight clearances)
Mount upper and lower tracks and slide one cork-faced panel sideways. Great when front clearance is limited and swinging a door panel is awkward.
Option C: French Cleat Lift-Off Panel (Best for renters or frequent access)
Attach a cleat strip to wall studs and hang a framed cork board panel. It lifts off for inspection and drops back in place cleanly.
Minimal hardware visibility, maximum accessibility.
Option D: Curtain + Cork Hybrid (Best budget)
Use a short curtain to soften the area and mount a narrow cork board panel above hookups for visual balance and utility pin space.
Not full concealment, but very fast and affordable.
Tools and Materials Checklist
- Cork board sheet or cork tiles (choose thickness based on frame rigidity needs)
- 1×2 or 1×3 wood for frame
- Measuring tape, level, pencil
- Drill/driver, pilot drill bits
- Wall anchors and/or stud screws
- Hinges (if using hinged panel), magnetic catch or latch
- Trim, edge banding, or fabric tape for finished borders
- Low-VOC construction adhesive (if needed)
- Paint or stain (optional)
- Moisture meter or humidity gauge (recommended)
Step-by-Step Tutorial: Build a Hinged Cork Hookup Cover
Step 1: Map every critical utility point
Identify hot/cold valves, drain standpipe, shutoff access, dryer exhaust path, power outlet, and hose/cord bend space. Take photos before you start.
Mark a “no-cover zone” around anything requiring frequent operation.
Step 2: Measure the concealment area (and add access margin)
Measure width and height of the hookup zone. Add at least 1–2 inches of buffer around protruding valves and hose loops so your panel never rubs.
If hookups sit behind appliances, ensure the panel can still open without hitting the washer/dryer body.
Step 3: Locate studs and choose mounting method
If your panel is heavy, anchor into studs. If it’s lightweight, combine anchors and studs. Heavy cork assemblies should not rely on weak adhesive alone.
If using adhesive strips for a light panel, verify the actual rated load and surface compatibility.
Step 4: Build a lightweight frame
Cut wood strips to size and assemble a rectangular frame. Dry-fit it against the wall. Keep frame depth shallow but enough to avoid compressing hoses.
Sand edges for a clean finish.
Step 5: Attach cork board to frame
Cut cork to match frame face. Secure with adhesive and/or brads depending on material thickness. Press evenly and allow cure time if using glue.
Keep glue away from vented areas and follow ventilation instructions on the adhesive label.
Step 6: Add hinge side and opening direction
Install hinges on the side with the best swing clearance. Usually that’s away from door traffic and away from baskets.
Test motion before final tightening.
Step 7: Add latch and soft-stop points
Install a magnetic catch so the panel sits flush. Add felt bumpers where panel contacts wall or frame to reduce vibration noise during spin cycles.
Step 8: Build in airflow intelligence
Leave small top or side gaps so humidity doesn’t get trapped. Do not block vent duct joints, terminations, or closet air openings required by appliance setup.
Your goal is concealment, not airtight sealing.
Step 9: Test emergency access
With panel closed, simulate a leak scenario: can you open it with one hand in under five seconds? If not, improve hardware.
Emergency usability beats decorative perfection every time.
Step 10: Finish for style
Add trim, paint, or stain. You can create zones on cork with simple tape borders: “Care tags,” “Shopping list,” “Lost socks tribunal,” and “Things I swear I’ll fold today.”
Step 11: Add utility organization
Pin your stain chart, wash-temperature guide, and a maintenance schedule: vent cleaning, hose inspection, filter checks, and wipe-down dates.
Function is part of the aesthetic.
Step 12: Recheck clearances after one laundry cycle
Run a full wash and dry cycle. Confirm no new rattles, heat buildup, odor, or moisture condensation appears behind/around the panel.
Adjust spacing if needed.
Mistakes to Avoid (Because DIY Regret Is Real)
- Blocking shutoff valves: If you can’t quickly reach valves, your “before” photo may become your insurance claim “before” photo.
- Using thick decorative layers over hot zones: Keep the cover off vent components and high-heat pathways.
- Ignoring duct shape: Crushed flexible duct = poor airflow, longer drying times, and higher risk.
- Skipping moisture checks: Laundry spaces need humidity awareness, especially in small closets.
- Overloading adhesive mounts: Weight ratings are real. Gravity also believes in accountability.
Budget, Timing, and Difficulty
Budget range: A basic cork hookup cover can be done inexpensively with a simple frame and cork sheet.
Upgrades like finished trim, premium hardware, or custom paint can increase cost modestly.
Time: Most projects fit into a weekend, including measuring, frame build, mounting, and styling.
Skill level: Beginner to intermediate. If you can measure accurately, drill pilot holes, and hang a panel level, you can do this.
Frequently Asked Questions
Can I glue cork directly over laundry hookups?
Not recommended. You need access to valves, hoses, drain, and vent connections. Use removable or hinged solutions instead.
Is cork board safe near a washer and dryer?
Cork board can be used near laundry hookups when installed with proper spacing, ventilation, and code/manufacturer clearance in mind.
Don’t place it where it obstructs venting or creates heat traps.
Can renters do this?
Yesfocus on lightweight framed panels using removable mounting methods rated for the load, or use a cleat system with minimal wall damage.
Keep all utility points accessible.
What if my hookups are in a closet?
Closet setups often need specific airflow openings. Use a panel that conceals hookups without blocking required ventilation paths.
Perforated or vented door concepts are often the best inspiration here.
Conclusion
Hiding laundry hookups with cork board is one of those rare DIY projects that makes a room look better and work better.
You get cleaner visuals, practical pin-up space, and easy utility accessif you design with airflow, clearances, and maintenance in mind.
Start with accurate measurements, build a removable system, protect ventilation paths, and keep moisture under control.
The result is a laundry area that finally looks intentional, not accidental.
Real-World Experience Notes (Extended 500+ Words)
The first time I built a cork panel to hide hookups, I made the classic beginner move: I designed for the “photo moment,” not the “oops-the-hose-is-dripping” moment.
The panel looked great. Beautiful trim. Clean paint line. Pinterest would have approved. Then I realized I had to remove six tiny screws just to reach the shutoff valves.
That was the day I learned a simple rule: if access takes longer than making coffee, redesign it.
On the second project, I switched to a hinged layout with a magnetic catch. Huge improvement. I also left a discreet side gap for airflow.
Was it visible? Barely. Was it worth it? Absolutely. The space stayed drier, and the panel stopped smelling like “warm laundry closet in July.”
I also started keeping a small humidity gauge nearby, because laundry rooms can get muggy fast, especially when stacked units run back-to-back.
That one tiny gauge changed how I used the room: more fan time, fewer damp corners, zero mystery mustiness.
Another lesson came from weight. I once built an oversized cork board masterpiece and mounted it like it was a poster.
It was not a poster. It was a small planet. After a week, the mounting began to creep. I rebuilt it with better support and proper anchors.
Since then, I treat panel weight as a design decision, not an afterthought. If the panel is heavy, I mount into studs. If the panel is light, I still check hardware ratings.
No one wants dramatic wall art that detaches itself at 2 a.m.
Style-wise, cork turned out to be more versatile than expected. In one home, we framed it in matte black for a modern laundry nook.
In another, we used warm wood trim and added brass hooks. Same function, different mood. My favorite touch is dividing the cork into zones:
“Now Washing,” “Air Dry,” “Don’t Shrink,” and “Household Notes.” It makes the space feel less like a utility closet and more like a tiny command center.
Families actually use it. Kids pin sports uniforms lists. Adults pin stain tips and shopping reminders. The cork becomes part organizer, part sanity saver.
The most helpful practical habit I’ve seen is pairing the cork cover with a maintenance card. Nothing fancyjust a pinned checklist:
clean lint screen each load, inspect hose connections monthly, check vent airflow, deep-clean vent periodically, replace aging hoses, and test panel access.
That checklist keeps the hidden area safe, not just pretty.
If you’re worried this project will look “too DIY,” here’s the truth: precision and restraint matter more than expensive materials.
Keep reveals even. Use a level. Don’t over-trim every edge. Match one existing finish in the room (cabinet color, hardware tone, or wall paint) and stop there.
A clean, simple panel usually looks more custom than an overdecorated one.
And yes, there will be moments when you question why you’re measuring half-inch offsets in a laundry corner while holding a pencil with your teeth.
Totally normal. But once it’s done, you’ll have a cover that hides visual clutter, supports safer maintenance habits, and makes the room feel intentionally designed.
In my experience, that combination is rareand worth every minute.





