Table of Contents >> Show >> Hide
- Before You Start: A Few Important Basics
- The 15 Steps to Give a Heparin Shot
- Step 1: Read the prescription label like it owes you money
- Step 2: Gather your supplies in one place
- Step 3: Wash your hands thoroughly
- Step 4: Prepare a calm, clean workspace
- Step 5: Inspect the syringe or vial carefully
- Step 6: Draw up the dose if you are using a vial
- Step 7: Choose the injection site wisely
- Step 8: Keep a rotation plan
- Step 9: Clean the skin and let it dry
- Step 10: Uncap the needle only when you are ready
- Step 11: Pinch a fold of skin
- Step 12: Insert the needle at the angle you were taught
- Step 13: Inject the medication slowly and steadily
- Step 14: Remove the needle carefully and protect the site
- Step 15: Dispose of the syringe safely and record the dose
- Common Mistakes to Avoid
- When to Call a Doctor Right Away
- Practical Tips That Make the Process Easier
- What the Experience Is Really Like: Real-World Expectations and Everyday Tips
- Conclusion
Giving a heparin shot at home can feel like a weird little graduation ceremony: one day you are minding your own business, and the next day you are holding a syringe like it is a tiny, very serious dart. The good news is that once you understand the routine, the process usually becomes much less intimidating. The even better news? Most people get more confident after only a few doses.
Heparin is an anticoagulant, often called a blood thinner, though it does not literally turn your blood into soup. Its job is to help prevent harmful clots or stop existing clots from getting bigger. Because it affects clotting, the technique matters. A clean setup, the right injection site, the correct dose, and careful disposal are not just “nice to have” details. They are the whole game.
This guide breaks the process into 15 clear steps in plain English. It is written for a general audience and meant to reinforce what a doctor, nurse, or pharmacist has already taught. For web readers, that means one important rule comes first: always follow your own clinician’s instructions if they differ from a general article. Your prescription, syringe type, and medical history are the boss here.
Before You Start: A Few Important Basics
A heparin shot is usually given into the fatty tissue just under the skin, not into a muscle. Common injection areas include the abdomen, the outer thigh, the upper buttocks, or the back of the upper arm if someone else is giving the shot. Many people prefer the belly because it is often easier to reach and can be less uncomfortable, as long as you stay away from the belly button and any scars, bruises, or sore spots.
You should also know that “heparin” is not a one-size-fits-all product. Some people draw the medication from a vial. Others use prefilled syringes. That matters because certain technique details can vary, especially around injection angle and whether a small air bubble should stay in the syringe. That is why this article keeps repeating the same grown-up, responsible message: follow the exact method your care team taught you.
The 15 Steps to Give a Heparin Shot
Step 1: Read the prescription label like it owes you money
Before you do anything else, verify the medication name, the strength, and the dose. Heparin comes in different concentrations, and using the wrong strength can cause serious problems. Check the expiration date too. If the label looks wrong, the medicine is expired, or the liquid looks cloudy, discolored, foamy, or full of particles when it should not, stop and call your pharmacist or healthcare provider.
Step 2: Gather your supplies in one place
Set up everything before you start so you are not hunting for gauze with one hand and guarding a syringe with the other. Most people need the medication, syringe or prefilled syringe, alcohol wipes, gauze or a bandage if instructed, and a sharps container. A clean, flat surface works best. Bathrooms are usually not ideal because they are not exactly famous for being the cleanest workstations on earth.
Step 3: Wash your hands thoroughly
Use soap and water and scrub well, including between your fingers and under your nails. Dry your hands with a clean towel. If soap and water are not available, an alcohol-based hand sanitizer may be used if your care team says that is okay. This step is simple, but it matters. Clean hands help protect the injection site from germs.
Step 4: Prepare a calm, clean workspace
Lay out your supplies on a clean surface. Good lighting helps more than people think. If you are anxious, take a minute. Breathe. Sit down. This is not a race. A rushed injection tends to feel more stressful, and stress has a magical way of making every tiny task feel harder than it really is.
Step 5: Inspect the syringe or vial carefully
If you are using a vial, make sure the rubber top is clean and the vial is the one you were prescribed. If you are using a prefilled syringe, keep the needle covered until you are ready. Do not touch the needle or let it touch the table, your fingers, your shirt, or anything else. Once a needle is contaminated, it should not be used.
Step 6: Draw up the dose if you are using a vial
If your prescription is not prefilled, your nurse may have shown you how to pull air into the syringe equal to the dose, inject that air into the vial, turn the vial upside down, and draw out the correct amount of medication. Then check for bubbles if your clinician instructed you to do so. If your heparin comes prefilled, skip the dose-drawing drama and move on.
Step 7: Choose the injection site wisely
Pick an area with enough fatty tissue. The abdomen is often a favorite, but stay at least 2 inches away from your belly button. Avoid skin that is bruised, swollen, red, tender, hard, scarred, or covered with stretch marks if your care team told you to avoid those areas. Rotate sites from one dose to the next. Your skin will thank you, and so will your future self.
Step 8: Keep a rotation plan
Do not inject into the same exact spot every time. Repeating the same location can irritate the skin and affect how the medication is absorbed. A simple notebook, calendar, or notes app is enough. You do not need a complicated spreadsheet unless spreadsheets bring you joy, which, for some people, they absolutely do.
Step 9: Clean the skin and let it dry
Use an alcohol wipe and clean the chosen area with firm pressure. Let the skin air dry completely. Do not blow on it, wave your hand over it, or touch it again after cleaning. Once it is dry, it is ready. If the skin was visibly dirty to begin with, soap and water may be needed before the alcohol wipe.
Step 10: Uncap the needle only when you are ready
Hold the syringe the way you were taught, often like a pencil or dart. Remove the cap carefully. Do not let the needle touch anything. With some prefilled blood-thinner syringes, your nurse may tell you not to remove a small air bubble. With other syringes, air bubbles may need to be cleared. This is one of those details that depends on the product, so your own instructions win every time.
Step 11: Pinch a fold of skin
Use your free hand to gently pinch a fold of skin between your thumb and fingers. The goal is to lift the fatty layer under the skin, not to squeeze like you are trying to win a stress-ball competition. A soft but secure pinch helps guide the injection into the right tissue.
Step 12: Insert the needle at the angle you were taught
Now comes the part people tend to overthink. Many classic vial-drawn heparin instructions describe inserting the needle at about a 45-degree angle into the pinched skin. Some short, prefilled syringes are taught as a straight-in, 90-degree injection. The important thing is consistency with your training. Insert the needle in one smooth, quick motion rather than inching it in slowly.
Step 13: Inject the medication slowly and steadily
Once the needle is in place, release the pinch if that is what your clinician taught you, then press the plunger slowly until all the medication is in. Slow and steady is the goal. This is not a race to the finish line. A smooth injection is usually more comfortable than a rushed one.
Step 14: Remove the needle carefully and protect the site
Pull the needle out at the same angle it went in. Some instructions recommend waiting a few seconds before removing it. Do not rub the injection site. Rubbing can increase bruising. If there is a tiny bit of bleeding, use light gauze or a bandage if your care team recommends it. The site may sting a little, but it should not feel dramatically painful.
Step 15: Dispose of the syringe safely and record the dose
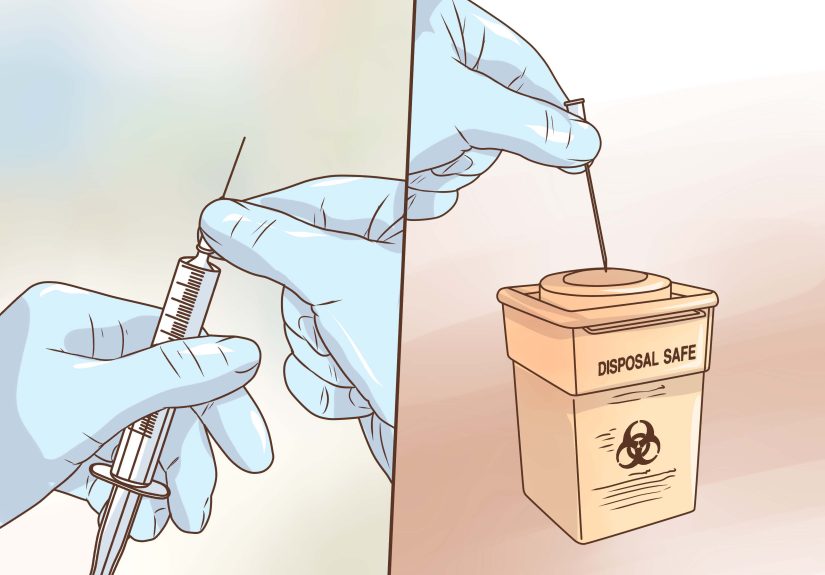
Place the used needle and syringe into a sharps container right away. Do not recap the needle unless your clinician specifically trained you to do that safely with a particular product. Never reuse needles or syringes. Then write down the date, time, dose, and injection site. That quick note can help prevent missed doses, repeated sites, and “Wait, did I already do this?” moments.
Common Mistakes to Avoid
The biggest mistake is using the wrong strength or dose. That is why label-checking deserves superstar status. Another common problem is injecting into bruised or irritated skin. People also sometimes forget to rotate sites, which can make the area sore over time. And, of course, the old classic: tossing a used syringe into the household trash. That is a hard no. Sharps go into a puncture-resistant sharps container.
It is also important not to inject heparin into a muscle unless a clinician has specifically told you to do so, which is not the usual home method. And if you miss a dose, do not double up unless your prescriber explicitly tells you to. A “catch-up shot” is not a DIY project.
When to Call a Doctor Right Away
Because heparin affects clotting, unusual bleeding should never be brushed off as “probably nothing.” Call your doctor right away if you notice heavy bleeding, blood in your urine or stool, black or tarry stools, nosebleeds that are hard to stop, unusual bruising, coughing up blood, or severe headache, chest pain, leg swelling, or sudden shortness of breath. Those can signal a serious bleeding problem or a clot-related emergency.
You should also contact your healthcare provider if the injection site becomes increasingly red, hot, swollen, very painful, or if you develop a rash or allergic-type reaction. If you fall, hit your head, or get injured while using heparin, it is worth reporting that too, even if you feel fine at first.
Practical Tips That Make the Process Easier
Let refrigerated medication warm to room temperature if your product instructions say that is appropriate. Cold medicine can sting more. Some people find that injecting in the abdomen feels easier than the thigh. Others like a consistent routine: same chair, same time of day, same checklist. Routine reduces stress, and reduced stress makes everything less dramatic.
If bruising is a big issue, ask your nurse whether gentle site selection changes could help. Good rotation habits, avoiding rubbing, and using calm technique can make a real difference. Also, wear clothing that allows easy access. Wrestling with a waistband while holding a syringe is an experience nobody needs.
What the Experience Is Really Like: Real-World Expectations and Everyday Tips
For first-timers, the emotional part is often harder than the physical part. Many patients say the first shot feels like a very big deal, and the fifth feels more like brushing your teeth: not exciting, not fun, but absolutely manageable. That learning curve is normal. If you are squeamish around needles, you are not automatically bad at this. You are just human.
One of the most common experiences people report is surprise at how quick the injection is once they finally do it. The setup can feel longer than the shot itself. You check the label, wipe the skin, steady your hand, question every life choice that got you here, and then the injection is over in seconds. The anticipation is usually worse than the actual poke.
Bruising is another big topic. Small bruises can happen even when the technique is correct. That does not automatically mean you did anything wrong. What usually helps is rotating sites, avoiding irritated skin, using a smooth insertion, and not rubbing afterward. Many patients also notice that certain body areas feel easier than others. The abdomen often becomes the practical favorite because it is easier to reach and easier to pinch.
Caregivers have their own learning curve too. If you are giving a shot to a parent, partner, or child under medical guidance, the hardest part may be staying calm enough not to over-apologize every five seconds. A clear routine helps. Gather supplies, explain each step, clean the area, inject confidently, dispose of the syringe, and document it. Calm energy is contagious.
Another real-life experience is “dose paranoia,” also known as staring at the syringe afterward and wondering whether the medicine actually went in. That is why a checklist and written log are so useful. Documenting the time, site, and dose creates a record you can trust later. It also helps if more than one person in the household is involved in giving the shot.
Travel and daily life can make things interesting too. People worry about taking syringes out of the house, storing medication correctly, and finding a safe place for used sharps. The best strategy is to plan ahead. Keep supplies together in one kit, know your storage instructions, and carry a proper sharps container or an approved alternative if your care team says it is acceptable.
Most of all, patients tend to say the same thing after a week or two: it gets easier because the mystery disappears. Once you know where your supplies are, which sites work best, and how your body usually reacts, the process starts feeling routine instead of intimidating. That does not mean you should get casual about safety. It just means confidence grows with repetition, and that is exactly what you want with a medication as important as heparin.
Conclusion
Giving a heparin shot is one of those skills that sounds scarier than it is. The key is not bravery worthy of an action movie. It is simple, repeatable technique: check the label, prepare the supplies, rotate sites, inject exactly the way your clinician taught you, and dispose of everything safely. Once that routine clicks, the process becomes far less intimidating.
For web readers, the takeaway is straightforward: a heparin injection should always match the instructions from the prescribing team and the specific product being used. A general article can teach the rhythm, the safety basics, and the common mistakes to avoid. Your own care team provides the final word. That combination is what keeps home injections accurate, calm, and as stress-free as possible.




