Table of Contents >> Show >> Hide
- Step 1: Gather Everything Before You Leave Home
- Step 2: Sort Clothes Before You Arrive
- Step 3: Read Care Labels Like They Are Tiny Legal Documents
- Step 4: Empty Pockets and Prep Every Garment
- Step 5: Pretreat Stains Before the Wash
- Step 6: Choose the Right Washer Size
- Step 7: Add the Right Amount of Detergent
- Step 8: Pick the Best Water Temperature
- Step 9: Select the Correct Wash Cycle
- Step 10: Start the Washer and Set a Timer
- Step 11: Transfer Clothes Promptly to the Dryer
- Step 12: Clean the Lint Filter Before Drying
- Step 13: Dry by Fabric Type and Heat Level
- Step 14: Fold, Hang, and Leave With a System
- Bonus Tips for Better Laundromat Laundry
- Real-Life Laundromat Experiences: What People Learn After a Few Laundry Days
- Conclusion
A laundromat can feel a little dramatic the first time you walk in. Rows of machines. Random beeping. Someone confidently folding fitted sheets like they were born with a PhD in laundry. Meanwhile, you are holding a bag of socks and wondering whether “warm” means “safe” or “goodbye forever” to your favorite hoodie.
The good news: doing laundry at a laundromat is not hard once you know the routine. The better news: you do not need to become a fabric scientist to get clean clothes. You just need a simple system, a little patience, and enough self-control not to dump half a bottle of detergent into one load like you are seasoning a giant pot of soup.
This guide walks you through how to do laundry at a laundromat in 14 steps, with practical tips on sorting clothes, choosing washer and dryer settings, preventing shrinkage, treating stains, and leaving with laundry that smells clean instead of vaguely mysterious.
Step 1: Gather Everything Before You Leave Home
Successful laundromat laundry starts before you ever touch a machine. Bring your dirty clothes, detergent, dryer sheets if you use them, stain remover, laundry bags or baskets, and something to hang or fold clean items into. It also helps to bring quarters if your local coin laundry still runs on them, though many modern laundromats use cards or payment apps.
Do not forget the obvious items people always forget: socks hiding under the bed, the damp towel in the bathroom, and the lone T-shirt sitting on a chair pretending it is not part of the laundry problem. A complete trip is always better than the annoying sequel where you realize you missed half the load.
Step 2: Sort Clothes Before You Arrive
If you want your white shirts to remain white and not evolve into “lightly disappointed pink,” sort your clothes ahead of time. At minimum, separate whites, lights, and darks. If you want better results, also sort by fabric type and soil level. Towels and jeans should not bully lightweight shirts in the same load, and very dirty items deserve their own wash instead of turning your whole load into a group project.
A smart sorting system saves money too. You can combine similar items into fuller, more efficient loads without overstuffing a machine. That means fewer cycles, faster drying, and less time sitting under fluorescent lighting wondering where your afternoon went.
Step 3: Read Care Labels Like They Are Tiny Legal Documents
Before anything goes into a washer, check the care label. Yes, it is small. Yes, it is annoying. Yes, it matters. That little tag tells you whether the item should be washed cold, warm, or hot, whether it can go in the dryer, and whether bleach is a terrible idea.
At a laundromat, this step matters even more because commercial machines can be powerful. If the label says gentle cycle, tumble dry low, lay flat to dry, or do not bleach, believe it. Laundry symbols are not decorative hieroglyphics. They are the last warning before your sweater turns into something your cat could wear.
Step 4: Empty Pockets and Prep Every Garment
Check every pocket. Remove coins, tissues, receipts, gum, earbuds, lip balm, and any mysterious object that feels like it belongs in a detective series. Zip zippers, fasten hooks, tie drawstrings, and turn dark clothes or graphic tees inside out. This helps reduce fading, pilling, snags, and general laundry chaos.
If you have delicate items such as bras, hosiery, or lightweight knitwear, place them in a mesh bag. That small step can prevent stretching and tangling. It is also a strong move for keeping straps from wrapping around everything else like tiny octopus arms.
Step 5: Pretreat Stains Before the Wash
A laundromat is not a magical place where ketchup stains go to repent. If you see visible stains, treat them before washing. Apply a stain remover or a small amount of liquid detergent directly to the area and gently work it in. Let it sit for a few minutes while you load the rest of your items.
The faster you treat a stain, the better your odds. Grease, sauce, sweat marks, makeup, and collar grime are all easier to remove before heat gets involved. That is why you should avoid tossing stained clothing straight into a hot dryer. Once a stain bakes in, it becomes a permanent member of the fabric family.
Step 6: Choose the Right Washer Size
Do not automatically grab the biggest machine in the building like you are renting a studio apartment for your laundry. Choose a washer size that fits your load comfortably. Clothes should have room to move around. If the washer is crammed full, detergent may not dissolve well, stains may not lift, and rinse performance can suffer.
On the other hand, washing one pair of jeans in a huge machine is not exactly efficient. Aim for a full but loose load. Bulky items like comforters, blankets, and large towels may need oversized washers. Regular everyday clothes usually do fine in standard machines. Think “comfortably full,” not “packed like a suitcase before a budget flight.”
Step 7: Add the Right Amount of Detergent
More detergent does not mean cleaner clothes. It often means leftover residue, weird stiffness, and soap that refuses to rinse out properly. Use the amount recommended on the detergent label, and adjust only if the instructions say to do so for larger or dirtier loads. If the machine is marked HE, use high-efficiency detergent.
Pods can be convenient, but follow package directions. Liquid detergent is great for pretreating stains. Powder can work well too, but you do not want clumps hanging around because the machine was overloaded or the detergent was not measured well. Laundry is one of those rare parts of life where “eyeballing it” is often the villain.
Step 8: Pick the Best Water Temperature
Water temperature matters more than many people think. Cold water is usually best for dark colors, delicate fabrics, and anything you do not want to shrink or fade. Warm water is a strong all-around choice for many everyday loads and can help with moderate soil. Hot water should generally be reserved for sturdy whites, towels, or bedding when the care label allows it.
If you are unsure, cold or warm is usually the safer bet. Going too hot is the laundry equivalent of making an expensive assumption. Better to be slightly cautious than to discover your cotton shirt now fits a middle-school action figure.
Step 9: Select the Correct Wash Cycle
Most laundromat machines offer familiar settings like Normal, Delicates, Heavy Duty, Quick Wash, and sometimes Bulky or Whites. Use Normal for everyday clothes, Delicates for gentle fabrics, Heavy Duty for heavily soiled items or sturdy fabrics, and Quick Wash only when the load is small and lightly dirty.
Cycle names can vary by machine, so read the panel instead of guessing. If your clothes are lightly worn but not really dirty, you may not need the longest cycle available. Laundry should be efficient, not dramatic. Save the epic setting for truly messy loads.
Step 10: Start the Washer and Set a Timer
Once the machine starts, set a timer on your phone. This is one of the best laundromat habits you can build. It keeps your day moving, prevents your clothes from sitting wet too long, and helps you avoid being “that person” whose finished load blocks a machine for twenty-five extra minutes.
While you wait, keep an eye on your supplies and personal items. Some people read, work, or run a very quick errand if the laundromat rules allow it, but staying nearby is usually smartest. Laundry is easier when you treat it like a process, not an emotional disappearance.
Step 11: Transfer Clothes Promptly to the Dryer
When the wash cycle ends, move your clothes to the dryer as soon as possible. Wet laundry left sitting too long can smell musty, wrinkle badly, or feel unpleasantly sour. Give the load a quick shake before drying to loosen twisted items and help everything dry more evenly.
This is also the perfect time to double-check for stains. If you still see one, do not dry that item yet. Re-treat it and wash again if needed. The dryer does not forgive. The dryer remembers.
Step 12: Clean the Lint Filter Before Drying
Always check the lint trap before every load. Remove the lint, toss it away, and then start drying. This simple step improves airflow, helps clothes dry faster, and reduces unnecessary wear on the machine. It is one of the easiest ways to make your laundromat routine more efficient.
Clean lint traps also make drying more consistent. If airflow is blocked, your towels may stay damp, your jeans may take forever, and your patience may evaporate long before the moisture does.
Step 13: Dry by Fabric Type and Heat Level
Just as you sorted for washing, sort for drying when possible. Heavy towels and sweatshirts need different drying time than thin T-shirts or activewear. Use low heat for delicates and items prone to shrinking, medium for many everyday clothes, and higher heat only for sturdy fabrics when the label allows it.
Do not over-dry your clothes. That is hard on fabric, wastes money, and can leave garments feeling rough or shrunken. If something is almost dry, sometimes the smartest move is to remove it and let it finish air-drying. That is especially true for stretchy fabrics, knits, and anything you actually like wearing.
Step 14: Fold, Hang, and Leave With a System
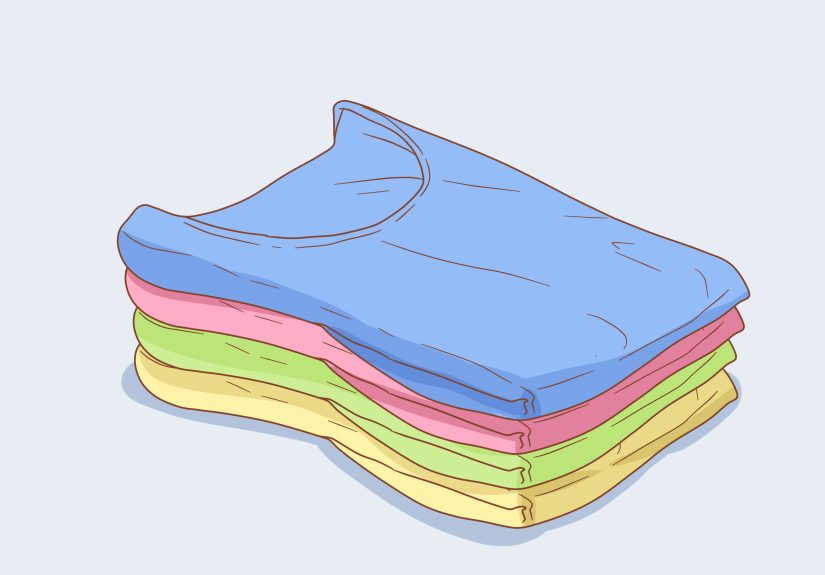
As soon as the clothes are dry, fold or hang them. This cuts down on wrinkles and saves you from dragging home a giant heap of clean chaos. Use the folding table if the laundromat has one, and group items by person, room, or type. Shirts with shirts. Towels with towels. Socks with their emotional support socks.
Before you leave, check the washer, dryer, table, and floor around you. Pick up detergent, empty baskets, stray socks, and receipts. A clean exit keeps you organized and makes next week’s laundromat trip feel much less painful.
Bonus Tips for Better Laundromat Laundry
Use full loads, but never overloaded loads
A full machine is efficient. An overstuffed machine is a soap-flavored regret. Clothes need room to move for proper washing and rinsing.
Wash similar fabrics together
Towels, jeans, T-shirts, delicates, and bedding all behave differently. Grouping similar fabrics helps washing and drying work better.
Keep bleach and specialty products under control
Only use bleach when the care label allows it, and follow product directions carefully. The laundromat is a place for clean clothes, not chemistry experiments.
Real-Life Laundromat Experiences: What People Learn After a Few Laundry Days
The first real lesson people learn at a laundromat is that laundry is mostly about rhythm, not genius. The first trip usually feels awkward. You stand in front of the machine pretending to study the settings when you are actually decoding them with the intensity of a NASA engineer. By the third or fourth trip, though, something shifts. You know how many loads fit in your baskets. You know which washer runs hottest. You know exactly how much detergent your clothes need. The process stops feeling like a puzzle and starts feeling like a routine.
One common experience is realizing how much easier life gets when clothes are sorted before arriving. People who toss everything into one giant bag usually spend the first ten minutes of laundromat time squatting on the floor separating blacks, whites, towels, and delicates while trying not to lose a sock. People who sort at home walk in calm, load machines quickly, and look suspiciously like responsible adults. It is not magic. It is preparation.
Another big lesson is that most laundry mistakes come from rushing. Someone is late, grabs the hottest dryer setting, and suddenly a favorite shirt has become a crop top with trust issues. Someone else dumps in extra detergent because the clothes are “really dirty,” then spends the next hour wondering why everything feels stiff. Laundromat experience teaches a simple truth: the right setting beats the strongest setting. Clean laundry is more about matching fabric, temperature, and cycle than brute force.
Many people also discover that the laundromat can become oddly peaceful. Not glamorous. Not luxurious. But peaceful. You get a block of time where there is only one job: wash, dry, fold, repeat. No multitasking Olympics. No inbox. No endless household distractions. Some people read. Some listen to podcasts. Some just enjoy the tiny satisfaction of turning a mountain of dirty clothes into neat stacks of order. It is one of the few chores with a clear before-and-after story.
Then there is the social side. Laundromats have their own unwritten etiquette. Move your clothes promptly. Wipe up spills. Do not occupy three folding tables like you are opening a department store. If someone is waiting for a machine, basic courtesy goes a long way. People who learn these habits quickly usually have better experiences because the laundromat works best when everyone remembers they are sharing the space.
Over time, frequent laundromat users get surprisingly strategic. They know which day is quietest. They bring smaller detergent containers instead of giant bottles. They pack one basket for darks and one for lights. They set timers. They bring hangers for button-down shirts. They stop making the classic rookie mistake of drying towels with lightweight tops. What starts as an inconvenient chore slowly becomes a system that saves time, protects clothes, and reduces stress.
And maybe that is the most useful experience of all. Doing laundry at a laundromat teaches practicality. It teaches attention to detail. It teaches patience. It teaches that one red sock can, in fact, ruin an otherwise respectable load of whites. But mostly, it teaches that a good routine beats guesswork every single time.
Conclusion
If you have been wondering how to do laundry at a laundromat without shrinking your clothes, wasting money, or accidentally turning your whites into a pastel experiment, the answer is simple: sort carefully, read labels, use the right amount of detergent, choose the right cycle, and dry with intention. That is the whole game.
The best laundromat routine is not fancy. It is consistent. Once you build your 14-step system, laundry day becomes faster, cheaper, and a lot less stressful. You may never love it, but you can absolutely get good at it. And honestly, that is enough to feel like a champion in the land of spinning metal drums.




