Table of Contents >> Show >> Hide
- What Descaling Actually Does (and Why Your Coffee Cares)
- Before You Start: Figure Out Which Breville You Have
- What You’ll Need (No, Not a Lab Coat)
- How to Descale a Breville Espresso Machine: 7 Easy Steps
- Step 1: Prep the machine (empty, remove, set up)
- Step 2: Mix your descaling solution correctly
- Step 3: Enter descale mode (your machine’s “spa day” setting)
- Step 4: Run the coffee (group head) portion of the descale cycle
- Step 5: Descale the steam and hot-water circuit (yes, it matters)
- Step 6: Repeat until the solution is used up (the “finish the job” step)
- Step 7: Rinse thoroughly (this is where great espresso is made)
- After Descaling: What to Clean, What to Reset, What to Expect
- How Often Should You Descale a Breville Espresso Machine?
- Troubleshooting: Common Descaling Problems (and Fixes)
- Extra: Real-World Experiences and Tips (500+ words of the stuff manuals don’t say)
If your espresso has started tasting a little “meh,” your steam wand has the enthusiasm of a sleepy sloth,
or your machine sounds like it’s trying to cough up a pebble… congratulations: you’ve met limescale.
The good news? Descaling a Breville espresso machine is totally doable at home, and you don’t need a degree
in Plumbing Wizardry. You just need a little time, the right solution, and a willingness to let your machine
do most of the work while you stand nearby like a supportive stage parent.
This guide walks you through how to descale a Breville espresso machine in 7 easy steps,
including what to prep, what to avoid, and what “normal” looks like during the cycle. We’ll also cover
model differences (Barista series vs. Bambino), troubleshooting, and real-world tips so your next shot tastes
like coffeenot like regret.
What Descaling Actually Does (and Why Your Coffee Cares)
Descaling removes mineral deposits (mainly calcium and magnesium) that build up inside your espresso machine
from water. Even if you use a filter, minerals can still accumulate over time. That buildup can:
- Slow your brew flow and reduce shot volume
- Make temperature less stable (goodbye, sweet espresso; hello, sour/bitter chaos)
- Weaken steam power and clog internal pathways
- Force the machine to work harder (which is basically espresso-machine cardio, and nobody asked for that)
Important note: Descaling is different from a cleaning cycle. Cleaning targets coffee oils
and residue (especially in the group head). Descaling targets mineral scale inside the hydraulic system.
You want both over the life of the machine, but they solve different problems.
Before You Start: Figure Out Which Breville You Have
Breville makes several espresso machine families, and the “how” of entering descale mode can vary.
The overall idea stays the same (run descaling solution through internal circuits, then rinse thoroughly),
but the button combos and indicators differ.
Common Breville families you’ll see at home
- Barista series (e.g., Barista Express, Barista Pro, Barista Touch, Impress): often guided by lights/LCD prompts.
- Bambino / Bambino Plus: typically uses flashing button patterns to indicate descaling mode.
If your machine has a screen that literally says “DESCALE,” that’s your machine being politely bossylisten to it.
If it has indicator lights, the manual’s “clean/descale” light behavior matters. When in doubt, follow the
manufacturer’s cycle for your exact model.
What You’ll Need (No, Not a Lab Coat)
- Descaling solution made for espresso machines (Breville’s descaler, or a reputable espresso-safe descaler)
- Fresh water (filtered is a smart move going forward)
- A large container (at least 2 liters / ~68 oz) to catch water from the group head and steam/hot-water outlet
- A towel for splashes (espresso machines love drama)
- Optional: a soft brush or cloth for wiping the drip tray and water tank
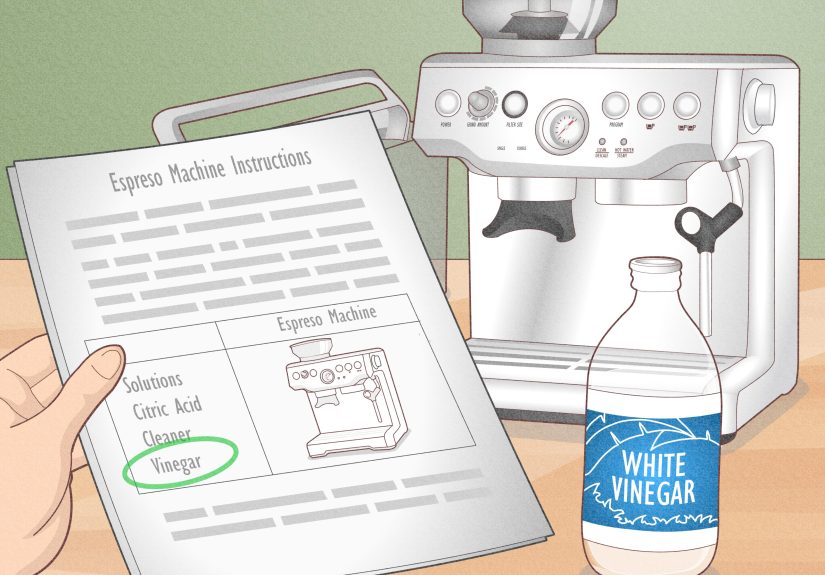
A quick word about vinegar
Some general coffee-cleaning advice online includes vinegar as a “DIY descaler.” The problem is that vinegar can
be stubborn to rinse out, leaving odor/flavor behindand many espresso-focused guides recommend using espresso-specific
descalers for best results. If you’re trying to keep your Breville tasting clean and running smoothly,
using a purpose-made descaling product (and doing a thorough rinse) is the simplest, least fussy path.
How to Descale a Breville Espresso Machine: 7 Easy Steps
Step 1: Prep the machine (empty, remove, set up)
Start with the basics:
- Turn the machine off and let it cool if it was just used.
- Empty the drip tray and knock box (if your model has one).
- Empty and rinse the water tank.
- Remove the water filter from the tank (don’t let the filter soak up your descaling solution).
- Place a large container under the group head, and position it so it can also catch water from the steam wand/hot-water outlet.
Pro tip: Put a towel under the front edge of the machine. It’s like insurance, but cheaper and made of fabric.
Step 2: Mix your descaling solution correctly
Follow the instructions on your descaler. If you’re using Breville’s descaling powder (common with Barista-series machines),
the standard approach is dissolving the sachet in water and filling the tank with the mixture.
Don’t eyeball it like you’re seasoning soup. Descaling is chemistry, not vibes.
If you’re using a commercial descaler, mix it exactly as directed, and make sure powders fully dissolve before the solution
goes into the water tank. Undissolved granules can lead to clogs or incomplete descaling.
Step 3: Enter descale mode (your machine’s “spa day” setting)
This is the only part that’s model-specific. Here are common patterns:
Barista Express-style (button interface)
Many Barista-series machines use a dedicated descale mode accessed by a button combination, then guide you with illuminated indicators.
Once the machine indicates it’s ready, you’ll run descaling through (1) the coffee circuit and (2) steam/hot-water circuits.
Bambino / Bambino Plus
Bambino models typically signal descaling with specific flashing patterns (for example, a continuously flashing 2-cup button on Bambino,
or alternating flashing among multiple buttons on Bambino Plus). Once in descale mode, the machine will run solution through its pathways,
then require a rinse cycle.
If your machine’s manual or screen prompts say “DESCALE,” follow that flow preciselyBreville designed it so you don’t have to guess.
Step 4: Run the coffee (group head) portion of the descale cycle
Start the cycle that sends solution through the brew circuit (the internal route that feeds the group head).
You’ll see liquid flow into your containersometimes in pulses. That’s normal.
- Make sure your container stays positioned to catch the output.
- Don’t walk away. Not because it’s dangerous, but because espresso machines have a talent for spilling the moment you stop watching.
- If the machine pauses, it may be switching phases or waiting for your input (depending on model).
Step 5: Descale the steam and hot-water circuit (yes, it matters)
Scale loves steam pathways. If your steam wand has gotten weaker, this step is a big deal.
Run the phase that pushes solution through:
- Steam wand circuit (steam function)
- Hot water circuit (hot-water dispenser, if your model routes separately)
Expect spurts, pauses, and a bit of noise. The machine is moving solution through internal valves and tubingthis is normal, not a breakdown.
Step 6: Repeat until the solution is used up (the “finish the job” step)
Many Breville cycles intentionally use the tank in stagesmeaning you’ll often repeat the coffee + steam/hot-water steps until the tank is empty
(or until the machine indicates the descaling phase is complete).
Do not remove the water tank mid-cycle unless the machine instructs you to do so. If your machine pauses and requests a refill or a rinse,
that’s the moment to act.
Step 7: Rinse thoroughly (this is where great espresso is made)
Rinsing is not optional. Any leftover descaler can affect taste and, in some cases, irritate internal materials over time.
To rinse:
- Empty your catch container and drip tray.
- Remove the water tank, rinse it well, and fill it with fresh cold water.
- Run the machine’s rinse cycle (or repeat the coffee + steam/hot-water steps using clean water) until the machine indicates it’s done.
For best results, use enough rinse water that you’re confident there’s no lingering odor. Your espresso should smell like coffeenot like a science fair.
After Descaling: What to Clean, What to Reset, What to Expect
Clean the easy stuff while you’re here
- Wash the drip tray and dry it
- Rinse the water tank (again) and wipe it clean
- Wipe the exterior and under the group head
- Purge the steam wand briefly with fresh water/steam (if your model allows)
Reset indicators (if needed)
Some models automatically reset the descale alert after a completed cycle. Others require a button press sequence.
If your descale light remains on after you’ve completed the full descale + rinse routine, check your manual’s “reset” instructions
(and confirm you didn’t accidentally run the cleaning cycle instead of the descaling cycle).
How Often Should You Descale a Breville Espresso Machine?
The most honest answer is: it depends on your water. Harder water = faster scale buildup.
Many Breville machines will alert you when it’s time. That’s the easiest schedule to follow because it’s based on actual usage and internal tracking.
If you want a practical rule of thumb:
- Soft/filtered water: descaling is less frequent
- Hard water: descaling becomes a regular part of life (like taking out the trash, but less smelly)
The best “cheat code” is prevention: use filtered water and replace/maintain your water filter when your model supports it.
Less scale means fewer descale cycles and more consistent espresso.
Troubleshooting: Common Descaling Problems (and Fixes)
“My machine stopped mid-cycle.”
Many Breville machines pause intentionally between phases. Check for indicator patterns or screen prompts.
If it’s waiting for a refill or a rinse step, follow the prompt. If it’s been truly inactive for several minutes,
power cycling may reset the statebut consult the manual first to avoid interrupting a required phase.
“The descale light is still on.”
This usually means one of three things:
- The rinse phase wasn’t completed fully
- The wrong cycle was run (cleaning vs. descaling)
- Your model requires a specific reset step after completion
“My espresso tastes weird after descaling.”
That’s almost always a rinse issue. Run additional fresh-water cycles through the group head and steam wand/hot-water circuit.
Then pull and discard one “test” shot before making espresso you actually want to drink.
“Steam pressure is still weak.”
If steam is weak even after descaling, the steam tip may be partially clogged with milk residue.
Clean the tip thoroughly and purge the wand. If the problem persists, it may be a deeper blockage that requires service.
Extra: Real-World Experiences and Tips (500+ words of the stuff manuals don’t say)
Descaling sounds straightforward in theory: pour solution in, press buttons, collect water, rinse, done. In real life,
there are a few “normal but confusing” moments that catch people off guardespecially if it’s your first time descaling a Breville.
Here’s what typically happens and how to keep it stress-free.
First, expect the cycle to feel longer than you think it should. Even when the active pumping happens in short bursts, the machine may
pause between phases. Those pauses aren’t the machine giving up; they’re part of how it routes solution through different internal paths.
If you’re used to a drip machine that just runs until it’s empty, a Breville can feel like it’s being dramatic. It’s not drama.
It’s valves.
Second, your catch container will fill faster than your brain predicts. People often place a mug under the group head and call it a day,
then discover the steam/hot-water phase is about to pour directly onto the counter like a tiny waterfall of regret. Use a container that’s
comfortably large (a mixing bowl, a 2+ liter pitcher, or a deep pot). If you can’t position one container to catch everything, use two and
swap them deliberatelydon’t play “liquid limbo” with one hand while the machine is pumping.
Third, the “vinegar question” comes up every single time. The temptation is understandable: vinegar is cheap, already in the kitchen, and
the internet loves a home remedy. But many home baristas report that the hardest part of vinegar descaling isn’t the descalingit’s the
aftertaste. Vinegar can linger in the system and show up in the aroma of your next few shots, even if you rinse “a lot.”
A purpose-made espresso descaler is designed to dissolve scale effectively and rinse cleanly, which usually means fewer cycles and fewer
“why does my cappuccino smell like salad dressing?” moments.
Fourth, descaling often reveals other maintenance issues you didn’t know you had. If your espresso tastes better but your flow is still slow,
that can be a sign the machine also needs a cleaning cycle (coffee oils, not minerals), the shower screen needs attention, or your grinder dose
is too high and you’re choking the puck. In other words: descaling helps water move through the machine, but it can’t fix every espresso
problem created by grind size, puck prep, or old coffee residue.
Fifth, the “first shot after descaling” is rarely the best shot of your life. Even with thorough rinsing, it’s smart to run a little extra
water through and then pull one sacrificial shot (or make a drink for someone who told you they “don’t really taste the difference,” which is
basically the universe handing you a solution). After that, espresso flavor typically snaps backoften cleaner, sweeter, and more consistent.
Finally, the most underrated tip: keep a simple maintenance note. Put a calendar reminder for filter replacement (if your model uses one) and
jot down the month you last descaled. Not because you love paperwork, but because it prevents the “Was that two months ago or last year?”
mystery that leads to either over-descaling (unnecessary) or under-descaling (scale city). Consistent, light maintenance is the path to
great espressoand a machine that doesn’t retaliate at 6:30 a.m. on a Monday.





