Table of Contents >> Show >> Hide
- Before You Start: Read the Couch Cleaning Code
- Tools and Supplies You Will Need
- Step 1: Remove Cushions, Throws, and Loose Items
- Step 2: Vacuum the Couch Thoroughly
- Step 3: Deodorize With Baking Soda
- Step 4: Spot Treat Stains the Right Way
- Step 5: Deep Clean a Fabric Couch
- Step 6: Deep Clean a Microfiber Couch
- Step 7: Steam Clean Only If the Fabric Allows It
- Step 8: Clean a Leather Couch Safely
- Step 9: Rinse Lightly and Remove Cleaning Residue
- Step 10: Dry the Couch Completely
- When Should You Call a Professional?
- How Often Should You Deep Clean Your Couch?
- Common DIY Couch Cleaning Mistakes to Avoid
- Extra Experience: What DIY Couch Deep Cleaning Teaches You
- Conclusion
Your couch works harder than most furniture in the house. It hosts movie nights, naps, pets, snacks, kids, guests, laundry piles, and the occasional “I’ll just sit here for five minutes” lie. Over time, even the nicest sofa can collect dust, body oils, crumbs, pet hair, mystery spots, and odors that no decorative pillow can politely hide.
The good news? You do not always need a professional upholstery cleaner to bring your sofa back to life. With the right tools, the right cleaning solution, and a little patience, you can deep clean your couch at home safely and effectively. The secret is not scrubbing like you are punishing the fabric. It is understanding your couch material, cleaning in layers, using moisture wisely, and letting everything dry completely.
This in-depth DIY guide explains how to deep clean your couch step by step, including fabric sofas, microfiber couches, leather couches, stain removal, odor control, steam cleaning, and practical maintenance tips. Grab your vacuum, put on your cleaning playlist, and prepare to meet the couch hiding underneath the crumbs.
Before You Start: Read the Couch Cleaning Code
Before you spray, steam, scrub, or sprinkle anything on your couch, find the manufacturer’s care tag. It is often tucked under a cushion, beneath the frame, or along a seam. This tiny tag is basically your couch’s instruction manual, and ignoring it is how innocent DIY cleaning becomes a very expensive “oops.”
Common Upholstery Cleaning Codes
- W: Water-based cleaners are usually safe.
- S: Use solvent-based cleaners only. Avoid water-based DIY mixtures.
- WS or W/S: Both water-based and solvent-based cleaners may be used.
- X: Vacuum or brush only. Do not use water, foam, steam, or solvent cleaners.
If your couch has no tag, proceed carefully. Test any cleaner on a hidden area first, such as the back bottom edge or under a cushion. Let the test spot dry fully before deciding whether the cleaner is safe. Some fabrics look fine when wet and then reveal a water ring later, like they were waiting for dramatic effect.
Tools and Supplies You Will Need
A successful DIY couch deep clean starts with simple tools. You do not need a cleaning closet that looks like a science lab, but you do need the basics.
- Vacuum with upholstery attachment and crevice tool
- Soft-bristle brush
- Microfiber cloths or white cotton towels
- Baking soda
- Mild dish soap or upholstery-safe cleaner
- Distilled water, especially for light-colored fabric
- Spray bottle
- Bucket or bowl
- Portable upholstery cleaner or steam cleaner, if fabric-safe
- Leather cleaner and conditioner for leather couches
- Fan or dehumidifier for faster drying
Use white cloths whenever possible. Colored towels can transfer dye, and your beige couch probably did not ask for a surprise blue tattoo.
Step 1: Remove Cushions, Throws, and Loose Items
Start by stripping the couch down to its basic form. Remove cushions, pillows, blankets, slipcovers, pet beds, toys, and whatever else has taken up residence between the seats. Check the cracks for coins, snack wrappers, remote controls, and that one pen you blamed your spouse for stealing.
If your cushion covers are removable, read their care labels separately. Some covers can be machine washed, while others may shrink, fade, or lose their shape. If washing is allowed, use a gentle cycle, mild detergent, and air drying unless the label clearly permits machine drying.
Step 2: Vacuum the Couch Thoroughly
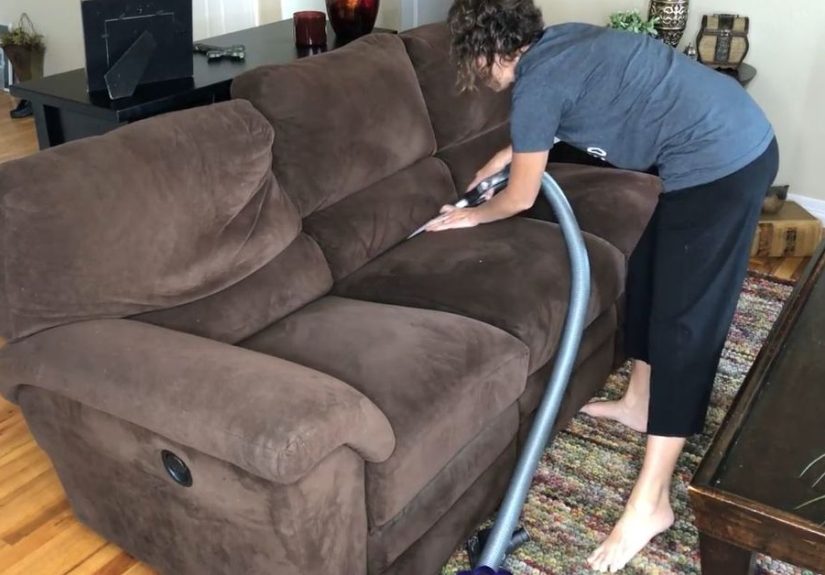
Vacuuming is not optional. It is the foundation of deep cleaning upholstery. If you skip this step and go straight to wet cleaning, you can turn dust into muddy residue and drive dirt deeper into the fabric.
Use the upholstery attachment to vacuum the arms, back, seat deck, cushions, and sides. Then switch to the crevice tool and get into seams, button tufts, cushion gaps, and corners. Vacuum both sides of loose cushions. If you have pets, go slowly. Pet hair has the survival instincts of a superhero villain.
Pro Tip for Pet Hair
If vacuuming does not remove all the fur, put on a clean rubber glove, lightly dampen it, and run your hand across the upholstery. The hair will clump together, making it easier to collect. A lint roller or upholstery brush can also help before wet cleaning.
Step 3: Deodorize With Baking Soda
Baking soda is one of the easiest ways to freshen a couch before deep cleaning. Sprinkle a light, even layer over the fabric and let it sit for 15 to 30 minutes. For stronger odors, you can leave it longer, but do not pile it on like powdered sugar on a funnel cake.
After the waiting period, vacuum thoroughly. Baking soda helps absorb odors and loosen fine debris. This step is especially useful for couches exposed to pets, food, smoke, sweat, or general life. In other words, most couches.
Step 4: Spot Treat Stains the Right Way
Stains should be treated before the full deep clean. Always blot instead of rubbing. Rubbing spreads the stain, pushes it deeper, and can rough up fabric fibers. Blotting is boring but effective, which is exactly what you want in stain removal.
For Fresh Spills
Blot immediately with a clean, dry cloth. Work from the outside of the stain toward the center to prevent spreading. Once most of the liquid is absorbed, apply a small amount of appropriate cleaner based on the upholstery code.
For Food and Drink Stains
For water-safe fabrics, mix a few drops of mild dish soap with distilled water. Dip a microfiber cloth into the suds, not the soaking water, and gently blot the stain. Follow with a clean damp cloth to remove residue, then blot dry.
For Greasy Stains
Sprinkle baking soda or cornstarch over the greasy spot and let it sit for 15 to 30 minutes to absorb oil. Vacuum it away, then treat with a fabric-safe cleaner. For S-code upholstery, use a proper solvent-based upholstery cleaner instead of water.
For Odor-Heavy Stains
Pet accidents, vomit, and other organic stains often need an enzyme cleaner designed for upholstery. Follow the product directions exactly, test first, and avoid over-wetting the cushion. If the liquid has soaked deep into the foam, surface cleaning may not fully solve the odor.
Step 5: Deep Clean a Fabric Couch
For couches labeled W or WS, a gentle water-based cleaning method can work well. The goal is to clean the fabric, not baptize the furniture.
DIY Fabric Couch Cleaning Solution
Mix 2 cups of distilled warm water with 1 teaspoon of mild dish soap. For light odor control, you may add 1 teaspoon of white vinegar, but skip vinegar on delicate fabrics and always test first. Stir gently to create suds.
Dip a microfiber cloth into the foam or lightly mist the cloth with the solution. Do not spray the couch directly until you know how the fabric reacts. Wipe small sections at a time, using gentle circular motions. Follow with a cloth dampened with plain distilled water to remove soap residue. Then blot with a dry towel.
Work evenly across the couch instead of cleaning one obvious spot only. This helps prevent water rings and patchy-looking fabric. If the couch is heavily soiled, repeat lightly rather than soaking it in one aggressive round.
Step 6: Deep Clean a Microfiber Couch
Microfiber is popular because it is soft, durable, and usually easier to maintain than many natural fabrics. However, it still needs the right cleaning method. Check the tag first. Some microfiber couches are W-safe, some are S-safe, and some allow both.
For W or WS microfiber, use a mild soap-and-water solution. Clean in small sections, blotting and wiping gently. Once dry, microfiber may feel stiff. Use a soft-bristle brush to fluff the fibers back up. This small finishing step can make the couch look less like it lost a wrestling match with a sponge.
For S-code microfiber, use rubbing alcohol or a solvent-based upholstery cleaner only if the care label allows it. Apply lightly with a spray bottle or cloth, blot, and allow it to dry. Keep the room well ventilated and avoid open flames when using solvent-based cleaners.
Step 7: Steam Clean Only If the Fabric Allows It
Steam cleaning can refresh a couch by loosening dirt, reducing odors, and helping sanitize certain water-safe fabrics. But steam is not right for every sofa. Avoid steam on leather, suede, silk, velvet, antique upholstery, X-code fabric, and any material that reacts badly to moisture or heat.
If your couch is labeled W or WS and the manufacturer allows steam cleaning, vacuum first, spot treat stains, and use an upholstery attachment. Move slowly in overlapping passes without holding the steamer in one place too long. Too much moisture can soak the padding and create musty odors.
After steam cleaning, open windows, turn on fans, and let the couch dry completely before anyone sits on it. A damp couch plus a family movie night equals a suspicious smell by morning.
Step 8: Clean a Leather Couch Safely
Leather couches need a different approach. Do not use the same soapy water method you would use on fabric unless the manufacturer recommends it. Too much water can stain leather, and harsh cleaners can strip its finish.
Vacuum with a soft brush attachment, then wipe the leather with a barely damp microfiber cloth. Use a leather cleaner designed for finished leather, following the label directions. After cleaning, apply a leather conditioner to help prevent drying and cracking.
For unfinished leather, suede, nubuck, or expensive leather furniture, professional cleaning is often the safest option. When in doubt, treat leather like a fancy jacket: gently, carefully, and without experimental kitchen chemistry.
Step 9: Rinse Lightly and Remove Cleaning Residue
Soap residue attracts dirt. That means a couch can look cleaner for two days and then somehow become grimier than before. After using a water-based solution, wipe the area with a clean cloth dampened with plain distilled water. Use as little water as possible.
Then blot with dry towels to lift moisture. Press firmly without rubbing. If cushions are removable, stand them on edge so air can circulate around both sides.
Step 10: Dry the Couch Completely
Drying is just as important as cleaning. Upholstery that stays damp too long can develop musty odors, mildew, or mold problems. Use fans, open windows, or run a dehumidifier. Avoid sitting on the couch until it is completely dry.
Most lightly cleaned couches dry within several hours, but thicker cushions may take longer. If the couch still feels cool, damp, or heavy, give it more time. Do not put pillows and throws back until everything is dry.
When Should You Call a Professional?
DIY cleaning is useful, but it has limits. Call a professional upholstery cleaner if your couch has an X cleaning code, delicate fabric, heavy staining, smoke damage, water damage, mold concerns, antique upholstery, or persistent pet odors. Professional cleaners have stronger extraction equipment and fabric-specific products that are not always practical for home use.
You should also get help if a stain has soaked into the cushion foam. Surface cleaning may improve the fabric but leave odor trapped underneath. That is not failure; that is upholstery physics being annoying.
How Often Should You Deep Clean Your Couch?
Vacuum your couch at least monthly, and more often if you have pets, kids, allergies, or a strong commitment to eating chips during television. Spot clean spills as soon as they happen. Deep clean fabric couches once or twice a year, depending on use.
High-traffic couches may need seasonal cleaning. Guest-room sofas may need less. Leather couches should be wiped regularly and conditioned a few times a year, depending on the climate and manufacturer recommendations.
Common DIY Couch Cleaning Mistakes to Avoid
Using Too Much Water
Over-wetting is one of the biggest upholstery cleaning mistakes. It can leave water rings, damage padding, and cause odors. Use light moisture and repeat if needed.
Scrubbing Stains Aggressively
Scrubbing can damage fibers and spread stains. Blot gently and patiently. Your couch is not a frying pan.
Skipping the Spot Test
A hidden spot test can save you from discoloration, shrinking, texture changes, or cleaning regret. Always test first.
Mixing Cleaners
Do not mix bleach, ammonia, vinegar, alcohol, hydrogen peroxide, or commercial cleaners unless the label specifically says it is safe. Some combinations can create irritating or dangerous fumes.
Using Heat on Protein Stains
Hot water can set protein-based stains such as blood, vomit, dairy, and some food stains. Use cool water and appropriate cleaners first.
Extra Experience: What DIY Couch Deep Cleaning Teaches You
After deep cleaning a few couches, you learn that every sofa has a personality. Some are cooperative. Some are dramatic. Some release enough crumbs to suggest a small bakery operated inside the cushions. The biggest lesson is that couch cleaning is not about one magical product; it is about process.
One practical experience is that vacuuming longer than you think necessary makes the rest of the job easier. At first, it may feel like you are wasting time, especially when the couch “looks fine.” Then you use the crevice tool and discover dust, hair, sand, cereal, and possibly evidence from three holidays ago. Removing dry soil first prevents the wet-cleaning stage from becoming muddy and uneven.
Another useful lesson is that stains respond better to patience than force. A coffee stain, for example, usually improves when you blot, apply a small amount of cleaner, wait briefly, and blot again. Scrubbing hard may feel satisfying, but it can make the area fuzzy or faded. Gentle repetition often wins.
Moisture control is also a big deal. The first time many people clean a couch, they use too much solution because “more cleaner means more clean.” Unfortunately, upholstery does not agree. Too much liquid can sink into the cushion, and then the couch takes forever to dry. A better approach is to clean lightly, towel-blot thoroughly, and use a fan immediately. Drying should begin the moment cleaning ends.
Pet owners learn a special truth: odor is not always on the surface. If a pet accident reached the cushion foam, cleaning the fabric may only reduce the smell temporarily. Enzyme cleaners can help, but the cleaner must reach the affected area without over-soaking everything else. In severe cases, replacing the cushion insert may be more effective than repeatedly treating the same spot.
Light-colored couches teach another lesson: use distilled water when possible. Tap water can sometimes leave mineral marks or faint rings, especially on pale fabric. Distilled water is inexpensive and can reduce the risk of those annoying outlines that appear only after the couch dries.
You also discover that drying time depends on more than the fabric. Humidity, cushion thickness, airflow, and how much cleaner you used all matter. A couch cleaned on a humid evening may still feel damp the next morning. A couch cleaned near an open window with a fan may dry much faster. Planning your deep clean for a dry day is not glamorous advice, but it works.
Finally, DIY couch cleaning makes regular maintenance feel less optional. Once you have spent an afternoon rescuing a sofa from crumbs, fur, and mysterious armrest stains, a quick weekly vacuum suddenly seems like a very reasonable life choice. A couch is easier to keep clean than to rescue after a year of neglect. Think of deep cleaning as the reset button and routine care as the reason you do not have to press that button too often.
Conclusion
Deep cleaning your couch DIY is absolutely possible when you use the right method for your upholstery type. Start with the care tag, vacuum thoroughly, deodorize with baking soda, spot treat stains carefully, clean with the least amount of moisture needed, and dry everything completely. For fabric and microfiber couches, gentle water-based or solvent-based methods can work beautifully when the cleaning code allows them. For leather, use leather-safe products and avoid harsh household mixtures.
The best couch cleaning routine is simple: vacuum regularly, treat spills quickly, deep clean once or twice a year, and do not experiment blindly with strong cleaners. Your couch will look better, smell fresher, and last longer. Plus, you will finally know what happened to the missing remote.




