Table of Contents >> Show >> Hide
- Why a Shoebox Is Perfect for a Valentine Box
- What You Need to Decorate a Shoebox for Valentine’s Day
- Step-by-Step: How to Decorate a Shoebox for Valentine’s Day
- Best Valentine Shoebox Themes That Always Work
- Easy Decorating Ideas by Age
- Budget-Friendly Tips for a Cute Box
- Common Mistakes to Avoid
- How to Make the Finished Box Look Extra Nice
- Experiences and Real-Life Lessons From Decorating Valentine Shoeboxes
- Final Thoughts
There are two kinds of Valentine’s Day shoeboxes in this world: the ones that look charming, creative, and ready for a classroom card avalanche, and the ones that look like a glue stick lost a wrestling match with glitter. The good news? You do not need a design degree, a craft closet worthy of a reality show, or the patience of a saint to make a cute one. You just need a shoebox, a simple plan, and a willingness to embrace a little pink chaos.
If you’re wondering how to decorate a shoebox for Valentine’s Day, the process is actually pretty straightforward. Start with a solid box, cover it with something festive, cut a card slot, and then layer on decorations that match your child’s style. The magic is in the details: a fun theme, a clean finish, and a box that can survive being carried to school without shedding sequins like a dramatic peacock.
This guide walks you through everything you need to know, from choosing supplies to picking a theme and avoiding common mistakes. Whether you’re making a classic heart-covered mailbox or turning a humble shoebox into a unicorn, monster, race car, or candy-inspired masterpiece, you’ll find easy, practical ideas that look great without making you question all your life choices.
Why a Shoebox Is Perfect for a Valentine Box
A shoebox is basically the little black dress of classroom crafts. It is sturdy, easy to find, and already shaped like something useful. Unlike flimsier containers, a shoebox usually has enough room for folded cards, flat valentines, and a few pieces of candy without collapsing halfway through the party. That matters, because nothing says “holiday spirit” quite like your child carrying home a box held together by hope and one sticker.
Another reason shoeboxes work so well is that they are easy to customize. You can wrap them in construction paper, tissue paper, scrapbook paper, fabric, or gift wrap. You can decorate the lid or remove it. You can keep the shape simple or build upward with ears, wings, clouds, hearts, or giant googly eyes. A shoebox gives you structure without limiting creativity, which is ideal when the goal is “cute and festive” and not “architectural marvel requiring a blueprint.”
What You Need to Decorate a Shoebox for Valentine’s Day
You do not need to buy half the craft aisle to make a great Valentine box. In fact, the best boxes often come from mixing basic supplies with a little imagination. Here are the essentials:
Basic Supplies
Shoebox, tissue box, or similarly sturdy cardboard box; scissors; glue stick or craft glue; tape; construction paper; tissue paper; wrapping paper; scrapbook paper; markers; stickers; ribbon; foam shapes; and cardstock. If you want extra dimension, you can also use pom-poms, pipe cleaners, doilies, felt, buttons, or cotton balls.
Optional Supplies
Paint, glitter glue, hole punch, washi tape, self-adhesive gems, paper straws, printable labels, and letter stickers. A hot glue gun can help with heavier decorations, but this is definitely grown-up territory. When craft knives or hot glue enter the chat, adult supervision should also arrive immediately.
Nice-to-Have Extras
A name tag, a small bag for candy, and a matching set of valentines can help the whole project feel pulled together. No, the box does not need branding. But a color palette is surprisingly effective. Even three coordinated colors can make a simple project look polished instead of “we found this in the car five minutes before bedtime.”
Step-by-Step: How to Decorate a Shoebox for Valentine’s Day
1. Pick the Right Box
Choose a clean, sturdy shoebox that opens and closes well. If the lid is loose, tape it down once you know the shape and design you want. The box should be big enough to hold classroom valentines without forcing every card into an awkward paper accordion. If your child’s class tends to exchange candy, pencil valentines, or small favors, a little extra space is smart.
2. Cut the Card Slot First
Before decorating, cut a slot in the top wide enough for standard valentines and small envelopes. This is one of those crucial steps people forget until the very end, at which point they’re poking a sad hole through three layers of decorative paper. Save yourself the drama. Cut first, decorate second.
3. Wrap or Cover the Box
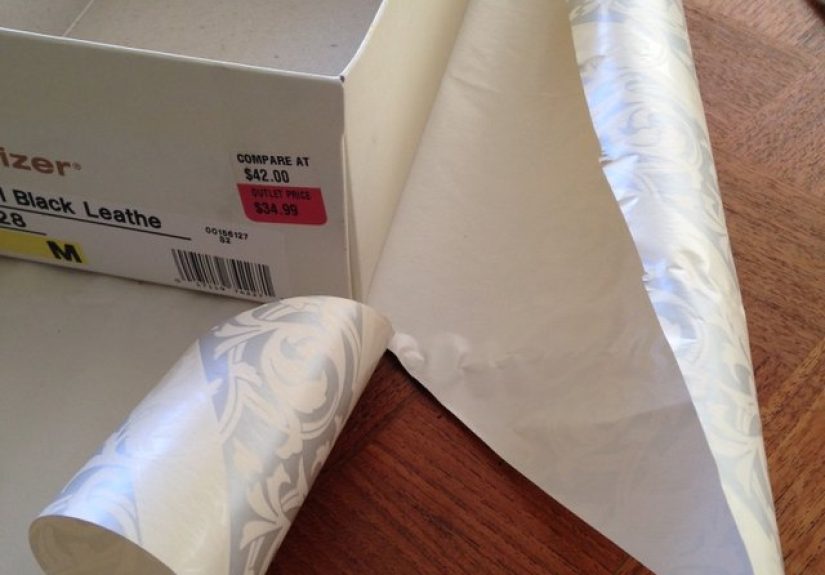
This is your base layer. Think of it as the foundation of the whole look. Cover the box with wrapping paper for a neat finish, tissue paper for a softer textured look, or construction paper for a quick kid-friendly option. Fabric can also work beautifully if you want something more durable or a little less shiny. Smooth the paper as you go so you don’t end up with giant wrinkles that make the box look like it slept in its clothes.
4. Choose a Theme
A theme makes decorating easier because it gives you boundaries. Instead of asking, “What else should we add?” you can ask, “Does this fit the theme?” That is how you avoid the all-too-common design style known as everything we had in the drawer.
5. Add Big Decorations First
Start with large visual elements like paper hearts, animal ears, wings, a rainbow, a big bow, or a face. Once those are in place, fill in empty spaces with smaller details like stickers, doodles, sequins, or mini cutout hearts. Working from large to small helps the box look intentional instead of randomly attacked by craft supplies.
6. Add Your Child’s Name
This part is not optional. A cute box is lovely, but a cute mystery box is less helpful in a classroom full of other adorable chaos. Add your child’s name in large, readable letters somewhere obvious. Letter stickers work well, but hand-cut cardstock letters or even a marker can do the job just fine.
7. Let It Dry and Test It
Before declaring victory, make sure the slot still works, the decorations are secure, and the box can be carried without pieces falling off like autumn leaves. Drop a few cards into the box as a test run. If a fluffy cloud blocks the opening or the lid caves in, now is the moment to fix it.
Best Valentine Shoebox Themes That Always Work
Classic Hearts and Love Notes
This is the easiest and most timeless option. Cover the box in red, pink, and white paper, then layer on paper hearts, doilies, ribbon, and hand-drawn love notes. Add phrases like “Be Mine,” “XOXO,” or “Love Mail” for a sweet finish. It is simple, cheerful, and hard to mess up, which honestly makes it a Valentine’s Day champion.
Unicorns, Rainbows, and Cute Creatures
If your child likes whimsical designs, go with a unicorn, koala, cat, dog, fox, monster, or dinosaur theme. These work beautifully because a box is already a great base for a face or body. Add ears, a horn, paper lashes, cotton ball clouds, or a rainbow arch, and suddenly the shoebox is living its best magical life.
Candy and Conversation Hearts
Turn the box into a giant conversation heart or a candy-inspired mailbox. Pastel paper, bold lettering, and oversized heart cutouts make this idea especially photo-friendly. It also feels unmistakably Valentine’s Day, which is nice when your child’s first idea was “What if it’s a shark with a cape?” Cute idea, sure, but candy is easier.
Hobby or Character-Inspired Boxes
If your child is into sports, video games, art, race cars, outer space, or animals, build around that interest. A basketball box, rocket box, camera box, robot box, or monster truck box can be more exciting than a generic heart theme. The trick is to keep the Valentine details present with heart accents, red-and-pink color pops, or sweet phrases so it still feels holiday appropriate.
Easy Decorating Ideas by Age
Preschool and Early Elementary
Keep it simple. Use big shapes, stickers, markers, and glue-friendly decorations that are easy for small hands to handle. A basic heart box, ladybug box, puppy box, or smiley monster is a solid win. Younger kids care more about helping than about perfect symmetry, which is honestly a beautiful lesson for all of us.
Older Elementary Kids
This age group often wants more detail and personality. Let them choose a theme and color palette, then help with cutting and assembly. Layered paper designs, pop-up elements, 3D decorations, and punny phrases tend to go over well. This is the sweet spot where kids want something cool, but they still think your assistance is useful instead of deeply embarrassing.
Tweens
Go cleaner and more intentional. Think monochrome pink, retro hearts, minimalist doodles, faux bows, checkerboard patterns, glitter accents used sparingly, or a theme based on music, fashion, or favorite colors. Tweens often prefer a box that feels customized rather than babyish, so fewer decorations can actually be more effective.
Budget-Friendly Tips for a Cute Box
You can make a fantastic Valentine shoebox without spending much money. Start by “shopping” your house. Leftover gift wrap, shipping ribbon, paper scraps, tissue paper from holiday bags, and old craft supplies are all fair game. Even grocery bags, cereal box cardboard, and paper doilies can look charming with a little effort.
Another smart move is to focus on one or two standout elements instead of adding every embellishment known to humankind. A wrapped box with a large heart, a good name label, and a few matching accents often looks better than a box overloaded with random glitter stars, six ribbons, and one confused pom-pom. Restraint is not boring. Restraint is elegant. Also cheaper.
Common Mistakes to Avoid
Forgetting the slot: A beautiful box that can’t accept valentines is basically a decorative brick.
Using a weak box: If the cardboard is flimsy, the decorations will only make it sag more.
Overdecorating the lid: If the top is too bulky, cards may not slide in easily.
Skipping the name: Classrooms are not the place for mystery mail.
Starting too late: Last-minute crafting can be fun, but it can also become a stress-powered glue festival.
How to Make the Finished Box Look Extra Nice
If you want the box to look more polished, pay attention to the edges. Fold paper neatly, trim excess material, and cover seams with ribbon, washi tape, or narrow strips of cardstock. Add dimension in a few intentional places instead of everywhere. A layered heart, a fluffy cloud, or a bold paper bow adds charm without turning the entire box into a three-dimensional obstacle course.
Color coordination also makes a huge difference. Pick two or three main colors and repeat them throughout the design. Red, pink, and white are classics, but blush and gold, rainbow pastels, or even black-and-pink can look amazing. The more consistent your colors, the more stylish the finished box appears. It is the craft version of accessorizing on purpose.
Experiences and Real-Life Lessons From Decorating Valentine Shoeboxes
One of the funniest things about decorating a shoebox for Valentine’s Day is that the project always seems simple at first. You start out thinking, “We’ll just wrap the box, glue on a few hearts, and call it a day.” Forty-five minutes later, you are in a mild debate about whether the box should have eyelashes, whether three shades of pink are too many, and why the glue stick has disappeared into another dimension. That is part of the experience, and honestly, it is part of the charm.
For many families, the Valentine shoebox ends up becoming less about the box itself and more about the memory attached to it. Parents remember staying up a little too late cutting out hearts after the kids went to bed. Kids remember proudly carrying a handmade box into school like it was a parade float. Siblings remember arguing over the glitter and then suddenly becoming artistic directors with very strong opinions. The shoebox is small, but the moment around it can feel surprisingly big.
A lot of people also discover that the best-looking boxes are not always the most complicated ones. Sometimes the winning design is a neatly wrapped box with a giant heart and a funny phrase on the front. Sometimes it is a goofy monster with crooked teeth and one oversized eye. Sometimes it is a rainbow that is a little lopsided but full of personality. The boxes that feel special are usually the ones that reflect the child who made them, not the ones that look like they were assembled by a professional event planner with an unlimited craft budget.
Another common experience is learning that kids care about ownership even more than perfection. A child who picked the theme, chose the stickers, or helped write their name on the front usually feels proud of the final result, even if the edges are not flawless. That pride matters. It turns a school project into something personal. It says, “This is mine. I made this. Also, please place your candy directly into my excellent cardboard kingdom.”
There is also something sweetly old-fashioned about the whole tradition. In a world full of screens, apps, and instant everything, decorating a shoebox for Valentine’s Day feels refreshingly hands-on. It is paper, glue, scissors, mess, laughter, and trial and error. It is low-tech in the best possible way. And when the box comes home stuffed with cards, puns, and tiny treats, it becomes a snapshot of childhood that many families end up remembering long after the glitter has migrated into the carpet forever.
So if your box turns out perfectly, wonderful. If it turns out a little crooked, slightly over-glittered, and wildly beloved, that is wonderful too. The goal is not museum-quality paper engineering. The goal is to make something fun, festive, and full of heart. Preferably with a card slot that actually works.
Final Thoughts
Learning how to decorate a shoebox for Valentine’s Day is really about combining creativity with practicality. A great box should look festive, hold plenty of cards, and reflect a little personality. Whether you choose a classic heart design, a whimsical animal theme, or a more modern look, the best approach is to keep the structure simple and let the decorations do the talking.
In the end, a Valentine shoebox does not need to be expensive or complicated to be memorable. With a sturdy base, a fun theme, and a few thoughtful details, you can turn an ordinary shoebox into a classroom-ready creation that feels personal, cheerful, and genuinely fun to make. That is a pretty good return on investment for one retired shoe container and a heroic amount of pink paper.





