Table of Contents >> Show >> Hide
- Before You Start: Identify What You’re Cleaning (Finish vs. Bare Wood)
- Your Wood-Cleaning Starter Kit
- Step 1: Dust Like You Mean It (This Is Not a Throwaway Step)
- Step 2: The Gentle Deep Clean (Dish Soap Method That Works for Most Furniture)
- Step 3: Tackling Sticky, Greasy Buildup (Especially on Kitchen Pieces)
- Step 4: Remove Water Rings and Heat Marks (The “Coasterless Confidence” Tax)
- Step 5: Disinfecting Wood (Without Wrecking the Finish)
- Step 6: Fixing the “It Looks Clean But Still Looks Old” Problem
- Step 7: Scratch and Scuff Touch-Ups (Small Wins That Make a Big Difference)
- Common Mistakes That Make Wood Look Worse
- Maintenance Plan: Keep the “New Again” Look Longer
- When Cleaning Isn’t Enough (And It’s Time to Refinish)
- Conclusion: Your Shortcut to “New Again” Wood
- Real-World Cleaning Notes (Experience-Based Scenarios) Extra
Wood furniture is basically the “good hair day” of home decor: when it looks great, the whole room looks expensive. When it looks grimy, dull, or speckled
with mystery smudges… suddenly your “vintage” table reads as “found on the curb.”
The good news: most wood pieces don’t need dramatic sanding montages to look refreshed. In many cases, they need a smarter clean (not a wetter clean),
a little patience, and the right finishing touch. This guide walks you through a safe, finish-friendly process to remove dust, grime, greasy buildup,
water rings, and dullnesswithout turning your dining table into a science experiment.
Before You Start: Identify What You’re Cleaning (Finish vs. Bare Wood)
The “rules” change depending on what’s protecting the wood. Most household furniture has a protective finish (like polyurethane, lacquer, varnish, or shellac).
That finish is what you’re cleaning on top ofand it’s also what can get damaged by harsh cleaners, excess water, or aggressive scrubbing.
Quick finish check (no detective hat required)
- Shiny or semi-shiny surface: Usually finished. Stick with gentle soap-and-water and careful drying.
- Very matte, dry-looking wood that “drinks” moisture fast: Might be oil-finished or even unfinisheduse minimal water and avoid soaking.
- Antiques or fragile finishes: When in doubt, clean gently and consider a pro for deep restoration.
Your Wood-Cleaning Starter Kit
Keep it simple. You’re not stripping paint off a spaceship.
- 2–4 microfiber cloths (one for cleaning, one for rinsing, one for drying/buffing)
- A soft toothbrush or cotton swabs (for carved details and corners)
- Mild dish soap
- A small bowl or bucket of warm water
- Optional: a wood-safe cleaner or oil soap (for finished wood, used sparingly)
- Optional: mineral spirits for heavy grime on sturdy finishes (ask an adult to handle; use ventilation)
- Optional: paste wax or furniture polish (choose one; don’t layer everything at once)
Step 1: Dust Like You Mean It (This Is Not a Throwaway Step)
Dust isn’t just dust. It’s tiny grit. If you wipe a dusty table with a damp cloth, you can grind that grit into the finish and create micro-scratches
that make wood look permanently tired.
- Use a dry microfiber cloth and wipe with the grain.
- For carved areas, use a soft brush (or a clean makeup brush) to lift dust out.
- Flip or refold your cloth often so you’re trapping dust, not redistributing it.
Step 2: The Gentle Deep Clean (Dish Soap Method That Works for Most Furniture)
For most finished wood furniture, a mild soap solution is the safest “big clean.” It removes everyday grime without stripping the finish.
How to do it
- Add a few drops of mild dish soap to warm water (you want “barely soapy,” not bubble-bath energy).
- Dampen a microfiber cloth and wring it out very well. It should be damp, not wet.
- Wipe the surface with the grain, working in small sections.
- Use a second cloth dampened with plain water to remove any soap residue.
- Dry immediately with a clean cloth. No air-drying. Wood and lingering moisture are not friends.
Pro tip for streak-free results
After drying, buff lightly with a clean microfiber cloth. That quick buff can bring back a surprising amount of “new furniture” glowwithout adding any product.
Step 3: Tackling Sticky, Greasy Buildup (Especially on Kitchen Pieces)
Cabinet fronts, dining chairs, side tables near snacksthese get coated in a thin film that dusting won’t touch. If your wood feels tacky, looks cloudy,
or seems to grab lint, you’re dealing with buildup: oils, old polish residue, cooking grease, or all of the above.
Option A: Repeat the dish-soap clean (with patience)
- Use the same soap method, but focus on small sections.
- Rinse and dry thoroughly so residue doesn’t remain.
Option B: Mineral spirits for stubborn grime (careful + adult help recommended)
Mineral spirits can cut through heavy buildup on durable finishes. Because it’s a strong solvent and flammable, use it only with good ventilation,
away from flames/heat, and ideally with an adult’s help.
- Test first in a hidden spot.
- Lightly dampen a cloth (do not pour directly on the furniture).
- Wipe with the grain, using gentle pressure.
- Switch to a clean part of the cloth as grime transfers.
- Wipe once with a slightly damp water cloth, then dry and buff.
Step 4: Remove Water Rings and Heat Marks (The “Coasterless Confidence” Tax)
Water rings come in two main types:
- White rings: Moisture trapped in the finish (often fixable).
- Dark rings: Moisture penetrated deeper (harder; sometimes permanent without refinishing).
Fix #1: The gentle heat method (for white rings)
- Place a clean cotton cloth over the ring.
- Use a warm iron briefly (no steam) and keep it moving.
- Check often. Stop as soon as the mark fades.
If an iron makes you nervous (valid), a hairdryer on medium heat can also helpjust keep it moving and don’t overheat the finish.
Fix #2: Non-gel toothpaste (mild abrasive) for small rings
- Use a tiny amount of non-gel white toothpaste on a soft cloth.
- Rub gently with the grain.
- Wipe clean with a damp cloth, then dry and buff.
Fix #3: The mayo trick (yes, really) for light water rings
For some white rings, a small amount of mayonnaise left briefly on the spot can help disguise or lift the mark by reconditioning the affected area.
Wipe clean thoroughly afterward so you don’t leave an oily film behind.
Step 5: Disinfecting Wood (Without Wrecking the Finish)
Wood doesn’t love harsh disinfectants. Alcohol, ammonia-based cleaners, and aggressive sprays can dull or strip finishes. For routine “clean enough,”
use the dish-soap method. If you need extra caution (like after food prep on a sealed surface), use a very lightly dampened cloth and dry immediately.
If you’re trying to clean mold on wood, prioritize safety: ventilation, minimal moisture, and thorough drying. In many situations, a professional assessment
is the safest choiceespecially if mold keeps returning.
Step 6: Fixing the “It Looks Clean But Still Looks Old” Problem
Sometimes the grime is gone, but the wood still looks dull. That’s often because the finish is dry, micro-scratched, or coated with uneven residue from old polish.
The solution is not “more product.” The solution is the right productused sparingly.
Polish vs. wax: what to use (and when)
- Furniture polish: Adds shine quickly. Best for occasional touch-ups. Overuse can cause buildup.
- Paste wax: Creates a more durable, soft luster and some protection. Great for tables and frequently touched surfaces.
How to apply paste wax (simple and satisfying)
- Make sure the piece is fully clean and dry.
- Apply a very thin coat with a soft cloth.
- Let it haze (follow label timing).
- Buff with a clean cloth until smooth and even.
Step 7: Scratch and Scuff Touch-Ups (Small Wins That Make a Big Difference)
Cleaning reveals scuffs you “never noticed” (even though they were basically waving at you daily). Many minor marks are in the finish, not the wood.
Try this first: buff and blend
- Buff lightly with a microfiber cloth.
- If needed, apply a small amount of polish and buff again.
For light scratches
- A matching touch-up marker can help camouflage.
- For antiques or valuable pieces, test carefully or consult a pro so you don’t create a bigger mismatch.
Common Mistakes That Make Wood Look Worse
- Using too much water: Can swell wood, loosen veneer, and leave cloudy spots.
- Scrubbing with abrasive sponges: Can dull or scratch the finish fast.
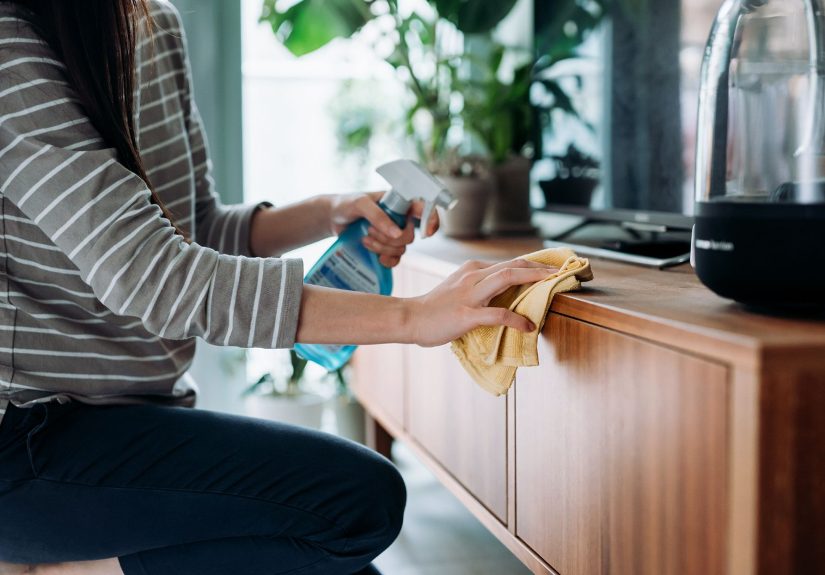
- Spraying cleaner directly on the surface: Liquids can seep into seams and damage joints or veneer.
- Using ammonia/glass cleaner: Can degrade finishes and cause hazing.
- Over-polishing: Creates a sticky layer that attracts dust like it’s getting paid for it.
Maintenance Plan: Keep the “New Again” Look Longer
Weekly (5 minutes)
- Dry dust with microfiber, following the grain.
- Spot-clean fingerprints with a barely damp cloth, then dry.
Monthly
- Do the gentle dish-soap wipe-down if the piece gets frequent use.
- Inspect high-touch areas (drawer pulls, table edges, chair backs).
Every 6–12 months (as needed)
- Apply a thin coat of paste wax on workhorse surfaces like dining tables and coffee tables.
- Skip waxing if the finish is already glossy and in great shapebuffing may be enough.
When Cleaning Isn’t Enough (And It’s Time to Refinish)
If you’ve cleaned thoroughly and the piece still looks blotchy, rough, or deeply stained, the finish may be failing. Signs you may need refinishing:
- Dark water stains that don’t improve with gentle methods
- Large areas of missing finish
- Sticky surfaces even after removing buildup
- Flaking, cracking, or widespread cloudiness
Refinishing can be a great DIY project, but it’s also easy to overdo. If the piece is valuable, antique, or sentimental, a furniture restoration pro may be the
smartest path (and often cheaper than fixing a DIY “oops”).
Conclusion: Your Shortcut to “New Again” Wood
The secret to making wood furniture look new again isn’t one magic sprayit’s the right sequence:
dust first, clean gently with minimal moisture, target buildup with the least aggressive method that works, then finish with a light buff (and wax or polish only
when it truly adds value). Do that, and even a tired table can bounce back from “meh” to “whoa, did you buy that recently?”
Real-World Cleaning Notes (Experience-Based Scenarios) Extra
People usually search “how to clean wood furniture” after one of three events: (1) guests are coming, (2) the sun hit the table at the wrong angle and exposed
years of fingerprints, or (3) someone set a sweaty glass down with the confidence of a billionaire. The patterns are surprisingly consistent, and the fixes are too.
Scenario 1: The “sticky dining table” mystery. A common complaint is a dining table that feels tacky even after wiping. Most of the time,
it’s not the wood “going bad”it’s product buildup. Many households unknowingly layer polish on top of old polish for years. It starts out shiny, then turns into
a dull, grabby film that catches dust and makes the surface feel grimy by lunchtime. In real homes, the fastest improvement usually comes from a patient two-step:
a mild dish-soap wipe (damp cloth, not wet), followed by a clean-water wipe and a thorough dry buff. If the stickiness is stubborn, a careful solvent wipe
(handled safely, ideally by an adult) often removes the old residue so the finish can look clear again.
Scenario 2: Kitchen chairs with “hand grime halos.” Chair backs and top rails collect oils from hands and hair (human beings are basically
walking skincare routines). You’ll often see darker patches where hands grab the chair to scoot it in. The trick is not scrubbing harderscrubbing harder can
dull the finish in that exact spot and create a “clean patch” that looks like a faded badge. Instead, clean in small sections with the grain, rinse, dry, and
then buff the whole rail so the sheen stays even. If you want one small upgrade that makes a big difference, switch to microfiber and stop air-drying.
Scenario 3: The dreaded white ring on a coffee table. White rings are usually moisture trapped in the finish, which is why gentle heat can work.
In practice, the key is restraint: short passes, check often, and stop early. People get into trouble when they treat the iron like a pressure washer and hold it
in place too long. If you’re careful, the ring often fades fast, and a quick buff afterward helps blend the sheen so the repair doesn’t stand out.
Scenario 4: “I cleaned it… why does it look streaky?” Streaks usually come from too much soap, too much water, or leftover cleaner that wasn’t
rinsed off. One repeatable fix: do a plain-water wipe with a well-wrung cloth, then dry immediately and buff. That final buff is underratedit can take a
piece from “clean but dull” to “clean and lively” with zero extra product.
Scenario 5: Old dresser, new confidence. A lot of “new again” results come from addressing what people skip: the seams, corners, and hardware
edges. Dirt hides where panels meet and around drawer pulls. Using a soft toothbrush or cotton swab in those areas (with minimal moisture) makes the whole piece
look refreshed, because your eye reads “clean details” as “overall clean.” It’s a small effort that pays off like you did something dramaticwithout actually
needing to sand anything in your driveway.





