Table of Contents >> Show >> Hide
- Why a Dollar Store Pizza Pan Works So Well for DIY Decor
- Supplies You Need
- Step-by-Step Dollar Store Pizza Pan Home Decor Idea
- Creative Pizza Pan Decor Variations
- Design Tips to Make It Look More Expensive
- Common Mistakes to Avoid
- Where to Display Your Pizza Pan Decor
- Budget Breakdown
- Is This Project Beginner-Friendly?
- Extra Experience: What I Learned Making Dollar Store Pizza Pan Decor
- Conclusion
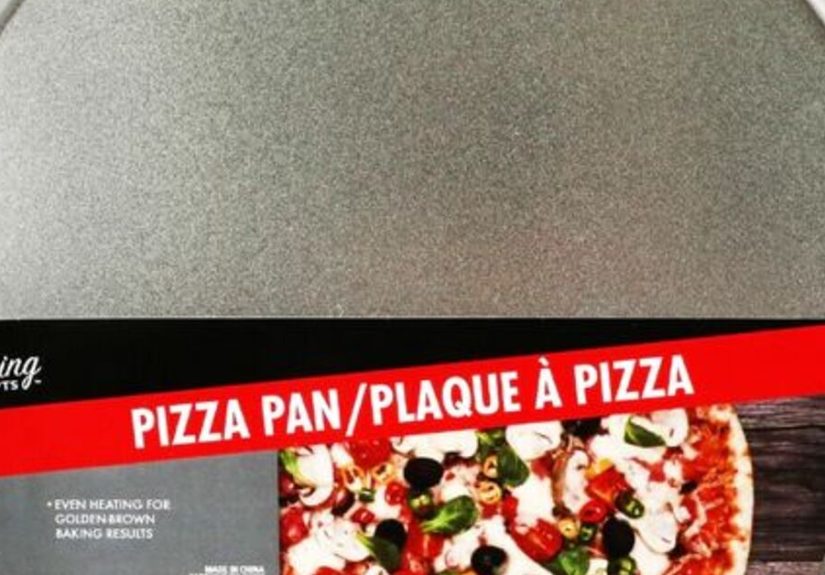
Sometimes the best home decor idea is not hiding in a fancy design showroom. Sometimes it is sitting in the kitchen aisle at the dollar store, quietly pretending it only wants to bake frozen pizza. That humble round metal pizza pan can become a farmhouse door hanger, a seasonal wall sign, a coffee bar accent, a faux tray, a mini mirror frame, or even a cheerful wreath base. The best part? You do not need a professional craft room, a luxury budget, or a mysterious toolbox inherited from a woodworker uncle. You need a pizza pan, a few simple supplies, and the courage to look at bakeware and say, “You are wall art now.”
A dollar store pizza pan home decor idea is popular because it checks every box modern DIY lovers care about: affordable, beginner-friendly, customizable, and surprisingly stylish. The round shape gives you an instant frame. The shallow rim adds dimension. The lightweight metal makes it easy to hang. And because the surface is flat, it works beautifully with paint, fabric, paper, peel-and-stick tile, napkins, vinyl decals, scrapbook paper, rope, faux greenery, ribbon, wood beads, or seasonal signs.
This guide walks you through a complete pizza pan decor project, plus creative variations, decorating tips, common mistakes, and real-life crafting experience to help your finished piece look charming rather than “I wrestled a glue gun and lost.”
Why a Dollar Store Pizza Pan Works So Well for DIY Decor
The magic of this project is the shape. A 12-inch pizza pan is basically a ready-made round canvas. Round decor is naturally soft and welcoming, which is why wreaths, mirrors, trays, clocks, and medallion-style wall pieces are so popular in interior design. Instead of cutting wood into a circle or buying a pricey craft blank, you can use a metal pizza pan as the base.
The pan’s thin profile also makes it practical. It is light enough for command strips, ribbon hangers, twine loops, or small sawtooth hangers. It can fit on a kitchen wall, porch door, gallery wall, mantel, coffee bar, laundry room shelf, entryway hook, or nursery door. Because the pan is inexpensive, you can experiment without feeling like every brushstroke needs to be blessed by an art professor.
Best Decor Styles for Pizza Pan Crafts
A pizza pan can match many styles depending on the finish. For farmhouse decor, use white chalk paint, buffalo check ribbon, jute rope, wood beads, and greenery. For coastal decor, try soft blue paint, rope trim, seashells, and sandy beige accents. For modern glam, use matte black paint, metallic gold details, a small mirror, or faux marble contact paper. For seasonal decor, add pumpkins, florals, patriotic stars, Christmas greenery, spring tulips, or Halloween lettering.
Supplies You Need
For a basic dollar store pizza pan wall hanging, gather the following materials:
- One 12-inch dollar store pizza pan
- White chalk paint or acrylic craft paint
- Foam brush or small paintbrush
- Fine-grit sandpaper or sanding sponge
- Scrapbook paper, decorative napkin, fabric, placemat, calendar print, or vinyl decal
- Mod Podge or craft glue
- Hot glue gun and glue sticks
- Jute rope, nautical rope, ribbon, or wood bead trim
- Faux greenery or flowers
- Twine, ribbon, or a metal hanger for the back
- Optional: clear acrylic sealer
You can usually find many of these items at a dollar store, craft store, discount store, or in that mysterious drawer where ribbon scraps go to live dramatic second lives.
Step-by-Step Dollar Store Pizza Pan Home Decor Idea
Step 1: Clean and Prep the Pizza Pan
Before painting, wash the pizza pan with warm soapy water and dry it completely. Metal pans often have a smooth or slightly shiny finish, which can make paint slide around like it is avoiding commitment. Lightly sand the surface to help paint and glue grip better. Wipe away dust with a dry cloth.
This small prep step makes a big difference. Skipping it may cause paint to peel or scratch easily, especially if the finished piece will be handled, stored, or moved seasonally.
Step 2: Paint the Base
Apply a thin coat of chalk paint or acrylic paint to the front of the pan. Let it dry, then add a second coat if needed. Thin coats are better than one gloopy coat. Thick paint can show brush marks, create bubbles, or take longer to cure. For a rustic farmhouse look, you can leave a little texture. For a cleaner modern look, use a foam brush and smooth strokes.
Popular color choices include white, cream, sage green, charcoal, black, navy, pale blue, or warm beige. If you want the pan to look less like metal bakeware and more like boutique decor, paint the rim too.
Step 3: Add the Main Decorative Center
Now comes the fun part: the focal point. You can use scrapbook paper, a seasonal napkin, a printed quote, a calendar image, a small round sign, peel-and-stick wallpaper, fabric, or a vinyl phrase such as “welcome,” “home,” “gather,” “hello spring,” or “coffee first.”
If using paper or a napkin, cut it into a circle slightly smaller than the pan. Apply a thin layer of Mod Podge to the pan, lay the paper down carefully, and smooth from the center outward to reduce wrinkles. Add another thin coat over the top once the first layer begins to dry. If using fabric, trim neatly and glue it flat. If using vinyl, make sure the painted surface is fully dry before applying.
One simple idea is to use a pretty floral paper in the center, then frame it with rope around the pan’s inner edge. Another is to paint the pan white, apply a black “Welcome” decal, and add a buffalo check bow with eucalyptus stems at the top.
Step 4: Trim the Edge
The rim is what transforms the project. Without trim, the pan may still look a little too close to its pizza-baking past. Use hot glue to attach jute rope, nautical rope, ribbon, lace, wood beads, or braided yarn around the edge. Work in small sections so the glue does not cool before the trim sticks.
For farmhouse decor, jute rope is a classic choice. For a coastal look, nautical rope feels breezy and casual. For cottagecore style, lace or floral ribbon softens the design. For modern decor, try black rope, leather cord, or a clean painted rim without extra embellishment.
Step 5: Add Flowers, Greenery, or a Bow
Decorative accents give the piece dimension. A bow at the top or bottom can make the sign feel finished. Faux greenery adds softness. Seasonal flowers make it easy to match spring, summer, fall, or winter decor.
Try these combinations:
- Spring: tulips, lavender, gingham ribbon, and pastel lettering
- Summer: sunflowers, lemons, patriotic stars, or coastal shells
- Fall: mini pumpkins, maple leaves, burlap ribbon, and warm orange tones
- Christmas: pine sprigs, red berries, plaid ribbon, and a “Merry Christmas” center
- Everyday farmhouse: eucalyptus, white paint, black script lettering, and jute rope
Step 6: Attach a Hanger
Turn the pan over and hot glue a loop of twine, ribbon, or rope to the back. For extra strength, glue a small piece of felt, cardboard, or craft stick over the ends of the hanger. This spreads the tension and helps prevent the hanger from pulling loose.
If you plan to hang the decor on a front door, choose a secure hanger and avoid placing it where it will be hit by heavy rain or strong wind. A pizza pan sign is lightweight, which is great for hanging but not ideal for stormy weather. It prefers compliments, not hurricanes.
Creative Pizza Pan Decor Variations
1. Dollar Store Pizza Pan Mirror
Glue a small round mirror to the center of a painted pizza pan, then decorate the rim with wood beads, rope, or faux flowers. This creates an inexpensive accent mirror for an entryway, bedroom, bathroom, or gallery wall. For a more upscale look, spray paint the pan matte black or metallic gold before adding the mirror.
2. Pizza Pan Coffee Bar Sign
Paint the pan black or white, apply a coffee-themed vinyl decal, and add a small bow. Phrases like “But First, Coffee,” “Coffee Bar,” or “Fresh Brewed Happiness” work well. Hang it above mugs, near a coffee cart, or beside open kitchen shelves.
3. Seasonal Door Hanger
Use the pizza pan as a round door sign. Add a seasonal image in the center, trim the rim with rope, and attach a large bow. This is one of the easiest ways to change your decor without buying a new wreath for every holiday.
4. Faux Decorative Tray
Paint the pan and add decorative feet using wood beads, small blocks, or sturdy knobs. Decorate the top with peel-and-stick tile, faux marble paper, or a painted stencil. Use it as a decorative tray for candles, faux plants, or wrapped treats. Do not use a decorated pizza pan tray for hot food unless all materials are food-safe and heat-safe.
5. Kids’ Room Name Sign
Paint the pan in a soft color, add a child’s name with vinyl or letter stickers, and decorate with stars, animals, flowers, dinosaurs, cars, or rainbows. It makes a sweet bedroom door sign or nursery wall accent.
Design Tips to Make It Look More Expensive
The difference between “cute craft” and “wow, where did you buy that?” is usually restraint. Choose a color palette before you start. Two or three main colors often look more polished than seven competing colors having a tiny parade on one pan.
Texture also matters. Rope, beads, ribbon, greenery, and matte paint can make inexpensive materials feel layered and intentional. If the center image is busy, keep the trim simple. If the center is plain, add more texture with florals or a statement bow.
Scale is another secret. A tiny bow on a 12-inch pan may look lost. A massive bow may look like it is trying to take over the neighborhood. Aim for balance: one focal point, one trim style, and one accent cluster.
Common Mistakes to Avoid
Using Too Much Glue
Hot glue is helpful, but too much can create lumps, strings, and visible bumps under paper or ribbon. Use small amounts and press carefully. Keep a craft stick nearby to smooth edges without burning your fingers.
Not Letting Paint Dry
Crafting requires patience, which is rude but true. If you apply paper, vinyl, or sealer too soon, the paint can peel, smear, or bubble. Let each layer dry fully before adding the next.
Skipping Surface Prep
Metal is slick. A quick wash and light sanding help paint adhere. If you want a long-lasting finish, this step is worth the extra five minutes.
Overdecorating the Pan
It is tempting to use every ribbon, flower, bead, and sticker you own. Resist. The best pizza pan decor ideas look intentional, not like a craft supply explosion with a handle.
Where to Display Your Pizza Pan Decor
This project is versatile enough for almost any room. Hang a welcome sign in the entryway, a coffee sign in the kitchen, a floral piece in the bedroom, a seasonal wreath on an interior door, or a playful quote in the laundry room. You can also prop it on a shelf, layer it with cutting boards, or place it behind a small plant for depth.
For outdoor use, keep the sign under a covered porch or storm door. Seal painted and decoupaged surfaces with a clear acrylic sealer for added protection, but remember that most craft materials are weather-resistant at best, not invincible. Rain, humidity, and direct sunlight can shorten the life of paper, glue, ribbon, and faux flowers.
Budget Breakdown
A basic dollar store pizza pan home decor project can cost very little, especially if you already own paint, glue, and ribbon. A simple version may include one pizza pan, one roll of rope, one small floral bunch, and one sheet of decorative paper. More detailed versions with mirrors, wood beads, vinyl, or seasonal picks may cost more, but they are still usually far cheaper than buying a finished wreath or custom round sign.
The biggest money-saving tip is to reuse leftovers. Ribbon scraps, old calendar pages, napkins from a party pack, leftover peel-and-stick wallpaper, broken faux flower stems, and spare beads can all become part of the design. This is the kind of project that rewards the person who says, “I might use this later,” and actually does.
Is This Project Beginner-Friendly?
Yes. This is one of the best beginner DIY home decor projects because the base is already shaped, the materials are affordable, and the process is forgiving. If the paint looks uneven, add another coat. If the paper wrinkles, cover the edge with ribbon or rope. If the bow looks strange, remake it or use greenery instead. The pizza pan is patient. It has seen frozen pepperoni at 425 degrees, so it can handle your learning curve.
Extra Experience: What I Learned Making Dollar Store Pizza Pan Decor
After making several pizza pan decor pieces, the biggest lesson is that the pan may be cheap, but the finish does not have to look cheap. The first time you try this project, it is easy to focus only on the center design. You paint the pan, stick on a cute quote, add a bow, and call it done. That version can be adorable, but the real upgrade happens around the edges. Adding rope, beads, or ribbon to the rim hides the original pan shape and makes the whole piece feel more like intentional wall decor.
Another useful experience is to test your layout before gluing anything down. Place the paper, bow, flowers, and trim on the pan first. Take a quick photo with your phone. For some reason, a photo makes design issues easier to spot. You may notice that the bow is too low, the flowers are too heavy on one side, or the lettering is slightly crooked. It is much better to discover this before the hot glue becomes a permanent member of the family.
I also learned that not all decorative paper behaves the same. Thick scrapbook paper is easier to handle, but it may not curve smoothly if your pan has a raised center. Napkins are beautiful for decoupage, especially floral or seasonal patterns, but they wrinkle more easily. If using napkins, separate the printed top layer from the plain backing layers before applying. Use a very thin coat of decoupage medium and smooth gently. Do not attack it with the brush like you are painting a fence. Napkins require a soft touch and a little emotional maturity.
For a cleaner look, matte finishes tend to photograph better than glossy finishes. White chalk paint, black matte paint, and soft neutral acrylics give the project a modern handmade look. Glossy paint can work, especially for Christmas or glam decor, but it may highlight brushstrokes or surface imperfections. If your goal is farmhouse style, do not worry about perfection. Slight texture and dry-brushed edges can actually add charm.
The hanger on the back deserves more attention than most tutorials give it. A simple ribbon loop glued directly to the metal may work for a lightweight indoor sign, but it can pull loose if the decor is moved often. A stronger method is to glue down the ribbon ends, then cover them with a small piece of felt, cardboard, or a craft stick. This creates a stronger bond and keeps the back neater. If the sign will hang on a frequently used door, use a sturdy ribbon and check it occasionally.
Storage is another practical point. Seasonal pizza pan signs are thin, which makes them easier to store than bulky wreaths. Wrap them loosely in tissue paper or place them in a shallow storage bin. Avoid stacking heavy items on top of signs with flowers, bows, or raised bead trim. Nobody wants to open a holiday bin and find a flattened bow looking like it had a rough winter.
Finally, this project is a great reminder that home decor does not need to be expensive to feel personal. A dollar store pizza pan can become a spring welcome sign, a farmhouse kitchen accent, a child’s room decoration, or a thoughtful handmade gift. The charm comes from the details you choose: your colors, your phrase, your ribbon, your flowers, your style. And if the first one is not perfect, congratulations. You have created a prototype, which is just a fancy word for “I am making another one.”
Conclusion
A dollar store pizza pan home decor idea is proof that creativity can turn the most ordinary item into something delightful. With paint, paper, rope, ribbon, and a few embellishments, a simple metal pan can become a custom wall sign, door hanger, mirror, tray, or seasonal accent. It is affordable, beginner-friendly, and endlessly adaptable to farmhouse, coastal, cottage, modern, holiday, or everyday decor styles.
The key is to prep the surface, build a balanced design, finish the edges, and avoid overloading the pan with too many details. Whether you are decorating a small apartment, refreshing a kitchen wall, making a budget-friendly gift, or just enjoying a relaxing craft afternoon, this project delivers big charm from a tiny price tag. Not bad for something that started life next to the baking sheets.
Note: This article is written in original American English for web publishing and is based on current DIY home decor practices, common dollar store craft techniques, and real pizza pan craft examples.




