Table of Contents >> Show >> Hide
- Why Build DIY Wood Pallet Shelves?
- Choose the Right Pallet Before You Start
- Tools and Materials You Will Need
- Step-by-Step: How to Build DIY Wood Pallet Shelves
- Mounting DIY Pallet Shelves Safely
- Finish Ideas for Wood Pallet Shelves
- Design Ideas for DIY Wood Pallet Shelves
- Common Mistakes to Avoid
- Maintenance Tips for Pallet Shelving
- Real-World Experience: Lessons From Building DIY Wood Pallet Shelves
- Conclusion
- SEO Tags
DIY wood pallet shelves are the home-improvement equivalent of finding a twenty-dollar bill in an old jacket: surprisingly useful, slightly thrilling, and likely to make you wonder why you did not do this sooner. A humble shipping pallet can become rustic wall storage, a farmhouse-style kitchen display, a garage organizer, a plant shelf, a bathroom towel rack, or a cozy little book ledge that looks like it came from a boutique shop with Edison bulbs and expensive candles.
The beauty of pallet shelving is simple: the material is often affordable, the style is warm and imperfect, and the project can be scaled to match your skill level. You can build a quick wall-mounted shelf from a single pallet board, or you can get ambitious and create a multi-tier unit with cubbies, hooks, and a finish smooth enough to make your guests say, “Wait, you made that?” That is when you casually nod like a woodworking wizard, even if you spent half the afternoon arguing with a bent nail.
Still, a good pallet shelf is not just about charm. It needs to be clean, safe, solid, level, and attached properly. Reclaimed wood has personality, but it also has splinters, mystery stains, old fasteners, rough edges, and sometimes treatment stamps you should understand before bringing it indoors. This guide walks you through how to choose the right pallet, prepare the wood, design shelves that fit your space, mount them securely, and finish them beautifully.
Why Build DIY Wood Pallet Shelves?
Wood pallet shelves are popular because they hit the sweet spot between budget-friendly and character-rich. New lumber can be expensive, especially if you want thicker boards with an aged look. Pallet wood already has knots, grain variation, nail holes, weathering, and color shifts. In other words, it arrives with a backstory. You just need to make sure that backstory does not involve motor oil, mildew, or a warehouse spill from 2009.
DIY pallet shelves also support creative reuse. Instead of sending usable wood to the waste pile, you can turn it into storage with purpose. A narrow pallet shelf can hold spices in the kitchen. A deeper one can display framed photos in the living room. A stronger bracketed shelf can organize paint cans, garden supplies, or power-tool batteries in the garage. With the right design, pallet shelving can be decorative, practical, and satisfyingly inexpensive.
Choose the Right Pallet Before You Start
The first rule of pallet projects is simple: not every pallet deserves a second life inside your home. Some pallets are cleaner and safer than others. Look for pallets that are dry, solid, free from strong odors, and not visibly contaminated. Avoid pallets with dark mystery stains, chemical smells, mold, excessive grease, broken stringers, or boards that crumble when you touch them. A pallet shelf should look rustic, not radioactive.
Understand Pallet Stamps
Many shipping pallets carry an IPPC-style stamp that shows how the wood was treated for pests. A stamp with “HT” means heat-treated. That is generally the preferred option for DIY home projects because the wood was treated with heat rather than fumigated. A stamp with “MB” means methyl bromide fumigation. Avoid MB-stamped pallets for indoor DIY shelving. If a pallet is unmarked, heavily stained, or impossible to identify, it is better to pass and keep searching.
Also watch out for brightly painted pallets. Some colored pallets belong to pallet rental systems and may not be free to take. Paint can also hide damage, contamination, or old coatings. If you do use painted pallet wood, do not sand unknown old paint without proper testing and precautions. When in doubt, choose plain, clean, heat-treated wood.
Where to Find Pallets
Good places to ask include small hardware stores, garden centers, local warehouses, furniture shops, feed stores, and independent retailers. Always ask permission before taking pallets. A stack behind a building may look abandoned, but it might be part of a return system. Besides, asking nicely is free, and it keeps your DIY project from accidentally becoming a legal thriller.
Tools and Materials You Will Need
You do not need a professional workshop to build DIY wood pallet shelves, but the right tools make the job cleaner and safer. For a basic wall shelf, gather a pry bar or pallet buster, hammer, reciprocating saw or circular saw, drill, driver bits, tape measure, level, stud finder, clamps, sandpaper, screws, wall anchors or shelf brackets, wood glue, and your chosen finish. Safety gear matters too: gloves, eye protection, hearing protection, and a dust mask or respirator when sanding.
If you plan to disassemble multiple pallets, a reciprocating saw with a metal-cutting blade can save time by slicing through nails between boards and stringers. If you prefer to keep the pallet structure intact, you can cut sections directly from the pallet and turn them into ready-made shelf frames. This shortcut works especially well for rustic wall cubbies and vertical plant shelves.
Step-by-Step: How to Build DIY Wood Pallet Shelves
Step 1: Plan the Shelf Size and Purpose
Before cutting anything, decide what the shelf needs to hold. Decorative shelves for small plants and picture frames can be light and narrow. Kitchen shelves for mugs or jars need more depth and stronger mounting. Garage shelves for tools need sturdier brackets and direct attachment into studs. The heavier the load, the more serious your structure should be.
Measure the wall space and mark the shelf width with painter’s tape. This lets you see the scale before committing. A shelf that looks charming in your imagination may look like a wooden diving board once it is on the wall. Painter’s tape prevents design regret, which is one of the most underrated DIY hazards.
Step 2: Disassemble the Pallet Carefully
Place the pallet on a stable surface and remove boards slowly. Use a pry bar to lift boards from the stringers, working near the nails to reduce splitting. If nails are stubborn, cut through them with a reciprocating saw. Pull or punch out remaining nail pieces so they do not surprise you later. Reclaimed wood already has attitude; it does not need hidden metal spikes.
Sort your boards by width, thickness, and condition. Save the straightest boards for visible shelf faces. Use more weathered or imperfect boards for backs, braces, or hidden supports. If a board is split at the end, cut away the damaged section. Pallet boards are rarely perfect, so design with flexibility rather than fighting every irregularity.
Step 3: Clean the Wood
Brush away dirt, dust, and loose debris. Wipe the boards with a damp cloth and mild soap if needed, then allow them to dry completely. Do not trap moisture under paint or stain. For indoor shelves, cleanliness is especially important. A rustic shelf should smell like wood, not like the back corner of a delivery dock.
Step 4: Sand for Safety and Style
Sanding is where pallet wood transforms from “splinter factory” to “charming reclaimed material.” Start with a coarser grit, such as 80-grit, to knock down roughness. Move to 120-grit or 150-grit for a smoother surface. For shelves that will hold towels, clothing, books, or kitchen items, sand edges and corners especially well. Nobody wants a shelf that exfoliates their knuckles.
Use dust control whenever possible. Sand outdoors or in a well-ventilated area. Wear respiratory protection, and use a vacuum or dust collection attachment if available. Wood dust can irritate eyes, skin, and lungs, so treat sanding as real work, not just the dusty prelude to the fun part.
Step 5: Cut the Boards to Length
Cut your shelf boards to the planned width. A simple shelf might use one wide board as the surface and one narrower board as a front lip. A deeper shelf might require two or three pallet boards joined side by side with cleats underneath. Always measure twice. Cut once. Then measure again because pallet boards enjoy being slightly weird.
Step 6: Assemble the Shelf
For a basic picture ledge, use one board as the back, one as the base, and one narrow strip as the front rail. Apply wood glue along the joints, clamp the pieces, and secure them with screws or brad nails. Pre-drill holes to reduce splitting, especially near board ends. Pallet wood can be dry and brittle, so forcing screws into it without pilot holes may create cracks.
For a box-style shelf, build a rectangular frame with a top, bottom, and side pieces. Add a back board if you want extra stability. For a rustic floating look, attach a cleat to the wall and design the shelf to slide over it. For heavier storage, visible metal brackets are often simpler and stronger than trying to hide all the support.
Mounting DIY Pallet Shelves Safely
Mounting is where good DIY becomes responsible DIY. A shelf is only as strong as its attachment to the wall. Whenever possible, fasten shelves directly into wall studs. Use a stud finder, mark the stud locations, and confirm with small pilot holes if needed. Use a level before driving final screws. A slightly crooked shelf will announce itself every time you look at it, usually while you are trying to enjoy coffee.
If you cannot hit studs, use wall anchors rated for the expected load and the wall type. Toggle bolts or molly bolts are better choices for heavier shelves than basic plastic anchors. Spread weight across multiple brackets or supports. For long shelves, add additional brackets to reduce sagging. If the shelf will hold heavy items, use a backer board attached to studs, then mount the shelf or brackets to the backer board.
Think About Weight Before Decorating
Pallet shelves are great for books, plants, jars, framed art, towels, and everyday storage, but every shelf has limits. Heavy items should sit near brackets or close to the wall, not at the front edge. Distribute weight evenly rather than loading one side. If you notice flexing, wobbling, creaking, or fasteners pulling loose, remove the weight and reinforce the shelf before using it again.
Finish Ideas for Wood Pallet Shelves
The finish you choose determines whether your pallet shelf looks rustic, modern, farmhouse, industrial, coastal, or “I found this behind the garage and hoped for the best.” A clear matte polyurethane protects the wood while preserving the reclaimed look. A light stain can warm up pale boards. A darker stain creates a dramatic, aged appearance. Whitewash works beautifully for coastal or cottage interiors. Paint is best when you want a cleaner, more uniform look.
Use finishes in a ventilated area and follow label directions. Many paints, stains, and sealers release odors or volatile organic compounds as they dry. Water-based finishes are often easier to clean up and lower odor than many oil-based products. Let the shelf cure fully before placing books, food containers, towels, or decor on it. Dry to the touch does not always mean fully cured.
Design Ideas for DIY Wood Pallet Shelves
Rustic Kitchen Spice Shelf
Use narrow pallet boards to build a shallow ledge with a front rail. Mount it near your cooking area for spice jars, olive oil, small mugs, or recipe cards. A front lip helps keep jars from sliding off. Finish with clear sealer so the wood is easier to wipe clean.
Bathroom Towel Shelf
A box-style pallet shelf works well above the toilet or near the vanity. Add hooks underneath for hand towels or baskets. Because bathrooms are humid, seal the wood carefully on all sides. Avoid moldy or questionable pallet wood in bathrooms; moisture has a way of turning small problems into science projects.
Living Room Display Ledge
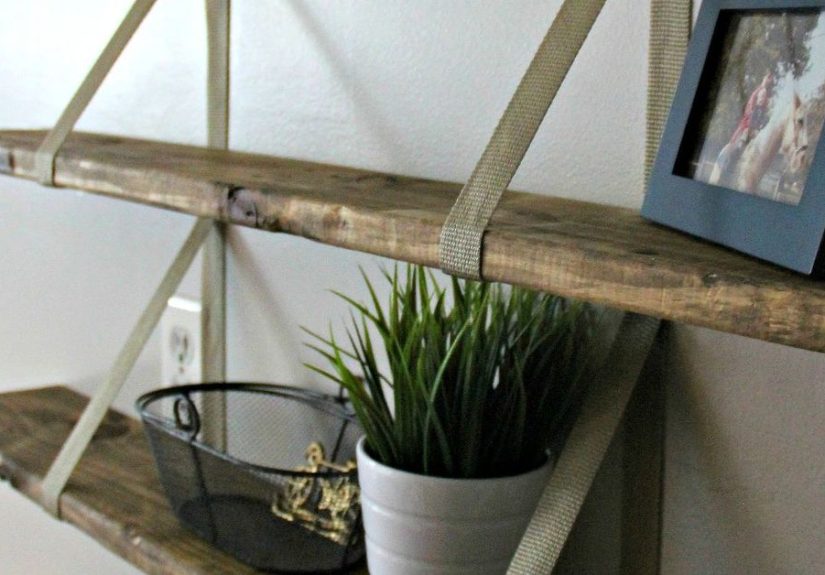
Create a long, narrow picture ledge for framed prints, small plants, and candles. This is one of the easiest pallet shelf projects for beginners. Keep the shelf shallow and mount it into studs for a secure installation. Use a smooth finish so frames slide without snagging.
Garage Tool Shelf
For garage storage, prioritize strength over delicate beauty. Use thicker pallet stringers or add new 2x lumber as supports. Mount brackets into studs, and reserve the shelf for moderate loads unless you build a heavy-duty frame. Add labeled bins to keep screws, tape, chargers, and small tools from staging a rebellion.
Plant Shelf
Pallet wood and plants look naturally good together. Build a tiered shelf for succulents, herbs, or small pots. If the shelf will be outdoors, choose exterior-rated screws and an outdoor finish. Leave space for drainage trays so water does not soak into the wood every time you water your plants with heroic enthusiasm.
Common Mistakes to Avoid
The biggest mistake is using unsafe or contaminated pallets. The second is underestimating how much sanding reclaimed wood needs. The third is mounting shelves poorly. A shelf can look amazing on day one, but if it is not attached to studs or proper anchors, gravity will eventually file a complaint.
Another common mistake is skipping pilot holes. Pallet boards split easily, especially near ends. Also avoid overloading a shelf just because it “feels sturdy.” Test gradually. Put a little weight on the shelf, check for movement, then add more only if everything remains secure. Finally, do not rush the finish. Stain, paint, and sealer need time to dry and cure. Patience gives you a better result and fewer sticky book covers.
Maintenance Tips for Pallet Shelving
Dust pallet shelves regularly with a soft cloth. For sealed shelves, wipe with a slightly damp cloth and dry immediately. Avoid soaking reclaimed wood. Check screws and brackets every few months, especially if the shelf holds plants, books, or frequently moved items. If the shelf is in a garage, porch, laundry area, or bathroom, watch for moisture damage, warping, or mildew.
If your shelf gets scratched, lightly sand the spot and touch up the finish. Small imperfections are part of the charm. In fact, pallet shelves are forgiving. A tiny ding in a glossy store-bought shelf looks like damage. A tiny ding in a pallet shelf looks like character. That is the magic of reclaimed wood: it makes flaws feel intentional.
Real-World Experience: Lessons From Building DIY Wood Pallet Shelves
The first thing most people learn when building DIY wood pallet shelves is that pallets are not standardized pieces of furniture politely waiting to be transformed. They are rough shipping platforms that have lived complicated lives. Some boards pop off cleanly. Others cling to the frame like they signed a lifetime contract. The best mindset is to treat every pallet as a material source, not a perfect kit.
One practical experience is to collect more pallet wood than you think you need. If your design requires six clean boards, gather at least ten or twelve. Some will split during removal. Some will reveal hidden cracks after sanding. Some will be too warped to sit flat against a wall. Having extra boards lets you choose the best pieces instead of trying to convince a banana-shaped plank to behave like fine cabinetry.
Another lesson is that sanding takes longer than expected, but it is the step that makes the project feel finished. A rough shelf may look cool in photos, but in daily life it can snag sleeves, scratch baskets, and collect dust in every raised grain. Smooth the top, front edge, and corners first. Those are the surfaces people touch most. You can leave some texture on less visible areas if you want a rustic look, but any area that meets hands, towels, books, or dishes should be comfortable.
Dry fitting is also worth the time. Before gluing or screwing the pieces together, lay everything out on a flat surface. Check whether the boards line up, whether the shelf depth feels right, and whether the front lip is high enough to hold items without hiding them. This quick rehearsal catches small issues early. It is much easier to adjust a board before assembly than after the glue has dried and your shelf has developed opinions.
Mounting teaches humility. Even a beautifully built shelf can become a problem if it is attached casually. Use a level, mark studs, and do not rely on guesswork. If the shelf is going over a desk, bed, toilet, or coffee station, imagine what would happen if it fell. That little mental picture usually inspires better hardware. For heavier shelves, visible brackets are not a failure. They can look industrial, farmhouse, or modern depending on the finish, and they provide confidence that hidden shortcuts do not.
Finishing is where personality shows. Clear sealer keeps the authentic pallet look. Dark stain makes mismatched boards feel more unified. White paint can turn rough pallet boards into cottage-style shelving. A two-tone finish, such as stained boards with black brackets, can make the project look intentional rather than improvised. Test finishes on scrap pieces first because pallet boards absorb stain unevenly. What looks like warm walnut on one board may look like burnt toast on another.
The best experience-based advice is to build the shelf for a real need. A random shelf may become clutter parking. A shelf designed for coffee mugs, cookbooks, mail baskets, bathroom jars, or garage chargers becomes useful immediately. Measure the items you plan to store, then design around them. A shelf that fits your life will always look better than one that merely fits the wall.
Finally, enjoy the imperfections. Pallet shelves are not supposed to look machine-perfect. Nail holes, saw marks, color variation, and slightly uneven edges are part of the appeal. The goal is not to erase the wood’s history; it is to clean it, strengthen it, and give it a better job. Yesterday, it carried boxes. Tomorrow, it holds your plants, books, tools, or coffee mugs. That is a pretty good career change for a board.
Conclusion
DIY wood pallet shelves are affordable, flexible, and full of character, but the best results come from smart preparation. Start with a clean, heat-treated pallet. Avoid questionable wood, stains, odors, mold, and unsafe treatment marks. Disassemble carefully, sand thoroughly, build with pilot holes and solid joinery, and mount the shelf into studs or properly rated anchors. Choose a finish that matches your room and protects the wood for everyday use.
Whether you are building a spice rack, plant ledge, bathroom shelf, garage organizer, or living room display, pallet wood can deliver a custom look without a custom-furniture budget. With patience, safety, and a little creative confidence, a discarded pallet can become one of the most useful pieces in your home. And yes, you are fully allowed to tell guests it is “reclaimed wood.” That sounds much fancier than “I rescued it from behind a garden center.”





