Table of Contents >> Show >> Hide
- What “Ready-Made Containers” Means in Real Life
- Why Balcony Gardeners Love the Ready-Made Approach
- The Balcony Gardener System: 8 Steps for Outdoor Ready-Made Containers
- Step 1: Map your balcony microclimate before you buy anything
- Step 2: Choose container size like a strategist, not a gambler
- Step 3: Use the right growing medium (not backyard soil)
- Step 4: Build form with thriller, filler, spiller
- Step 5: Water deeply, then allow oxygen back in
- Step 6: Feed on purpose, not panic
- Step 7: Rotate and refresh through the seasons
- Step 8: Maintain structure and safety
- Five Ready-Made Balcony Container Recipes You Can Use Right Now
- Common Mistakes (and How to Avoid Them)
- A Practical Weekly Care Plan for Busy People
- Cost vs. Value: Is Ready-Made Worth It?
- Research Foundation for This Guide (U.S.-Focused)
- Conclusion
- Experience Section: from a Balcony Gardener’s Real-World Routine
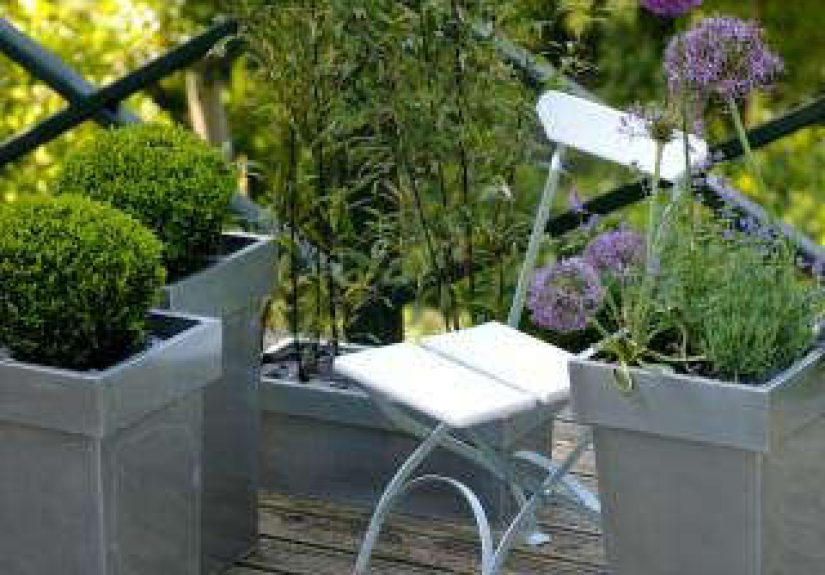
If your outdoor space is the size of a yoga mat and one optimistic folding chair, welcome to the club. Balcony gardening is where big dreams meet tiny square footageand somehow, it works beautifully. The secret? Ready-made containers. They save time, reduce guesswork, and let you skip the “why did I buy seven random plants that hate each other?” phase.
This guide shows you how to choose, style, and maintain ready-made balcony containers so they look lush, stay healthy, and don’t become a crispy science project by July. We’ll combine practical horticulture, design strategy, and field-tested routines. You’ll get clear steps, real examples, and enough confidence to build a balcony garden that feels like your favorite café patiominus the $9 sparkling water.
What “Ready-Made Containers” Means in Real Life
In modern balcony gardening, ready-made containers usually fall into three categories:
- Pre-planted containers from nurseries or garden centers: Already arranged, rooted, and ready to place.
- Container kits: Pot + planting mix + curated plant list (sometimes with layout instructions).
- Design templates you assemble fast: You buy plants by role (thriller, filler, spiller) and build a polished look in one session.
All three formats work. The best choice depends on your time, budget, and whether your “DIY confidence” is currently at chef-level or microwave-level.
Why Balcony Gardeners Love the Ready-Made Approach
1) It removes decision fatigue
Balconies have microclimates: reflected heat from walls, stronger wind at height, and rapidly drying containers. Ready-made systems simplify selection by matching plants with similar needs.
2) It improves survival rates
Container success is mostly about fundamentals: drainage holes, proper potting media, sunlight match, and consistent feeding/watering. Pre-planned containers build around those rules from the start.
3) It gives instant design confidence
A cohesive pot arrangement can make even a tiny balcony feel intentional. The classic “thriller, filler, spiller” method creates height, body, and movement quickly.
The Balcony Gardener System: 8 Steps for Outdoor Ready-Made Containers
Step 1: Map your balcony microclimate before you buy anything
Track light for one day: morning sun, afternoon shade, or full blast all day. Then note wind exposure. Wind can shred tender foliage, dry pots fast, and tip lightweight containers. If your balcony is breezy, choose sturdier pots, drought-tolerant plants, and a protected placement near walls or corners.
Step 2: Choose container size like a strategist, not a gambler
Bigger containers buffer stress better. They hold more root space, retain moisture longer, and require less frantic daily intervention. Small pots can work for accents; main containers should be generous enough for mature plant size.
Rule of thumb: if the plant tag promises “vigorous growth,” your container should not be tiny. Plants read roots, not optimism.
Step 3: Use the right growing medium (not backyard soil)
For balcony containers, use high-quality potting mix or soilless media designed for containers. It should drain well while still holding moisture. Garden soil tends to compact, reducing aeration and drainage. In short: your plants need breathable shoes, not concrete boots.
You can enrich with compost depending on crop type and container size, but keep texture light and airy.
Step 4: Build form with thriller, filler, spiller
- Thriller: Upright focal point (height and drama).
- Filler: Mid-height plants that add fullness and color mass.
- Spiller: Trailing plants that soften edges and add movement.
This formula works for flowers, herbs, and edible mixes. Yes, kale can be a thriller. No, it does not need to apologize for being beautiful.
Step 5: Water deeply, then allow oxygen back in
Balcony containers dry faster than in-ground beds, especially in full sun and wind. Water thoroughly until it drains from the bottom. Don’t just wet the top inch; roots live deeper. Then avoid letting pots stay waterlogged.
In peak summer, daily checks are normal. A finger test works: if top mix is dry, water. If it’s still moist, wait.
Step 6: Feed on purpose, not panic
Container plants lose nutrients quickly due to regular watering. Use either:
- Slow-release fertilizer at planting, plus supplemental feeding as needed, or
- Diluted water-soluble fertilizer on a regular schedule.
Long-season fruiting crops (tomatoes, peppers, cucumbers, eggplant) often need steady light feeding. More fertilizer is not better; it can create leafy monsters with fewer flowers and fruit.
Step 7: Rotate and refresh through the seasons
One underrated advantage of containers: fast seasonal swaps. After spring crops fade, replant with summer performers; shift again for fall color. This keeps your balcony productive and attractive without redesigning from scratch.
Step 8: Maintain structure and safety
Support tall plants with stakes or ties before wind events. Check brackets for window boxes and wall-mounted containers. If you use reused or improvised pots, ensure they are clean, non-toxic, and properly drained.
Five Ready-Made Balcony Container Recipes You Can Use Right Now
Recipe A: The “Weekday Calm” Evergreen-Plus-Texture Pot
- Thriller: Upright evergreen grass-like plant
- Filler: Heuchera or compact foliage perennial
- Spiller: Creeping thyme or trailing ivy
Best for: year-round structure and low drama maintenance.
Recipe B: The “Pollinator Balcony” Bloom Burst
- Thriller: Salvia or upright flowering annual
- Filler: Zinnia or lantana-type bloomers
- Spiller: Trailing calibrachoa or nasturtium
Best for: bright color and pollinator visits.
Recipe C: The “Salad in a Pot” Edible Mix
- Thriller: Swiss chard or kale
- Filler: Leaf lettuce and compact herbs
- Spiller: Thyme or nasturtium
Best for: cut-and-come-again meals and photo-worthy harvests.
Recipe D: The “Heat-Tough Balcony” Sun-Loving Combo
- Thriller: Compact pepper
- Filler: Basil or oregano
- Spiller: Sweet potato vine or trailing herb
Best for: hot, reflective balconies with long sun exposure.
Recipe E: The “Shady Corner Fix”
- Thriller: Upright fern or coleus
- Filler: Begonia or shade-tolerant foliage
- Spiller: Trailing shade annual
Best for: low-light balconies where sun lovers fail fast.
Common Mistakes (and How to Avoid Them)
- No drainage holes: This is container gardening’s biggest plot twistand not the good kind.
- Using garden soil: Too dense in pots; roots suffocate.
- Mixing opposite plant needs: Sun lovers and shade lovers don’t become friends because they share a pot.
- Adding rocks at the bottom for “better drainage”: Popular myth; it often does not help and may worsen drainage behavior.
- Ignoring wind and heat reflection: Balcony conditions can be harsher than ground beds.
- Random fertilizing: Underfeeding leads to weak growth; overfeeding leads to lush leaves and disappointing blooms.
A Practical Weekly Care Plan for Busy People
Monday (5–10 minutes)
Moisture check, remove obvious dead blooms, quick pest scan.
Wednesday (10 minutes)
Deep watering cycle, rotate containers for even light, tie tall stems if needed.
Saturday (15–20 minutes)
Light pruning, fertilizer application (if scheduled), sweep balcony, refresh styling.
Monthly reset (20–30 minutes)
Top up potting mix, inspect drainage, sanitize tools, replace one underperforming plant if needed.
Cost vs. Value: Is Ready-Made Worth It?
Ready-made containers usually cost more up front than assembling every component yourself. But the value comes from reduced failure, less trial-and-error spending, and faster aesthetic results. For many balcony gardeners, paying for a smart start is cheaper than repeatedly replacing stressed plants.
If budget is tight, use a hybrid strategy: buy one professionally balanced “hero container,” then replicate the structure in simpler companion pots with more affordable plants.
Research Foundation for This Guide (U.S.-Focused)
This article was synthesized from horticultural guidance and design references across U.S.-based institutions and publishers, including:
- Remodelista (title inspiration and ready-made container context)
- University of Minnesota Extension
- University of Maryland Extension
- Clemson Home & Garden Information Center
- Oregon State University Extension
- Texas A&M AgriLife Extension
- UF/IFAS Extension
- Missouri Botanical Garden
- Iowa State University Extension
- University of Georgia CAES
- Alabama Cooperative Extension
- UC Master Gardeners (UC ANR)
- Chicago Botanic Garden
- Proven Winners (container design framework)
- Better Homes & Gardens (consumer-facing container best practices)
Conclusion
Balcony gardening does not require a giant yard, a greenhouse, or elite plant telepathy. It requires a system. Ready-made containers give you that system: proper drainage, appropriate media, plant combinations that make sense, and routines you can actually keep. Start with one great container, learn its rhythm, then scale to a balcony collection that feels both effortless and intentional.
Your balcony is not “too small to matter.” It is the perfect lab for great outdoor design. Build it one container at a timeand let your neighbors wonder when your tiny space became the best-looking corner in the building.
Experience Section: from a Balcony Gardener’s Real-World Routine
The first container I ever set on a balcony looked amazing for exactly six days. On day seven, the flowers drooped like they had watched a three-hour documentary about disappointment. I watered more. Then less. Then panicked. Then Googled at midnight. What I learnedslowly, stubbornly, and with a compostable amount of trial and erroris that balcony gardening is less about luck and more about systems.
My turning point came when I stopped buying random “pretty” plants and started buying compatible plants. I now do a 10-minute light audit before every seasonal refresh. Where does the sun hit at 9 a.m.? At 2 p.m.? Is one corner a wind tunnel? Once I started matching plants to those conditions, survival rates jumped immediately. My balcony stopped being a plant emergency room and started feeling like a real outdoor room.
The next big lesson was container size. I used to buy cute little pots because they were affordable and looked great in photos. In real heat, they dried out faster than my attention span during tax season. When I switched to larger containers for centerpiece plantings, everything stabilized: fewer watering crises, better root growth, and stronger blooms. I still use small pots, but only as accents, not as the main event.
Watering was my third breakthrough. I used to “sip water” the surface and call it done. Now I water deeply until I see runoff, then wait for the top layer to dry before watering again. I also group containers by thirst level. Herbs and drought-tolerant plants go together; thirstier flowering mixes get their own zone. That single change cut my maintenance time and reduced both overwatering and underwatering mistakes.
Fertilizer used to intimidate me because every label seemed to assume I had a chemistry degree and a spreadsheet. I simplified: slow-release at planting, then light supplemental feeding on schedule. The results were obviousmore consistent growth, better flowering, and fewer “why is this yellow?” mysteries. I also learned that more fertilizer is not a shortcut; it’s a fast track to lush leaves and fewer blooms.
Design-wise, thriller-filler-spiller saved me from chaos. I used to build containers like a buffet plate: everything I liked, all at once, no structure. Now each pot has a focal point, supporting texture, and one trailing element. Suddenly, my balcony looked intentionaleven when I was improvising. Guests started asking who “did the design,” and I got to casually say, “Oh, just me and my Saturday coffee.”
The final, most human lesson: plants are seasonal, not permanent décor props. Some will decline. Some combinations will flop. That is not failure; it is feedback. I now do monthly mini-resets: deadhead, prune, top up mix, and replace one underperformer without drama. This keeps the space fresh and removes guilt from the process.
Today, my balcony has edible pots near the kitchen door, pollinator flowers by the rail, and one evergreen-texture container that anchors everything year-round. It is not perfect, but it is alive, useful, and unmistakably mine. And every time a new leaf unfurls or a pepper turns red, I remember: the best balcony gardens are not built in one shopping trip. They are built in routines, revisions, and tiny wins that add up.