Table of Contents >> Show >> Hide
Hanging kitchen cabinets can seem like a daunting task, but with the right tools, careful planning, and a step-by-step approach, it’s entirely achievableeven for a beginner. Whether you’re remodeling your kitchen or installing new cabinetry in a fresh space, knowing how to properly hang kitchen cabinets is key to ensuring they’re secure, level, and functional. In this article, we’ll walk you through the process, offering helpful tips and tricks along the way to make your cabinet installation as smooth as possible.
Gather Your Tools and Materials
Before you start hanging your cabinets, it’s important to gather all the necessary tools and materials. Having everything ready ensures a smoother installation process and helps you avoid unnecessary trips to the hardware store. Here’s a list of essentials you’ll need:
- Measuring tape
- Level
- Stud finder
- Power drill and bits
- Cabinet screws (2-1/2 inches is a good starting point)
- Wood shims
- Clamps (optional, but can help hold cabinets in place)
- Cabinet mounting brackets or screws (depending on the cabinet design)
- Safety goggles and gloves
Once you have everything you need, you’re ready to begin!
Step 1: Plan and Mark the Cabinet Placement
One of the first and most important steps when hanging kitchen cabinets is deciding where they should go. You’ll want to ensure that your cabinets are placed at the correct height and alignment. Here’s how to plan your layout:
- Measure the wall height: Start by measuring the height at which you want your upper cabinets. A standard height for wall cabinets is about 18 inches above the countertop, but you can adjust this depending on your preferences.
- Mark the studs: Use a stud finder to locate the studs in the wall where you’ll anchor the cabinets. Mark the stud locations with a pencil. This is crucial because securing the cabinets to the studs will ensure they are sturdy and won’t fall over time.
- Level the marks: Use a level to ensure that your cabinet marks are straight. A crooked cabinet will affect the overall look and functionality of your kitchen.
Once you’ve marked the studs and determined the height, draw a horizontal line to indicate where the bottom of your cabinets will be. This line will serve as a guide to keep everything level as you install each cabinet.
Step 2: Install the Upper Cabinet First
When installing kitchen cabinets, it’s generally a good idea to start with the upper cabinets. This prevents you from having to work around the lower cabinets later, and it ensures that your wall space is clear for better maneuvering. Here’s how to go about it:
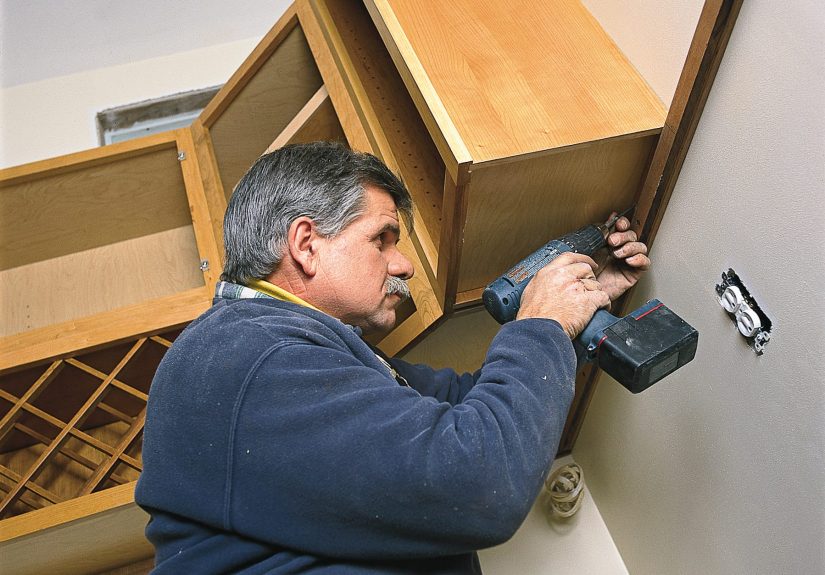
- Secure the cabinet to the wall: Lift the cabinet and align it with the marks you made earlier. Use clamps to hold it in place while you drill pilot holes through the cabinet’s mounting brackets or back panel into the studs. Be sure to drive screws into the studs to anchor the cabinet securely.
- Check the level: Before fully tightening the screws, use a level to double-check that the cabinet is straight. If needed, use wood shims to adjust the cabinet’s position so it is perfectly level.
- Repeat for each cabinet: Work your way across the wall, installing each upper cabinet one by one. Always check for levelness and ensure that the cabinets are aligned both horizontally and vertically.
Step 3: Install the Lower Cabinets
With the upper cabinets installed, you’re ready to move on to the lower cabinets. The process for hanging lower cabinets is similar to the upper ones but with some key differences:
- Position the lower cabinets: Place the lower cabinets on the floor and position them according to your measurements. Use clamps to hold them in place against the wall.
- Install a temporary support: Lower cabinets can be heavy, so it’s helpful to install temporary support brackets or a sturdy piece of lumber underneath them. This will hold the cabinet in place while you secure it to the wall.
- Level the cabinets: Ensure that the lower cabinets are level both front to back and side to side. Again, use shims if necessary to achieve perfect alignment.
- Secure to the studs: Drill screws through the cabinet into the studs, just as you did with the upper cabinets. Make sure each screw is tightened securely, but avoid overtightening, which could cause the cabinet to warp.
Step 4: Attach Doors and Hardware
Once your cabinets are secured to the wall, it’s time to add the finishing touches. This includes attaching the cabinet doors and installing any hardware, such as knobs or handles. Here’s how to proceed:
- Attach the doors: Line up the hinges with the pre-drilled holes on the cabinet doors and attach them with screws. Make sure the doors are aligned properly before tightening the screws completely.
- Install hardware: For knobs and pulls, measure and mark where you want the hardware to go. Drill holes as necessary and install the knobs or pulls using screws.
Step 5: Final Adjustments
With everything in place, take a step back and review your work. Do a final check to ensure that all cabinets are level and securely fastened to the wall. If necessary, make any adjustments to the door alignment or cabinet height.
It’s also a good idea to double-check all screws and fastenings to ensure they’re tight enough. You don’t want your cabinets to come loose after a few months of use.
Conclusion
Hanging kitchen cabinets is a rewarding project that can significantly improve the look and functionality of your kitchen. By following these steps and taking your time, you’ll end up with a sturdy, well-organized kitchen space. Remember to plan your layout carefully, take accurate measurements, and always use the right tools for the job. And if you ever run into trouble, don’t hesitate to consult a professional to help with more advanced tasks like plumbing or electrical work.
sapo: Hanging kitchen cabinets might seem challenging, but with careful planning and the right tools, it’s a project you can do yourself. Follow our step-by-step guide to ensure a smooth, secure installation that will give your kitchen a fresh, organized look.
My Experience with Hanging Kitchen Cabinets
Having installed several kitchen cabinets myself, I can say that the task is quite manageable with the right preparation. The first time I installed upper cabinets, I didn’t fully appreciate the importance of securing everything to the studs. As a result, I had to re-do a section of the work after realizing the cabinets weren’t as secure as they should have been. Lesson learned! Since then, I’ve made sure to take extra time to locate the studs and use the right length screws to avoid any issues with stability. It’s also critical to keep the cabinets level. Even a small misalignment can create noticeable gaps between doors and shelves.
Another thing I learned is the value of good cabinet clamps. They’re a bit of a hidden hero when it comes to keeping the cabinets in place while you’re securing them to the wall. Holding the cabinet steady while you drill the screws is so much easier when you have a helper, but clamps do an amazing job of keeping things in place, especially when you’re working alone.
Lastly, one trick I swear by is temporarily marking a horizontal line with a pencil to ensure the cabinets are at the correct height. This keeps things consistent, especially when installing multiple cabinets. It’s also a great way to catch any misalignments before the final screws go in.
Overall, hanging kitchen cabinets can be a fun and rewarding DIY project. With the right planning, tools, and a bit of patience, your kitchen will be transformed in no time!




