Table of Contents >> Show >> Hide
- First, Know Your Hibiscus (Because “Hibiscus” Is a Big Family)
- Quick Supplies Checklist
- Method 1: Propagating Hibiscus by Cuttings (The Clone Method)
- When to Take Hibiscus Cuttings
- Step-by-Step: How to Take and Prepare the Cutting
- Choose the Right Rooting Medium (Light + Airy Wins)
- Plant the Cutting and Create High Humidity
- Watering and Temperature: The “Goldilocks Zone”
- How to Tell When Your Cutting Has Rooted
- Potting Up and Pinching for Bushiness
- Troubleshooting Cuttings
- Method 2: Propagating Hibiscus by Seed (The Adventure Method)
- Why Hibiscus Seeds Often Don’t “Come True”
- How to Collect and Store Hibiscus Seeds
- Seed Prep: Scarification and Soaking (Helps a Lot)
- How to Sow Hibiscus Seeds Indoors (Reliable and Easy to Control)
- Timing: When to Start Seeds
- Germination and Early Seedling Care
- Transplanting Outdoors Without Shocking Your Plants
- Troubleshooting Seeds
- Cuttings vs. Seeds: Which Propagation Method Should You Choose?
- Extra Pro Tips for Higher Success (Without Fancy Equipment)
- Conclusion
- Real-World Experiences and Lessons (An Extra )
Hibiscus is basically the plant world’s way of saying, “What if fireworks, but flowers?” Big blooms, bold color,
and a talent for turning an average patio into a vacation photo. The only downside: once you fall in love with one
hibiscus, you immediately want five more. Good newshibiscus is very propagatable (yes, that’s a word in the
garden shed), and you can multiply your plants in two main ways: cuttings (fast and predictable)
and seed (slower, but full of surprises).
This guide walks you through both methods in a way that’s practical, not precious: exactly what to cut, when to
sow, how to keep things from rotting, and how to know you’re actually succeeding. We’ll also cover the biggest
“gotcha” with hibiscus propagationdifferent types behave differentlyso you can choose the method that matches
your plant, your climate, and your patience level.
First, Know Your Hibiscus (Because “Hibiscus” Is a Big Family)
Before you snip or sow, do a quick ID check. “Hibiscus” can mean a few common garden categories, and propagation
success depends on which one you have:
-
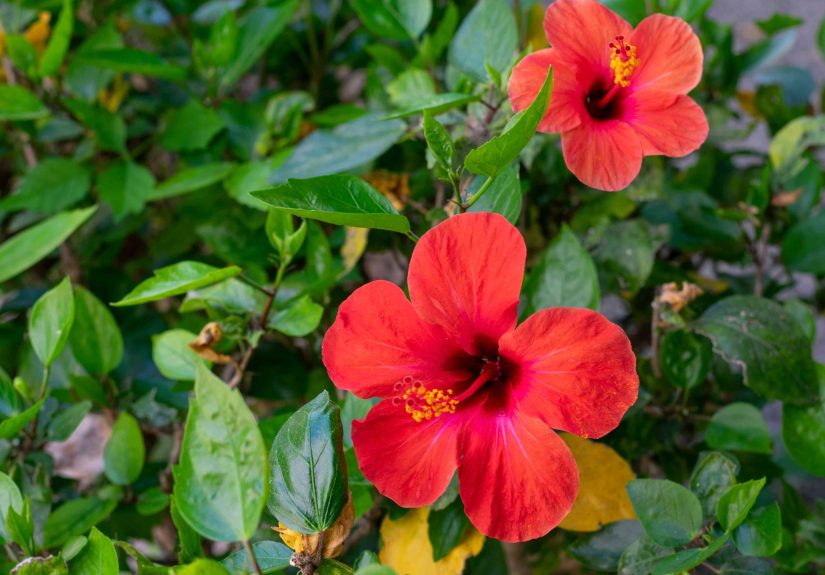
Tropical hibiscus (often Hibiscus rosa-sinensis): Woody evergreen shrub in warm climates; commonly
grown in pots elsewhere. Usually best propagated by cuttings if you want the same plant again. -
Hardy hibiscus (often Hibiscus moscheutos and relatives): Herbaceous perennial that dies back in
winter and returns in warm weather. Can be grown from seed or cuttings, but named
cultivars are best cloned by cuttings if you want a true copy. -
Rose of Sharon (Hibiscus syriacus): A hardy, woody shrub with lots of seed pods. It can
self-seed enthusiastically (depending on your region), and seedlings may not match the parent.
If you’re unsure, don’t panic. The methods below still work as a general guide; just pay attention to the notes on
“tropical vs. hardy” and expect seeds from hybrids to behave like tiny genetic lottery tickets.
Quick Supplies Checklist
Propagation doesn’t require a greenhouse. You just need a mini “plant spa” setup:
- Clean pruning shears or scissors (sterilized with alcohol)
- Small pots or cell trays with drainage
- A light rooting medium (examples: perlite + peat, perlite + coco coir, or a seed-starting mix; avoid heavy garden soil)
- Rooting hormone (optional, but helpful for many hibiscus)
- Clear plastic bag, humidity dome, or a clear storage bin (your DIY propagation chamber)
- Bright, indirect light (or a basic grow light)
- Heat mat (optional, but a big win in cool rooms)
- Labels (because “I’ll remember which is which” is a lie we tell ourselves)
Method 1: Propagating Hibiscus by Cuttings (The Clone Method)
Cuttings are the go-to method when you want a new plant that’s exactly like the parentsame bloom color,
same growth habit, same everything. If you’re propagating a named variety you love, cuttings are your best friend.
When to Take Hibiscus Cuttings
Aim for late spring into early summer when the plant is actively growing and stems are flexible but not mushy.
For many hibiscus, this is when you get the best balance of “young enough to root” and “mature enough not to collapse.”
If you’re in a cooler climate and your tropical hibiscus lives indoors part of the year, wait until it’s in active
growth (often after it’s back outside or under strong indoor light). For hardy hibiscus, late spring/early summer
is also a common sweet spot.
Step-by-Step: How to Take and Prepare the Cutting
-
Pick a healthy stem. Choose a vigorous shoot with no buds or blooms if possible (flowers steal energy
you want going into roots). -
Cut the right length. A practical target is about 3–5 inches of stem.
Make the cut just below a leaf node (where leaves attach). -
Strip the lower leaves. Remove leaves from the bottom half so the cutting can sit in the medium
without rotting. -
Optional: Reduce leaf area. If remaining leaves are large, you can cut them in half (yes, it looks
dramatic; yes, it helps reduce moisture loss). - Dip in rooting hormone. Tap off excessmore powder does not equal more roots. (It equals more mess.)
Choose the Right Rooting Medium (Light + Airy Wins)
Hibiscus cuttings tend to root best in a medium that holds moisture but drains well. Think “damp sponge,” not “swamp.”
Good options include perlite blends, vermiculite blends, or a light potting mix designed for seed starting.
Avoid heavy garden soil in small potsit compacts, stays wet, and encourages rot. Your goal is oxygen around the stem
while keeping it evenly moist.
Plant the Cutting and Create High Humidity
- Pre-moisten the medium so it’s evenly damp, not dripping.
- Make a hole first (pencil or chopstick) to avoid scraping off rooting hormone.
- Insert the cutting so at least one node is in the medium, then gently firm the mix around it.
-
Cover for humidity. Put the pot inside a clear plastic bag or under a dome. Keep plastic from touching
leaves (use skewers or a small stake if needed).
Place the cutting in bright, indirect light. Direct hot sun inside a plastic bag can cook a cutting
like it’s in a tiny solar oven. (Congratulations, you’ve invented steamed hibiscus.)
Watering and Temperature: The “Goldilocks Zone”
Keep the medium slightly moist. If it dries completely, cuttings wilt and fail. If it stays soggy,
cuttings rot. Vent your humidity cover briefly each day or every few days to discourage mold.
Warm conditions speed rooting. If your home is cool, a heat mat can help. Many gardeners see roots form in a few weeks
under good conditions; some hibiscus cuttings can root in roughly 3–5 weeks, while others may take longer.
How to Tell When Your Cutting Has Rooted
- Gentle tug test: light resistance can indicate new roots.
- New growth: fresh leaves are a good sign (though not 100% proof on their own).
- Clear pot method: if you use a clear cup inside an opaque sleeve, you can sometimes see roots.
Potting Up and Pinching for Bushiness
Once rooted, transplant into a slightly larger pot with a quality potting mix. Then give the plant a week or two to settle
in before you start “training” it.
Want a fuller hibiscus instead of one long floral noodle? After the cutting is rooted and growing, you can
pinch the tip (snip just above a leaf node) to encourage branching.
Troubleshooting Cuttings
-
Wilting fast: humidity too low, light too intense, or medium too dry. Increase humidity and move to
brighter shade/indirect light. -
Black/mushy stem: rot from overly wet medium or poor airflow. Use a lighter mix, vent more often,
and water less. - Mold on surface: common under domes. Vent, remove dead leaves, and avoid soaking the medium.
-
Cutting looks “stuck” (not rooting, not dying): be patient. Some take longer, especially in cool temps.
Add bottom heat and keep conditions steady.
Method 2: Propagating Hibiscus by Seed (The Adventure Method)
Growing hibiscus from seed is part gardening, part mystery novel. It can be very rewardingespecially for hardy hibiscus
but it’s important to know what you’re signing up for: seedlings may not match the parent plant, particularly if your
hibiscus is a hybrid or has been cross-pollinated.
Why Hibiscus Seeds Often Don’t “Come True”
Many garden hibiscus are hybrids, and pollination can mix traits. That means seeds can produce plants with different
flower colors, sizes, or growth habits than the parent. If you want a guaranteed clone, use cuttings. If you like
surprises, seeds can be a blast.
How to Collect and Store Hibiscus Seeds
- Watch for seed pods. After flowering, hibiscus can form pods that mature and dry on the plant.
-
Harvest when pods are dry and beginning to split. If you wait too long, the plant may “release” seeds
on its own (nature’s version of scattering confetti). - Dry and store. Let pods dry in a paper bag, then separate seeds. Store in a cool, dry place until sowing.
Seed Prep: Scarification and Soaking (Helps a Lot)
Many hibiscus seeds have a tough outer coat. Two common tricks can improve germination:
- Scarification: lightly rub the seed with sandpaper or nick the coat (be gentledon’t injure the inside).
- Soaking: soak seeds in water (often overnight or up to 24 hours) to soften the coat and encourage sprouting.
For hardy hibiscus, soaking overnight is widely recommended, and scarification can help water penetrate even faster.
If you’re sowing rose of Sharon seeds, note that it may self-seed readily outdoors in some areas, so you may not even
need the indoor startjust a plan for where all the babies will go.
How to Sow Hibiscus Seeds Indoors (Reliable and Easy to Control)
- Start with a seed-starting mix in a tray or small pots. Moisten it so it’s evenly damp.
-
Plant at the right depth. A practical range is about ¼–½ inch deep depending on seed size.
(Hardy hibiscus seeds are often on the larger side, so closer to ½ inch can work well.) -
Warmth matters. Keep the setup warmaround the mid-70s °F is a common target for best germination.
A heat mat can help if your room runs cool. - Cover for humidity with a dome or plastic wrap, then vent occasionally.
- Give bright light after sprouting (a sunny window can work; grow lights make it easier and sturdier).
Timing: When to Start Seeds
For hardy hibiscus, a common guideline is to start seeds 6–12 weeks before the last frost so you have
strong seedlings ready for the outdoor season. In warm climates where you can direct sow after frost, you can also plant
outdoors once nights are consistently warm.
Germination and Early Seedling Care
Hibiscus germination time varies by species, seed freshness, and temperature. Under warm, consistent conditions,
some hardy hibiscus seeds can sprout quickly (sometimes in under a week), while others may take a couple of weeks.
Once seedlings emerge:
- Remove the humidity cover gradually to prevent damping off (a seedling killer).
- Keep soil lightly moist, not wet.
- Provide strong light to avoid leggy, weak stems.
- Thin or separate seedlings if they’re crowdedcompetition slows growth.
Transplanting Outdoors Without Shocking Your Plants
Hibiscus seedlings and newly rooted cuttings both benefit from hardening off: a 7–10 day period where
you gradually introduce them to outdoor sun, wind, and temperature swings. Start with an hour or two in bright shade,
then increase time and light exposure each day.
Plant hardy hibiscus in full sun when possible and keep the soil consistently moist as it establishes. Tropical hibiscus
should only go outside when nights are warm enough for it (and should come in before cold weather returns).
Troubleshooting Seeds
-
No sprouts: seeds may be old, too cold, too deep, or not scarified/soaked. Increase warmth, try
scarification, and sow fresh seed when possible. -
Seedlings fall over at soil line: damping off (often from excess moisture + poor airflow).
Use clean trays, sterile seed mix, and better ventilation. - Leggy seedlings: not enough light. Move closer to a bright window or use a grow light.
Cuttings vs. Seeds: Which Propagation Method Should You Choose?
- Choose cuttings if you want a clone of a favorite plant, need faster results, or have tropical hibiscus.
-
Choose seed if you’re growing hardy hibiscus, want lots of plants on a budget, or you enjoy experimenting
with new color variations.
Many gardeners do both: use cuttings to preserve must-have varieties, and grow a tray of seeds for “bonus hibiscus”
you can keep, gift, or trade.
Extra Pro Tips for Higher Success (Without Fancy Equipment)
-
Label everything immediately. “I’ll label later” is how you end up with five mystery hibiscus and
one existential crisis. - Take multiple cuttings. Even pros lose a fewpropagation is a numbers game.
- Use bright shade, not darkness. Cuttings need light energy, just not harsh direct sun.
- Stability beats tinkering. Most failures happen when conditions swing wildly (dry → soggy → dry).
- Don’t overpot. Moving a small cutting into a huge pot increases the risk of waterlogged soil and rot.
Conclusion
Propagating hibiscus is one of the most satisfying “garden magic tricks” you can learn. Cuttings give you a reliable
clone of a plant you already love, while seeds let you explore new possibilities (and sometimes discover a surprise
superstar). With a light medium, steady moisture, warm temps, and a little patience, you can turn one hibiscus into
manywithout buying a single extra plant.
Real-World Experiences and Lessons (An Extra )
Let’s talk about what actually happens at kitchen-counter levelwhere propagation dreams are big, but the humidity dome
is a recycled salad container. In real-world setups, the most common hibiscus propagation “problem” is not that the steps
are hard; it’s that the conditions drift. One day your cutting is perfectly hydrated, the next day the medium is bone dry
because the heat kicked on overnight. Or it’s soggy because you watered “just in case,” and now the stem has turned into
something with the texture of overcooked asparagus. The biggest lesson most growers learn is that hibiscus likes
consistent moisture, not dramatic plot twists.
Another practical insight: the “right” stem matters more than people expect. Many gardeners report their best success with
stems that are neither super soft nor fully woodythink flexible enough to bend slightly, but firm enough to hold shape.
If you take a cutting from extremely tender growth, it can wilt fast even under high humidity. If you take a cutting from
very woody growth, it may sit there stubbornly for weeks like it’s waiting for a written invitation. When you find that
Goldilocks stage, rooting feels almost unfairly easy.
Humidity covers are a gift and a trap. They stop wilting, but they also create a tiny weather system where fungus can throw
a party. A small habit that many successful propagators swear by is brief ventilation: crack the bag or lift
the dome for a minute each day (or every couple of days) and wipe away condensation if it’s dripping. This single step often
reduces mold dramatically without sacrificing humidity. Also: remove any leaf that drops into the medium. A decaying leaf is
basically an engraved invitation for rot.
For seed growing, gardeners often underestimate the power of warmth. If hibiscus seeds don’t germinate, people
assume the seeds are deadwhen the real issue is a chilly windowsill. Moving the tray to a warmer spot (or using a heat mat)
frequently changes “nothing happened” into “oh wow, they’re up.” Scarification and soaking are another real-world accelerator:
even a quick rub with sandpaper plus an overnight soak can turn a slow, uneven sprout into a faster, more uniform batch.
The tradeoff is that you need to handle the seeds gentlynick the coat, don’t crush the seed.
Finally, here’s a practical example that shows how these lessons combine. Imagine you have a potted tropical hibiscus that
spent winter indoors and is now pushing new growth in early summer. You take six 4-inch cuttings, strip the bottom leaves,
dip in rooting hormone, and stick them into a perlite-rich mix. You water once to settle the medium, cover with a clear bin,
and place everything in bright shade. You vent briefly each day and keep the medium slightly moist. Three to five weeks later,
you feel gentle resistance on most cuttings, pot them up individually, and pinch the tips once they’re growing to encourage
branching. In one season, you go from one patio showstopper to a small hibiscus armyenough to keep, gift, or trade for
someone else’s favorite plant. That’s the kind of gardening math everyone likes.