Table of Contents >> Show >> Hide
- Before You Build: The Quick Game Plan
- The Bed Zone: Build the Biggest Piece First
- 1) The simple platform bed (clean, modern, beginner-friendly)
- 2) The 2x lumber bed frame (sturdy, budget-friendly, forgiving)
- 3) Mission-style / Arts & Crafts bed (timeless, detail-driven)
- 4) Mid-century inspired bed (tapered legs, big style)
- 5) Storage bed with drawers (small-bedroom superhero)
- 6) Captain’s bed (built-ins without the built-in price)
- 7) Daybed (bed + couch energy)
- 8) Trundle bed (guest-ready, space-smart)
- Headboards That Don’t Look Like a DIY Apology
- Nightstands and Bedside Tables
- Dressers, Chests, and Drawer Storage
- 17) The modern 6-drawer dresser (the “real furniture” milestone)
- 18) The wide 9-drawer dresser (maximum storage, maximum satisfaction)
- 19) Tall chest of drawers (small footprint, big capacity)
- 20) “No-fear” drawer construction options (pick one and move forward)
- 21) Under-bed rolling storage bins (the simplest storage win)
- Closet and Wardrobe Builds
- Benches, Vanities, and the “Luxury” Pieces
- Finishing Tips That Make DIY Look Custom
- Conclusion
- Real-World Builder Notes: of Bedroom Furniture “Been There” Experience
Buying bedroom furniture is easy: click, cart, cry a little at checkout, wait for delivery, and then wrestle a dresser up the stairs like you’re auditioning for a strongman competition. Building your own is different. It’s cheaper (usually), sturdier (often), customizable (always), and deeply satisfying in a “wow, I made a thing that holds my socks” kind of way.
This guide pulls together the most practical DIY bedroom furniture ideasbeds, nightstands, dressers, closet systems, benches, vanities, and a few clever builds that make small bedrooms feel bigger. You’ll get 27 buildable options, each with tips on materials, joinery, and the little details that separate “homemade” from “custom.”
Before You Build: The Quick Game Plan
1) Measure like you mean it
Bedroom furniture fails in two classic ways: it doesn’t fit the room, or it doesn’t fit the stuff. Measure your space (including doorways and stair turns), then measure what the piece must holdmattress size, drawer depth for folded clothes, hanging height for shirts, clearance for nightstand drawers, and so on.
2) Pick the right material for the job
For beginner-friendly builds, sheet goods are your best friend: cabinet-grade plywood for cases and shelves, plus solid wood or hardwood plywood edge banding for durability and a clean finish. Use construction lumber (2x material) for rustic beds and hidden framing. Save expensive hardwood for visible parts like legs, face frames, and drawer fronts.
3) Choose joinery that matches your tools (and patience)
Pocket-hole joinery is fast and forgiving for boxes, frames, and many nightstands. For heirloom drawers, dovetails are the gold standard, but dowels and rabbets can be strong and approachable too. If you’re building a dresser, your drawer method matters more than your paint color. (Yes, even if your paint is “Whispering Linen Cloud.”)
The Bed Zone: Build the Biggest Piece First
-
1) The simple platform bed (clean, modern, beginner-friendly)
A platform bed is the MVP of DIY bedroom furniture because it’s basically a strong rectangle with smart support. Use 3/4-inch plywood or a 2x frame with slats. Add a center beam for queen/king sizes to prevent sagging. Want it to look “designer”? Wrap the base with a plywood skirt and add a slight reveal at the bottom for a floating effect.
-
2) The 2x lumber bed frame (sturdy, budget-friendly, forgiving)
If you’re new to woodworking for beginners, start here. Build a hidden skeleton from 2x6s (or 2x8s for extra height), then add slats. You can dress it up with a hardwood fascia board, or leave it intentionally rustic. Pro tip: pre-drill to avoid splitting, and use bed rail brackets if you want it to break down for moving.
-
3) Mission-style / Arts & Crafts bed (timeless, detail-driven)
This is where you start caring about proportions, reveal lines, and the fact that “square” is a lifestyle. Use solid wood for the legs and rails, and build slats into the headboard/footboard. It’s a classic look that pairs well with shaker nightstands and simple dressers.
-
4) Mid-century inspired bed (tapered legs, big style)
Mid-century modern looks fancy, but the structure is still a platform bed with leg geometry. Use hardwood for legs (maple, oak, walnut if you’re feeling fancy), and keep edges clean. If you add an upholstered headboard panel, you get comfort plus stylelike a suit with sneakers.
-
5) Storage bed with drawers (small-bedroom superhero)
Build a platform base with compartments and drawers on full-extension slides. Use plywood for the carcass, a face frame for strength, and drawer boxes sized precisely to your slide specs. This build turns dead under-bed space into real storageperfect for linens, off-season clothes, or your collection of cables you swear you’ll label someday.
-
6) Captain’s bed (built-ins without the built-in price)
Similar to a storage bed, but with open cubbies and/or larger drawerssometimes with a bookshelf headboard. Great for kids’ rooms, guest rooms, or anyone who wants a bed that also functions as a tidy little apartment.
-
7) Daybed (bed + couch energy)
A daybed is basically a twin platform with a back and one side rail. Use slats or plywood support, and keep the rail height comfortable for lounging. This is an excellent DIY project if your bedroom doubles as a home office.
-
8) Trundle bed (guest-ready, space-smart)
Build a standard twin frame, then build a low rolling trundle on casters sized for a twin mattress. Leave adequate clearance (including bedding height) so the trundle actually fits and doesn’t become a decorative suggestion.
Headboards That Don’t Look Like a DIY Apology
-
9) Upholstered plywood headboard (soft, affordable, customizable)
This is one of the easiest “high impact” projects: plywood + foam + batting + fabric. Wrap and staple on the back. Mount to the wall or attach to the bed frame. Add tufting if you want, but don’t let tufting bully youclean panels look modern and polished.
-
10) Slat wall headboard (architectural and trendy)
Create a slatted feature using evenly spaced wood strips over a backer board. You can stain it, paint it, or go natural. Bonus points if you run it wider than the bed for that boutique-hotel look. Use a level. Then use the level again, because slats will expose your lies.
-
11) Reclaimed wood headboard (rustic character, budget-friendly)
Old boards, pallets (only if they’re safe and clean), fence picketsreclaimed wood brings texture fast. Sand thoroughly, remove metal, and seal it well to avoid splinters. Pair it with a simple bed frame so the headboard gets to be the main character.
-
12) Picture-frame or panel headboard (simple carpentry, polished result)
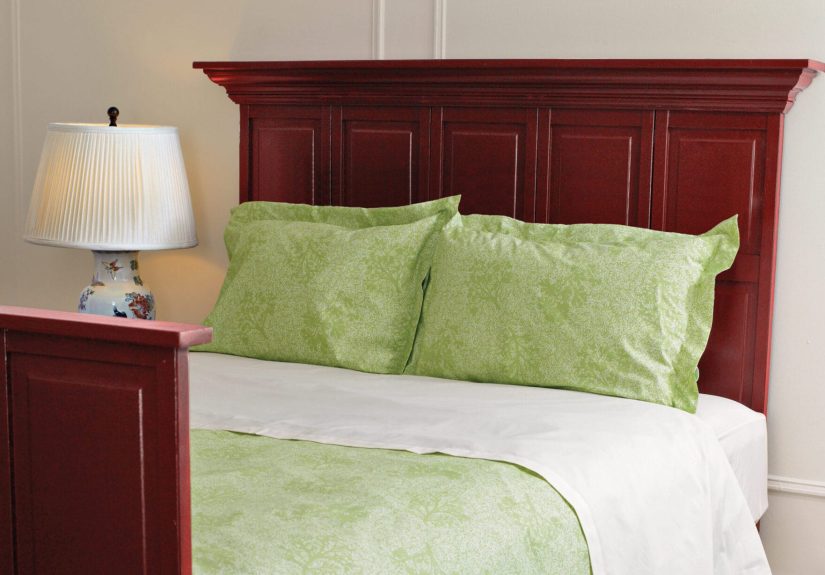
Build a rectangular frame with inset panels (plywood works fine). Add trim to create a shaker-style grid. Paint it a bold color for a dramatic focal point, or match your wall color for a subtle, built-in vibe.
Nightstands and Bedside Tables
-
13) The classic box nightstand with one drawer
A beginner-friendly build: a plywood box, a face frame, and a single drawer on slides. Keep it clean and square. Use edge banding or solid wood trim to hide plywood layers. Add a shelf underneath for books (or the 14 half-read books you’re “currently reading”).
-
14) Floating nightstand (small room, big visual payoff)
Wall-mount a compact drawer box or shelf unit into studs using a French cleat or heavy-duty bracket system. The floor stays clear, vacuuming becomes less of a negotiation, and the room feels bigger.
-
15) C-table bedside perch (minimalist, fast build)
Build a small C-shaped table that slides under the bed or near the mattress edge. Great if you don’t need drawers and want something quick: plywood top, hardwood sides, clean edges. Perfect for small bedrooms and late-night water glasses that you swear won’t spill.
-
16) Stacked-crate nightstand (modular, customizable)
Build wooden crates and stack them in a layout that fits your spacetwo high, side-by-side, or staggered. Secure them together, add a top panel, and finish. It’s storage plus flexibility, and it’s easy to reconfigure later.
Dressers, Chests, and Drawer Storage
-
17) The modern 6-drawer dresser (the “real furniture” milestone)
Use plywood for the carcass, add a face frame for rigidity, then build drawer boxes that fit your slides precisely. Full-extension slides make a huge usability difference. Keep drawer fronts consistent with tight reveals for a custom look.
-
18) The wide 9-drawer dresser (maximum storage, maximum satisfaction)
This is a bigger version of the 6-drawer build with more layout planning. The trick is alignment: build a rock-solid case, install dividers accurately, and don’t rush slide placement. If drawers rack or bind, it’s usually a squareness problemnot a “bad drawer slide” problem.
-
19) Tall chest of drawers (small footprint, big capacity)
A tall chest is ideal for tight bedrooms. Reinforce the case (especially the back), anchor it to the wall for safety, and use consistent drawer sizing so installation is repeatable. Consider slightly shorter top drawers for socks/tees and deeper lower drawers for jeans.
-
20) “No-fear” drawer construction options (pick one and move forward)
Drawers intimidate people, but you have choices: pocket-hole drawer boxes for speed, rabbets/dados for strength, dowels for a clean look, or dovetails for heirloom bragging rights. Use plywood bottoms captured in grooves for stability, especially on larger drawers.
-
21) Under-bed rolling storage bins (the simplest storage win)
Build shallow plywood boxes on casters sized to your bed clearance. Add finger pulls or a simple handle. Finish the edges so they don’t snag fabric. This is an excellent “Saturday build” that immediately reduces closet chaos.
Closet and Wardrobe Builds
-
22) DIY reach-in closet organizer (custom fit, huge payoff)
A plywood closet system can transform your bedroom. Build vertical towers, then add shelves and hanging rods sized to your wardrobe. Edge-band exposed plywood. Anchor everything into studs and use a level like your life depends on it (because your shelves do).
-
23) Freestanding wardrobe/armoire (for rooms with sad closets)
Build a tall cabinet with a hanging section on one side and shelves/drawers on the other. Use a solid back panel for rigidity. Add doors (slab, shaker, or even curtain panels if you want “soft closet” vibes).
-
24) Shoe bench cabinet (entry bench… but make it bedroom)
Create a low cabinet with cubbies or tilt-out shoe storage. Add a cushion top for seating. This works beautifully at the foot of the bed or along an empty walland keeps shoes from forming a little civilization on your floor.
Benches, Vanities, and the “Luxury” Pieces
-
25) Upholstered storage bench (hidden storage, big style)
Build a plywood box with internal bracing, then add a hinged upholstered lid. Use slow-close hinges if you want a premium feel. This is great for blankets, pillows, and anything you want nearby but not visible.
-
26) Vanity table with drawers (function meets “getting ready” joy)
Build a narrow desk-height table with two drawer stacks and knee clearance in the middle. Add a shallow top drawer for makeup tools. Pair with a mirror and soft lighting. Your morning routine will feel suspiciously competent.
-
27) Full-length mirror + jewelry cabinet (secret storage, clean room)
Build a slim wall cabinet with mirror front and felt-lined compartments inside for jewelry. Add small shelves for perfumes or watches. It looks like decor, but it’s also organization disguised as sophistication.
Finishing Tips That Make DIY Look Custom
- Sand in stages: Start around 120 grit, then 180, then 220 for most furniture-grade finishes.
- Hide plywood edges: Use iron-on edge banding or solid wood trim for a cleaner, higher-end look.
- Prime smart: If painting, use a quality primer and sand lightly between coats for smooth results.
- Protect high-touch surfaces: Nightstands and dresser tops benefit from a durable clear coat.
- Hardware matters: Handles can instantly shift a piece from “basic” to “boutique.”
Conclusion
Building your own DIY bedroom furniture isn’t just a money-saving projectit’s a way to design your space around how you actually live. Start with a bed frame or a nightstand if you’re new, then level up to a dresser or closet organizer when you’re ready. The best part? You get furniture that fits your room, matches your style, and doesn’t wobble like a newborn deer.
Real-World Builder Notes: of Bedroom Furniture “Been There” Experience
Here’s what tends to happen in real garages, basements, and “temporary workshops” (also known as dining rooms) when people build their own bedroom furnitureand how to make the process smoother.
First: beds feel deceptively simple until you realize a mattress is basically a giant test of engineering. A frame can look perfect and still squeak if wood rubs wood in the wrong spot. Builders who stay happiest usually add two things: solid bracing (especially a center beam for queen/king) and a plan for movementfelt pads where parts touch, tight fasteners, and a re-tighten schedule after the first week of use. New builds settle. Screws relax. Wood acclimates. A quick “bed tune-up” later prevents months of mystery noises that sound like a ghost learning tap dance.
Second: drawers humble everyone. The most common “why won’t this work?” moment is slide alignment. In real life, cases are rarely perfectly square unless you force them to be. The builders who succeed treat squareness like step zero: measure corner-to-corner diagonals, clamp the case until the numbers match, and only then fasten the back. A solid back panel (or well-nailed back) acts like a giant brace that locks everything into alignment. Do that, and your dresser drawers glide like they’re on vacation. Skip it, and you’ll be “micro-adjusting” forever.
Third: plywood is amazing, but exposed edges are a giveaway. People who end up with a truly custom-looking piece almost always hide edges intentionallyedge banding for quick wins, or solid wood edging when they want durability. They also plan where seams land. A face frame can make plywood look like fine cabinetry, while also adding strength (especially on dressers that get heavy).
Fourth: paint and stain are emotional experiences. The smooth, professional finish you want is usually the result of boring steps: sanding, vacuuming dust, wiping surfaces clean, priming, and giving coats time to dry. Rushing a finish is like trying to bake cookies by shouting “be delicious” at raw dough. If you want a low-stress path, many builders choose a painted carcass with natural wood drawer frontsless perfect sanding required, and it still looks high-end.
Finally: the best DIY bedroom furniture projects start with one honest decisionwhat matters most to you? If it’s speed, build a simple platform bed and a clean box nightstand. If it’s storage, invest your effort in a dresser or closet organizer. If it’s style, make a statement headboard or slat wall feature. Choose your “hero piece,” nail that, and let the rest support it. That’s how a bedroom goes from “I assembled this” to “I designed this.”





