Table of Contents >> Show >> Hide
- What Differential Fluid Does (and Why It Gets Nasty)
- Tools, Supplies, and Picking the Right Fluid
- How Often Should You Change Differential Fluid?
- How to Change Differential Fluid: 12 Steps
- Step 1: Confirm specs and buy the right supplies
- Step 2: Warm up the drivetrain (lightly)
- Step 3: Secure the vehicle like you actually like your legs
- Step 4: Find the fill plug before you do anything heroic
- Step 5: Clean around the plugs/cover
- Step 6: Remove the fill plug first (non-negotiable)
- Step 7: Drain the old fluid
- Step 8: Inspect what came out (this is your free diagnosis)
- Step 9: Clean and reseal (cover-style differentials)
- Step 10: Reinstall the drain plug (or finish cover torque)
- Step 11: Refill with new differential fluid
- Step 12: Reinstall the fill plug, test drive, and recheck
- Common Mistakes (AKA “How People Create New Problems for Fun”)
- DIY Cost vs. Shop Cost
- Quick FAQ
- Conclusion
- Real-World Experience: of “Been There, Smelled That”
- SEO Tags
Differential fluid is the unsung hero of your drivetrain: it keeps hypoid gears lubricated, cool, and happy while they do
the mechanical equivalent of sprinting in dress shoes. And like any hardworking fluid, it eventually gets dirty, shears
down, and turns into a glittery soup of “maybe I should’ve serviced this sooner.”
The good news: changing differential fluid is one of those DIY jobs that looks scarier than it is. If you can safely lift
a vehicle and follow directions, you can do this. Below is a practical, shop-style guide with a fun-to-read vibebecause
gear oil already smells like punishment; your instructions shouldn’t.
What Differential Fluid Does (and Why It Gets Nasty)
Your differential allows the left and right wheels to rotate at different speeds while you turn, all while transferring torque.
Inside are gears and bearings that live under heavy load and pressure. Differential fluid (often called gear oil) forms a protective
film between metal surfaces, reducing wear and heat.
Over time, heat cycles, moisture, and normal gear wear contaminate the fluid. It can darken, smell burnt, or show metallic particles.
If you tow, haul, drive off-road, or do lots of stop-and-go, the fluid generally ages fasterbecause your diff is working overtime.
Tools, Supplies, and Picking the Right Fluid
Basic tools you’ll actually use
- Jack and jack stands (or ramps), plus wheel chocks
- Drain pan, gloves, eye protection, shop towels
- Ratchet, sockets/hex bits as needed (many fill plugs use a 3/8" square drive)
- Torque wrench (recommendedespecially for covers and plugs)
- Fluid transfer pump (unless you enjoy pouring gear oil like a toddler with a juice box)
- Brake cleaner and a scraper (for cover-style differentials)
- New gear oil + gasket or RTV (only if your cover must be removed)
- Optional: new crush washers for drain/fill plugs (vehicle-dependent)
How to choose the correct differential fluid
This is the part where you don’t wing it. Check your owner’s manual or the manufacturer’s service info for:
viscosity (common examples: 75W-90, 75W-140), rating/spec (often GL-5 for hypoid gears),
capacity, and whether your axle requires limited-slip friction modifier.
Many modern gear oils are designed for hypoid differentials and severe loads. Some products also include limited-slip additives
already, while others require a separate friction modifier bottle. If your differential is clutch-type limited slip (or similar),
the correct friction modifier can help prevent chatter and shudder in turns.
How Often Should You Change Differential Fluid?
There isn’t one universal interval. Some vehicles go a long time under light duty; others (especially towing and off-road rigs)
benefit from more frequent service. The most reliable rule is: follow your manufacturer’s schedule, then shorten it if you do
severe service. If you’re unsure, a conservative window many owners use is roughly every 30,000–60,000 miles,
sooner for heavy towing, repeated off-road use, or high heat.
How to Change Differential Fluid: 12 Steps
There are two common designs:
(1) drain-and-fill plug style (easy mode), and
(2) cover removal style (slightly messier, but still DIY-friendly).
The steps below cover both.
-
Step 1: Confirm specs and buy the right supplies
Look up the exact fluid spec, viscosity, and capacity for your vehicle. Confirm whether your differential is limited slip and
whether it needs friction modifier (or gear oil with LS additives built in). Get enough fluid plus a little extrarunning out
mid-job is a special kind of character-building. -
Step 2: Warm up the drivetrain (lightly)
A short 5–10 minute drive helps the old fluid drain faster. Don’t go full racetrackwarm is good; “lava hot” is not.
Park on a level surface afterward. -
Step 3: Secure the vehicle like you actually like your legs
Set the parking brake, chock wheels, and lift the vehicle if needed. Support it with jack stands on solid points.
Keep the vehicle level if possiblethis helps you refill to the correct level. -
Step 4: Find the fill plug before you do anything heroic
Locate the differential housing and identify the fill plug (usually halfway up the housing) and the drain plug
(if equipped) on the bottom. Some vehicles don’t have a drain plugthose typically require removing the diff cover
to drain the old fluid. -
Step 5: Clean around the plugs/cover
Use a brush and brake cleaner to remove dirt around the fill plug, drain plug, and/or cover edge.
You do not want grit falling into your nice clean gear oil like it’s seasoning. -
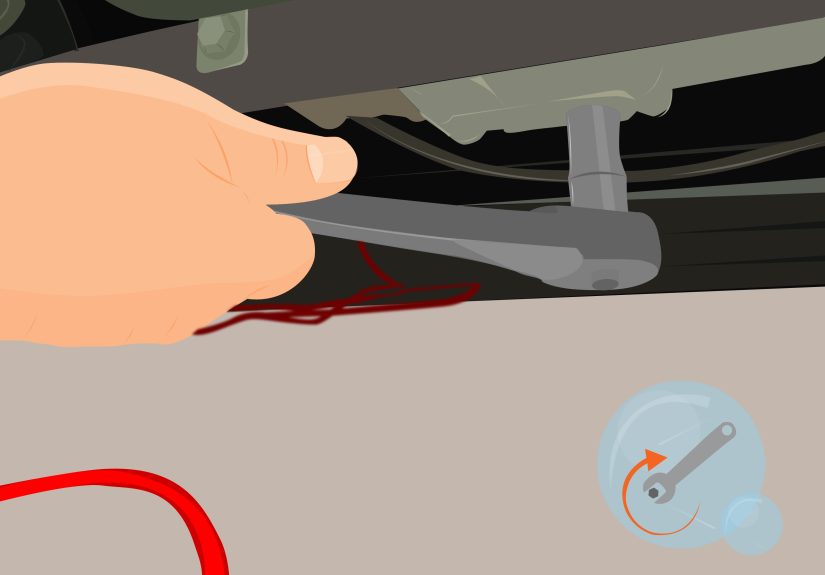
Step 6: Remove the fill plug first (non-negotiable)
Crack the fill plug loose before you drain anything. Why? Because if you drain the differential and then discover the fill plug
is seized, you’ve just turned your car into driveway decor. -
Step 7: Drain the old fluid
Place a drain pan under the differential.
- If you have a drain plug: remove it and let the fluid drain completely.
-
If you have a cover style diff: remove the cover bolts, leaving one top bolt loosely threaded so the cover
doesn’t drop. Gently pry the bottom edge to let fluid drain in a controlled waterfall (as controlled as gear oil ever gets).
-
Step 8: Inspect what came out (this is your free diagnosis)
Look at the old oil. Dark fluid can be normal; heavy metallic shimmer, chunks, or lots of metal on a magnetic drain plug is not.
A little “fuzz” on a magnet is common. Chunky bits are the drivetrain’s way of asking for professional help. -
Step 9: Clean and reseal (cover-style differentials)
If you removed the cover, scrape old gasket/RTV off both mating surfaces and clean until oil-free. Then reseal:
- Gasket: install a quality differential cover gasket per instructions.
- RTV: apply a consistent bead and follow the cure directions on the product label (some RTVs need time before filling).
Reinstall the cover and torque bolts in a crisscross pattern to the manufacturer’s spec.
-
Step 10: Reinstall the drain plug (or finish cover torque)
Once draining is complete, reinstall the drain plug with the correct washer (if applicable) and torque to spec.
For cover-style diffs, confirm all bolts are torqued evenly. Wipe everything clean so you can spot leaks later. -
Step 11: Refill with new differential fluid
Use a hand pump to add gear oil through the fill hole. The correct level for most differentials is
right at or just below the bottom of the fill hole when the vehicle is level.If your setup requires friction modifier, add it exactly as specified (some procedures add it first, then top off with gear oil).
If your gear oil already includes limited-slip additives and your manufacturer says no extra modifier is needed, don’t double-dose it. -
Step 12: Reinstall the fill plug, test drive, and recheck
Reinstall the fill plug and torque to spec. Lower the vehicle, take a short test drive, and then inspect for leaks around the
fill plug, drain plug, and cover. If you used RTV, follow the product’s instructions for full cure time and avoid hard driving
until it’s properly set.
Common Mistakes (AKA “How People Create New Problems for Fun”)
- Not removing the fill plug first: This is the #1 self-inflicted headache.
- Using the wrong viscosity/spec: Your differential isn’t a buffet. Feed it exactly what it calls for.
- Overfilling: Too much fluid can cause foaming, heat, and leaks.
- Skipping cleaning: Dirty mating surfaces = leaks. Leaks = sadness.
- RTV misuse: Too much RTV can squeeze inward; too little can leak; wrong cure timing can leak.
- Ignoring metal chunks: If the fluid looks like a snow globe, don’t just refill and hope.
DIY Cost vs. Shop Cost
DIY typically costs the price of gear oil, possible friction modifier, and maybe a gasket/RTV. The first time, you might buy a pump
and a few tools. A shop charges labor, supplies, and disposalworth it if you can’t safely lift the vehicle or if plugs are seized.
If you tow or off-road often, learning to do this job can pay for itself pretty quickly.
Quick FAQ
Do I have a front differential, a rear differential, or both?
Many RWD vehicles have a rear differential. 4WD trucks typically have both front and rear differentials. Some AWD and FWD layouts
integrate the front differential into the transaxle, while still using a separate rear differential.
What if my differential doesn’t have a drain plug?
Then you’ll likely drain it by removing the differential cover. It’s messier, but it also lets you clean the housing and inspect
the inside more thoroughly.
How do I know if I need friction modifier?
Your owner’s manual/service info is the final word. Clutch-type limited-slip differentials often require friction modifier (or a gear oil
formulated with LS additives). Symptoms like chatter/shudder in tight turns can also be a cluethough they can have other causes too.
What should I do with the used gear oil?
Treat it like used motor oil: keep it in a sealed container, don’t mix it with solvents or coolant, and take it to an approved recycler
or facility. Don’t pour it out “somewhere nature can enjoy it.” Nature does not enjoy it.
Conclusion
Changing differential fluid is a straightforward maintenance win: it protects expensive gears, reduces wear, and helps prevent the kind of
noises that make you turn the radio up and pretend everything’s fine. Work safely, confirm your exact fluid spec, remove the fill plug first,
refill to the correct level, and you’ll be done in an afternoonwith your drivetrain a little happier and your wallet a little heavier.
Real-World Experience: of “Been There, Smelled That”
The first time you change differential fluid, you learn three things immediately: (1) gear oil has a smell that can only be described as
“industrial regret,” (2) gravity is undefeated, and (3) whoever designed the fill plug location was not thinking about your knuckles.
That’s normal. Welcome to the club. We meet in driveways and occasionally in urgent-care waiting rooms (kiddingmostly).
In real life, the job is less about complexity and more about tiny moments that test your patience. The classic one is the fill plug that
refuses to budge. You’ll be under the vehicle thinking, “It’s just a plug,” while the plug thinks, “I am the final boss.” This is exactly
why experienced DIYers loosen the fill plug first. If it’s stuck, you haven’t drained anything yetyou can regroup with better tools,
penetrating oil, or professional help without leaving your differential empty.
Another real-world surprise is how different the “mess profile” can be between designs. Drain-and-fill differentials are tidy enough that
you can feel like a responsible adult. Cover-style differentials, on the other hand, are basically a trust fall exercise between you and
a sheet of gear oil. The trick that saves your sanity is leaving one top bolt loosely threaded and prying the cover from the bottom edge.
That small move turns a chaotic splash into a controlled drain. You’ll still smell like gear oil, but at least your driveway won’t.
Then there’s the “inspection moment.” When old fluid pours out, it tells a story. A little gray paste on a magnet can be normal wear.
But if you see sparkly glitter everywhere or actual chunks, you’ll feel that pit in your stomachbecause you know it’s not just a fluid
change anymore. The upside is that catching problems early can prevent catastrophic failures. I’ve seen people ignore gear noise for months,
only to discover the differential was slowly turning itself into metallic confetti. Changing fluid won’t fix worn bearings, but it can
reveal the warning signs before the failure becomes a tow-truck event.
The most unexpectedly satisfying part is the refill. Once you have a decent pump, refilling becomes almost relaxinguntil you’re on your
last half-quart, your arm is cramping, and you’re trying to judge “bottom of the fill hole” while holding a flashlight in your teeth.
The moment fluid starts to gently seep back out is your confirmation: you’re at level. Wipe everything down afterward, because the tiniest
leftover smear will look exactly like an active leak later and send you into unnecessary panic.
Finally, the test drive: you’re listening for anything weird, turning the radio down, and taking corners like a detective. If you had
limited-slip chatter before and it’s gone now, it feels like magic. If everything is quiet and dry afterward, it’s even betteryou just
did legitimate drivetrain maintenance. That’s grown-up stuff. Then you’ll throw your oil-soaked gloves away, wash your hands twice, and
still catch a whiff of gear oil at dinner. Consider it your victory perfume.




